To install Windows 10 to a USB drive, you must use the Microsoft Media Creation Tool to transform a standard flash drive into bootable installation media. This involves downloading the tool, selecting "Create installation media," configuring your version settings, and allowing the utility to format the USB and write the necessary system files.
As of 2026, Windows 10 remains a vital operating system for millions of users worldwide. Although Microsoft officially ended mainstream support for the OS in October 2025, its presence is still heavily felt in legacy business environments, specialized industrial setups, and on older hardware that does not meet the strict TPM 2.0 requirements of Windows 11. Creating a bootable USB drive is the primary method for performing clean installations, repairing corrupted systems, or upgrading existing hardware.
This guide provides a comprehensive, technically rigorous walkthrough of the seven essential steps required to create a Windows 10 installation USB. We will also address the hardware prerequisites and the specific considerations necessary for operating this OS in a post-support landscape.
Prerequisites: Hardware and System Requirements
Before beginning the installation process, you must ensure your hardware is capable of hosting the installation media. Not all USB drives are created equal, and using the wrong hardware can lead to slow installation times or "Media Driver Missing" errors during the setup process.
USB Drive Specifications
The minimum requirement for a Windows 10 installation USB is a drive with at least 8GB of capacity. However, in 2026, it is highly recommended to use a 16GB or 32GB USB 3.0 (or higher) drive. While the installation files themselves usually hover around 4.5GB to 6GB, the creation tool requires extra "scratch space" during the extraction and writing phase. Furthermore, USB 3.0/3.1 speeds significantly reduce the time spent waiting for the OS to install—often cutting a 30-minute process down to less than 10 minutes.
The Host Computer
The computer you use to create the USB does not have to be the one you intend to install Windows 10 on. However, it must have:
- An active internet connection: The Media Creation Tool will download approximately 4GB to 5GB of data.
- Administrative privileges: The tool must be able to format the USB drive and write to the master boot record (MBR) or GUID Partition Table (GPT).
- Sufficient local storage: At least 10GB of free space on the C: drive is needed for temporary files.
Step 1: Verify Hardware and Prepare the USB Drive
The first step is often the most overlooked: preparing the physical environment. Plug your USB flash drive into a direct port on your computer rather than a USB hub. Hubs can sometimes drop the connection during the heavy data transfer required for creating bootable media, leading to corruption.
Warning: The process of installing Windows 10 to a USB will completely erase all data currently on that drive. Before proceeding, verify that no important documents, photos, or backups are stored on the device. Even if the drive has multiple partitions, the Media Creation Tool typically re-initializes the entire disk.
In 2026, many modern laptops only feature USB-C ports. If you are using a USB-A flash drive with an adapter, ensure the adapter supports data transfer and is not merely a charging cable. Once the drive is inserted, ensure Windows recognizes it by checking "This PC" in File Explorer.
Step 2: Download the Windows 10 Media Creation Tool
Microsoft provides the official "Media Creation Tool" (MCT) as a standalone executable. Despite the age of the OS, Microsoft maintains the download page for recovery purposes.
- Navigate to the official Microsoft Software Download page.
- Look for the section titled "Create Windows 10 installation media."
- Click the "Download tool now" button.
The file is relatively small (around 20MB) because it acts as a downloader for the actual OS files. Be wary of third-party websites offering "pre-activated" Windows 10 ISOs or modified creation tools. These often contain malware or outdated security patches. Always source your tool directly from Microsoft to ensure the integrity of the system files.
Step 3: Launch the Tool and Authorize Permissions
Locate the MediaCreationTool22H2.exe (or the version current in 2026) in your Downloads folder. Right-click the file and select "Run as administrator."
The tool will begin by "Getting a few things ready." This involves checking your local system’s compatibility and ensuring there is enough space for temporary files. After a few moments, you will be presented with the Applicable Notices and License Terms. While Windows 10 is in its post-support phase, the licensing agreements still apply. Click "Accept" to move forward. If you decline, the tool will close immediately.
Step 4: Select the Installation Media Creation Path
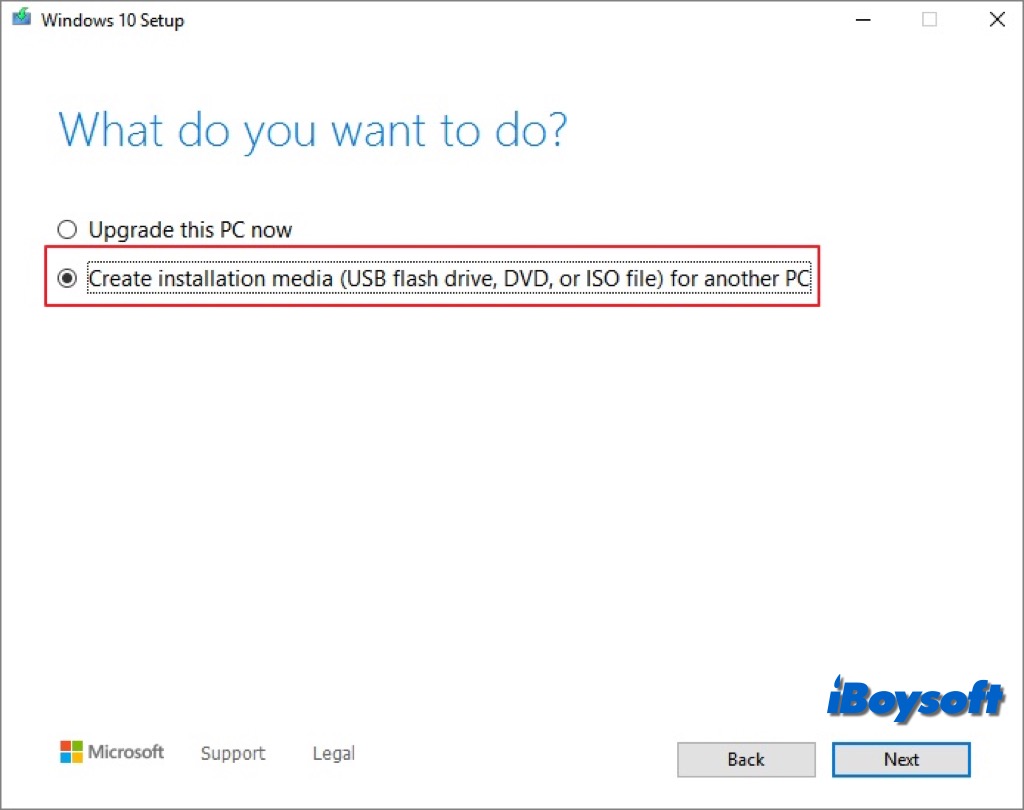
The tool will present you with two primary options:
- Upgrade this PC now: This performs an in-place upgrade, which is not what we want for creating a USB.
- Create installation media (USB flash drive, DVD, or ISO file) for another PC: This is the option required for our task.
Select the second option and click "Next." This path tells the tool that you want to download the Windows 10 image and package it into a format that can be booted from external hardware. This is essential for clean installs, where you wipe a hard drive and start from scratch.
Step 5: Define Language, Edition, and Architecture
On this screen, you will choose the specific version of Windows 10 you want to put on the USB. By default, the checkbox for "Use the recommended options for this PC" is usually selected.
- Language: Choose your preferred language (e.g., English United States).
- Edition: This will typically just say "Windows 10." The specific version (Home vs. Pro) is usually determined later by your digital license or product key during the actual installation.
- Architecture: You can choose 64-bit (x64), 32-bit (x86), or "Both."
- In 2026, almost all modern systems use 64-bit.
- Choose 32-bit only if you are installing on extremely old hardware with less than 4GB of RAM.
- Choosing "Both" is useful for IT professionals but requires a larger USB drive (at least 16GB).
Uncheck the "recommended options" box if you need to create a 32-bit installer for a different machine while working on a 64-bit computer. Click "Next" once your selections are finalized.
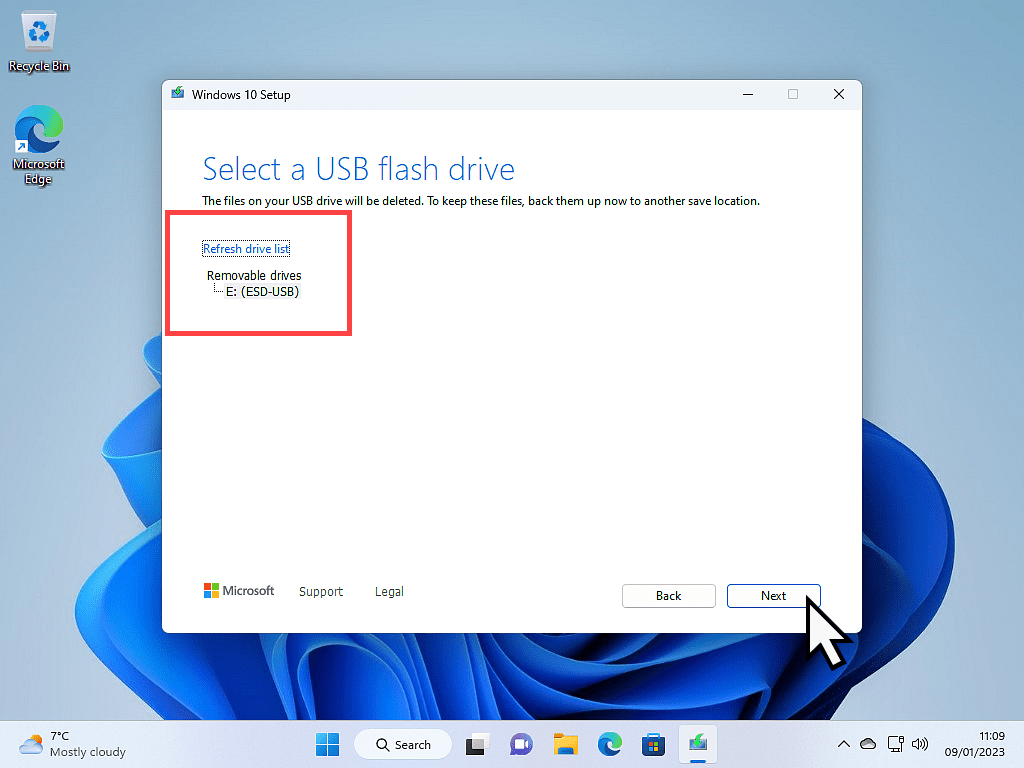
Step 6: Identify and Select the Target USB Flash Drive
The tool will now ask which media you want to use. You will see two choices:
- USB flash drive: The tool will handle everything, including formatting and making the drive bootable.
- ISO file: This downloads the image only, requiring you to use a third-party tool like Rufus to burn it later.
Select "USB flash drive" and click "Next." You will then see a list of available removable drives. If you have multiple USB drives plugged in, double-check the drive letter (e.g., D:, E:, or F:) to ensure you are selecting the correct one. If your drive does not appear, click "Refresh drive list." Once the correct drive is highlighted, click "Next."
Step 7: Monitor the Download and Creation Phase
This is the longest part of the process. The tool will now perform two distinct tasks:
- Downloading Windows 10: The tool fetches the latest build of Windows 10 from Microsoft’s servers. The speed depends entirely on your internet connection.
- Creating Windows 10 Media: Once the download is complete, the tool begins extracting the files and writing them to the USB drive. It also configures the boot sector so the computer can recognize the drive as a startup device.
Do not remove the USB drive or shut down your computer during this phase. Interrupting the process can lead to a "bricked" USB drive that requires a low-level format to recover. Once the tool displays "Your USB flash drive is ready," click "Finish." The tool will perform a quick cleanup of temporary files, and you can then safely eject your new Windows 10 installation USB.
Technical Comparison: USB 2.0 vs. USB 3.0 for Installation
The choice of hardware significantly impacts the user experience when installing an operating system. The following table illustrates the performance differences you can expect in a typical 2026 environment.
| Feature | USB 2.0 (Legacy) | USB 3.0/3.1 (Recommended) |
|---|---|---|
| Creation Time | 25–45 Minutes | 5–12 Minutes |
| OS Installation Time | 30–60 Minutes | 10–20 Minutes |
| Data Transfer Rate | Up to 480 Mbps | Up to 5-10 Gbps |
| Reliability | Higher risk of heat-related failure | Higher sustained performance |
| Compatibility | Universal | Universal (Backwards compatible) |
Advanced Considerations: BIOS vs. UEFI
When you use the Media Creation Tool, it creates a drive that is generally compatible with both Legacy BIOS and UEFI firmware. However, how you use the USB depends on the age of the target computer.
- UEFI (Modern): For computers made after 2012, UEFI is the standard. It supports the GPT partition style, which allows for faster boot times and support for drives larger than 2TB. The USB created by the MCT is formatted as FAT32 to ensure UEFI compatibility.
- Legacy BIOS: Older machines use MBR. If you are installing on a vintage system, you may need to go into the BIOS settings (usually by pressing F2, F12, or Del during startup) and enable "Legacy Support" or "CSM" (Compatibility Support Module) to boot from the USB.
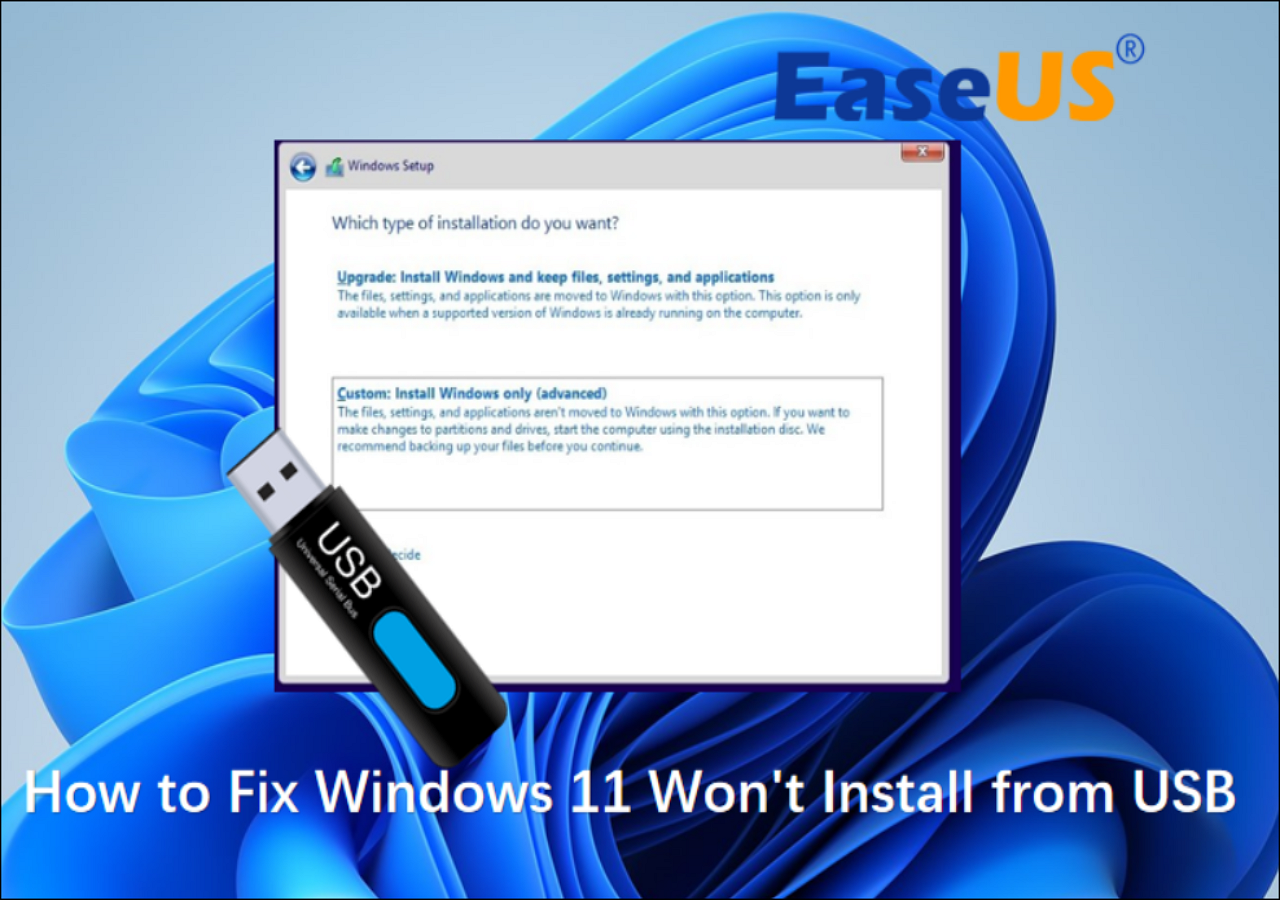
In 2026, if you are attempting to install Windows 10 on a machine that originally came with Windows 11, you may encounter "Secure Boot" issues. You might need to temporarily disable Secure Boot in the UEFI settings to allow the Windows 10 installer to initialize.
Troubleshooting Common Errors
Even with a streamlined 7-step process, technical hurdles can arise. Here are the most common issues encountered in 2026:
Error Code 0x80042405 - 0xA001B
This is a generic error that often occurs when the Media Creation Tool fails to format the USB drive. This is frequently caused by the drive being in a "non-standard" state or having hidden partitions. To fix this, use the Windows "Disk Management" tool to delete all partitions on the USB drive until it shows as "Unallocated," then try the MCT again.
"We can't find a USB flash drive"
If the tool doesn't see your drive, it may be because the drive is formatted as NTFS or another incompatible file system, or it is a "Windows-to-Go" drive. Try using a different USB port, preferably one on the back of the motherboard if you are using a desktop PC.
The USB Boots but Windows 10 Won't Install
If you reach the installation screen but cannot see your hard drive, it is likely a missing Storage Controller Driver. This is common on newer 12th, 13th, or 14th Gen Intel systems (Intel VMD). You will need to download the "Intel Rapid Storage Technology" (IRST) driver from your motherboard manufacturer's website, unzip it, and place it on the same USB drive you created in the 7 steps above.
Frequently Asked Questions
Is Windows 10 still safe to install in 2026?
Since mainstream support ended in late 2025, Windows 10 no longer receives free security updates for home users. If you are installing it in 2026, it is highly recommended to use it only for offline tasks, or ensure you are part of the Extended Security Updates (ESU) program. Running an unsupported OS online exposes you to unpatched vulnerabilities.
Can I use a 4GB USB drive?
No. The Windows 10 installation image has grown over the years due to cumulative updates. By 2026, the image size is consistently above 4.5GB, making an 8GB drive the absolute minimum required capacity.
Will this work on a Mac?
You can use this USB to install Windows 10 on an Intel-based Mac using Boot Camp. However, for Apple Silicon (M1, M2, M3) Macs, this USB will not work, as those systems require the ARM64 version of Windows, which is not provided through the standard Media Creation Tool.
Do I need a product key to create the USB?
No. You can create the installation media without a product key. You will only be asked for a key during the actual installation process on the target computer. You can even skip that step during installation and activate Windows later once you reach the desktop.
What is the difference between an ISO and a USB?
An ISO is a single file that contains the entire contents of an optical disc. A USB installation drive is a physical device that has been "burned" with that ISO data and made bootable. The Media Creation Tool performs the "burning" process for you automatically.
Practical Recommendation
For the best results in 2026, always use a high-quality USB 3.0 drive from a reputable manufacturer (such as Samsung, SanDisk, or Kingston). Cheap, unbranded drives often have high failure rates during the "Verification" stage of the Media Creation Tool.
Once your USB is created, label it clearly and keep it in a safe place. Even if you don't plan on a clean install today, having a bootable Windows 10 USB is an invaluable tool for system recovery if your computer fails to boot in the future. After the installation is complete, your first action should be to run Windows Update to ensure that every available security patch up to the end-of-life date is installed.
Image Gallery
Select an image to open it in a new tab.
Zara El-Hashem
Sociocultural Dynamics and Academics Writer
