
Drawing an anime body involves applying fundamental principles of human anatomy while intentionally exaggerating or simplifying proportions to achieve the distinct aesthetic characteristic of the medium. To construct an anime character, artists use a framework of geometric shapes—cylinders, spheres, and boxes—to establish volume and posture before refining the character’s silhouette, facial features, and costuming. By mastering these construction techniques, you can transition from flat, static figures to dynamic characters capable of conveying complex motion and expression.
Establishing the Anatomical Framework
Before adding details like hair, clothing, or expressive eyes, you must build a structural foundation. In the context of anime and manga, proportions are often categorized by "head counts"—the number of times the head's height fits into the total length of the body.
A realistic human is typically seven to eight heads tall. Anime characters, however, vary significantly based on their archetype:
- Chibi/Super Deformed: Usually 2 to 3 heads tall.
- Standard Shonen/Shojo: Typically 6 to 7 heads tall.
- Heroic/Mature: Often 8 or more heads tall, featuring longer legs and broader shoulders.
To begin, draw a vertical line representing the center of the body. Divide this line into your desired head count segments. The first circle represents the cranium. Below this, you will place the torso, hips, and limbs. Using a central axis ensures your character maintains balance and weight distribution, preventing the "leaning" effect common in early-stage character design.
Constructing the Torso and Hips
The torso is the most complex part of the anime body to construct because it functions as the bridge between the head, shoulders, and lower body. Treat the ribcage and the pelvic girdle as two distinct, movable volumes.
- The Ribcage: Represent this as an inverted egg or a modified box shape. The width of the ribcage determines the character's core build.
- The Waist: Connect the ribcage to the pelvis using a tapered cylinder. This space is where the spine’s flexibility allows for the character to twist or bend.
- The Pelvis: Represent this as a sphere or a sturdy box. The width of the pelvis determines the center of gravity.
In anime styles, the waist is often drawn much thinner than the shoulders for male characters (the V-taper) or slightly broader with curved hips for female characters. Regardless of the desired aesthetic, maintain the connection between these volumes to ensure the figure appears physically anchored.
Mapping the Limbs and Joints
Limbs should not be drawn as simple lines but as interlocking volumes. Think of the arms and legs as a series of cylinders connected by spheres representing joints (shoulders, elbows, wrists, hips, knees, and ankles).
- Shoulders: Place them slightly below the top of the ribcage. In anime, shoulders are often drawn as rounded, soft shapes unless the character design specifically calls for sharp, muscular definition.
- Arms: The elbow generally aligns with the bottom of the ribcage. The hand, when the arm is relaxed, typically reaches mid-thigh.
- Legs: The femur (thigh) and the tibia/fibula (lower leg) should ideally be of similar length, though many anime styles exaggerate leg length to create a taller, more elegant silhouette.
When mapping these, keep the joints in mind. The elbow is a hinge, while the shoulder and hip are ball-and-socket joints. Understanding these mechanics prevents the limbs from appearing disconnected or "boneless," a common error in beginner illustrations.
Refining the Silhouette and Form
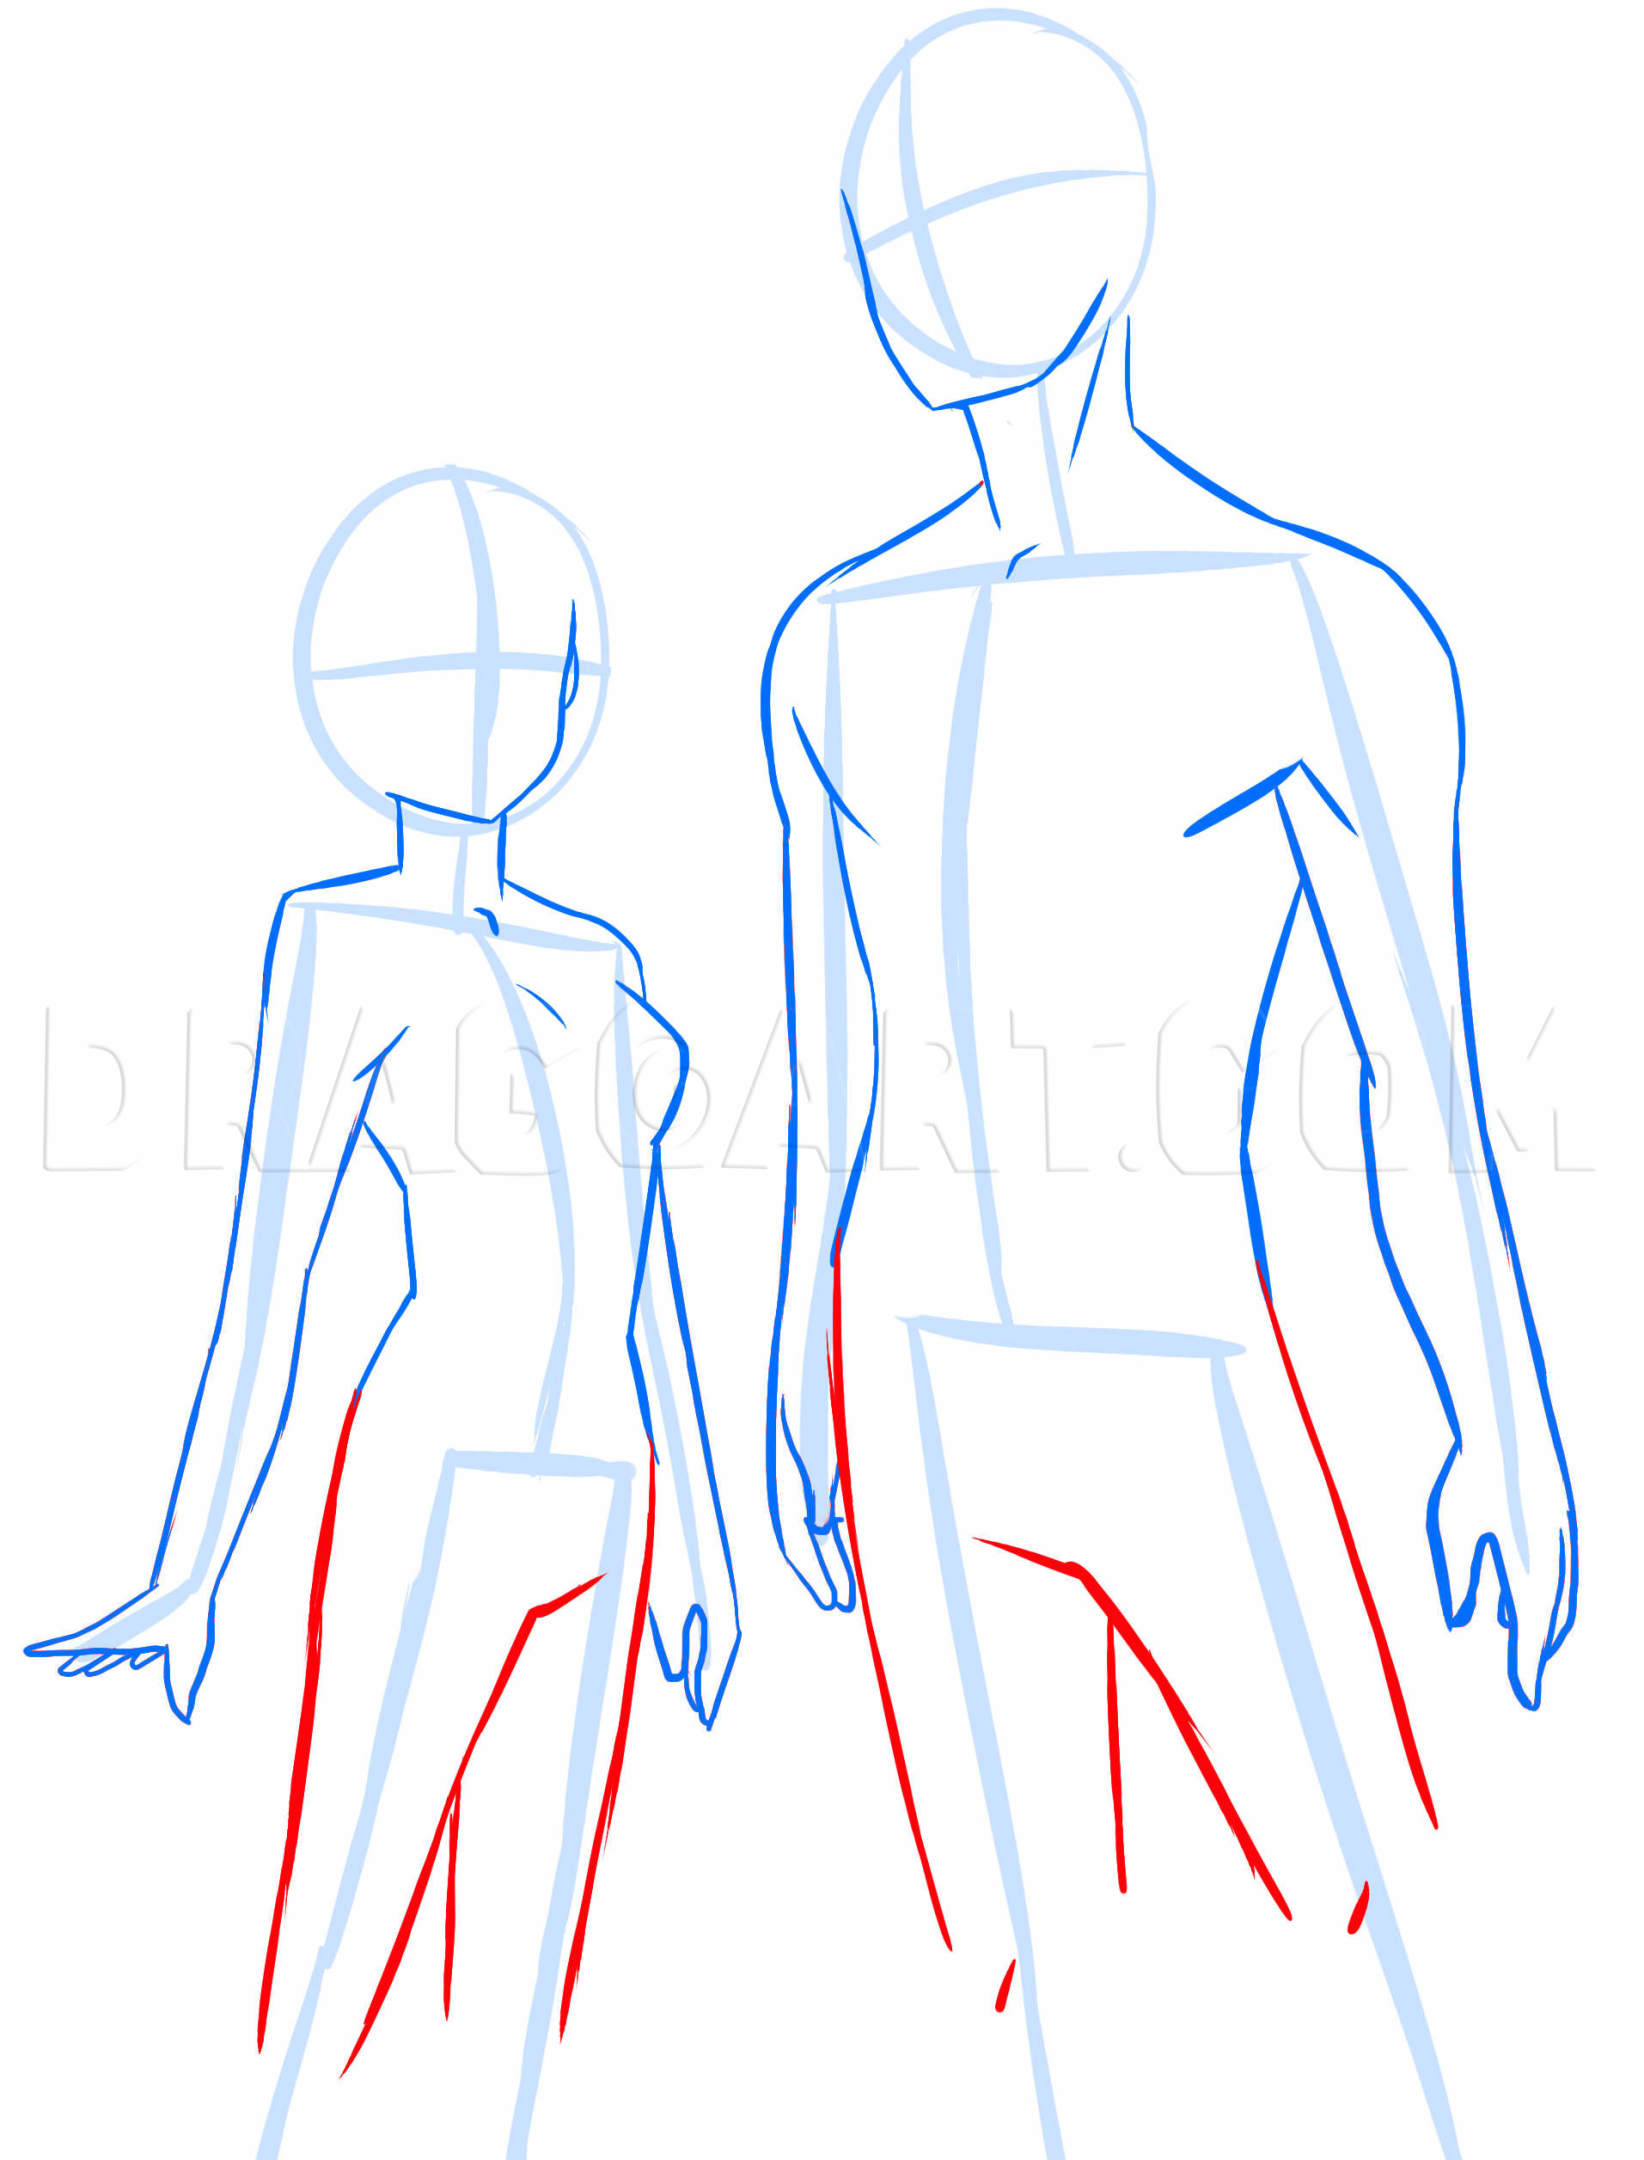
Once the geometric skeleton is in place, you must wrap the "skin" and musculature around it. This is where the character’s personality starts to emerge. Use flowing lines to connect the geometric shapes, smoothing out the transitions between the torso and the limbs.
Focus on the following for a clean silhouette:
- Tapering: Limbs should naturally taper toward the wrists and ankles.
- Curves: Even in male characters, avoid purely straight lines. Subtle curves suggest muscle, fat, and fluid movement.
- Compression: When a joint bends, consider how the skin "bunches" or overlaps. For example, when the arm bends at the elbow, the forearm muscle pushes against the bicep.
At this stage, you are not drawing individual muscles in anatomical detail, but rather defining the overall volume that clothing will eventually cover. If you plan to add detailed armor or complex outfits, this step is critical—the clothing must look like it sits on top of a solid body, not floating in a vacuum.
Standardized Body Proportions Comparison
The following table outlines common head-count variations used in industry-standard character design for anime and manga.
| Character Type | Head Count | Distinguishing Features | Target Use |
|---|---|---|---|
| Chibi | 2.5 – 3 | Large head, tiny limbs | Comedic relief, mascots |
| Teen/School | 6 – 6.5 | Slender, neutral curves | Slice of life, romance |
| Adult/Action | 7.5 – 8 | Defined muscles, long legs | Battle shonen, fantasy |
| Tall/Heroic | 8.5+ | Extreme limb length, broad chest | Seinen, high fantasy |
Handling Dynamic Poses and Foreshortening
A static standing pose is a useful starting point, but anime is defined by action. To move beyond standing still, you must understand the "Line of Action"—an imaginary line that follows the spine and defines the character's movement.
If a character is jumping, their spine should follow a clear curve rather than a vertical line. When a limb moves toward the viewer, use foreshortening. This involves drawing the closer part of the limb larger and overlapping it over the distal (farther) parts. The key to successful foreshortening is to overlap the shapes clearly. If your construction lines are well-defined, you will see that the sphere of the knee or the box of the hand effectively hides the parts of the limb behind it.
Common Mistakes to Avoid
- The "Noodle Arm" Syndrome: Avoiding the use of joints makes arms and legs look like rubber. Always mark your circles for elbows and wrists before drawing the outer lines.
- Disconnected Shoulders: Ensure the shoulders are attached to the upper ribcage, not floating off the neck.
- Ignoring Gravity: Even in stylized art, clothing and hair should obey gravity. If the character is leaning, the weight of their clothing should shift toward the direction of the lean.
- Symmetry Overload: Perfect symmetry makes characters look mechanical. Try to vary the pose slightly—one foot slightly more forward than the other, or one shoulder slightly lower—to create a natural look.
Troubleshooting Your Construction
If your character looks "off" but you cannot pinpoint why, return to the construction phase. Check the following:
- The Vertical Axis: Is the body weight centered? If the character is standing, draw a plumb line from the pit of the throat to the ground. If the weight is resting on one leg, that foot should align with the pit of the throat.
- Joint Alignment: Are the elbows and knees aligned correctly relative to each other?
- Volume Consistency: Does one arm look significantly thicker than the other? Compare the width of the cylinders used for both limbs.
Frequently Asked Questions
How do I make my anime bodies look more dynamic? Focus on the "Line of Action." Before sketching the body, draw a single, sweeping curve that represents the motion of the spine. Build your geometric framework along this curve to ensure the entire pose feels intentional and fluid.
Should I learn realistic anatomy before drawing anime? While you do not need to be a medical illustrator, understanding the basic skeletal structure—where bones connect and how they move—will significantly improve your ability to stylize. Learning the "rules" of anatomy allows you to break them intentionally to create the desired anime aesthetic.
What is the best way to practice drawing body proportions? Use "gesture drawing." Find a source of poses, and set a timer for 30 to 60 seconds per pose. Focus only on capturing the essential volumes and the line of action using simple cylinders and spheres. Speed forces you to prioritize form over detail.
How do I draw different body types? Adjust the volume of your base shapes. For a broader character, widen the box of the ribcage and the pelvis. For a slender character, elongate the cylinders of the limbs and tighten the waist. Consistency in these base volumes is the key to varied character design.
Do I need specialized equipment to draw anime bodies? No. You can start with standard graphite pencils, an eraser, and copy paper. Digital tools like clip studio paint or tablets are useful for their layer systems, which allow you to keep your "construction" sketch on a separate, low-opacity layer beneath your final line art, but they are not required to learn the fundamental techniques.
Next Steps for Skill Development
To further your progress, dedicate one week to sketching only the skeletal framework of characters in motion. Avoid drawing faces, hair, or clothing during this period. By focusing solely on the structural integrity of the torso, hips, and limbs, you will build the muscle memory required for more complex illustrations. Once you are comfortable with the geometric construction, begin adding simple clothing volumes to understand how fabric interacts with the body.

Image Gallery
Select an image to open it in a new tab.




Zara El-Hashem
Sociocultural Dynamics and Academics Writer
