Home Remedies for Mold: Practical Cleaning Techniques and Safe Removal Guide

To effectively remove small patches of indoor mold using home remedies, apply undiluted 5% white vinegar or a 3% hydrogen peroxide solution directly to the affected surface, allow a contact time of at least 10 to 60 minutes, and scrub with a stiff brush. These non-toxic household agents kill fungal spores and penetrate semi-porous materials without emitting hazardous volatile organic compounds (VOCs).
Indoor mold growth is a common issue triggered by excess moisture, elevated relative humidity, or undetected plumbing leaks. While commercial fungicides and heavy chemical sprays exist, simple household items like acetic acid (distilled white vinegar), sodium bicarbonate (baking soda), and hydrogen peroxide offer highly effective, low-toxicity alternatives for localized mold problems.
Understanding how these home remedies interact with different structural materials, how fungal organisms grow, and how to protect yourself during remediation ensures thorough cleaning without spreading spores throughout your home.
Understanding Mold Dynamics, Biology, and Safety Thresholds
Fungi reproduce by releasing microscopic spores into the air. When these spores land on damp organic substrates—such as timber, drywall paper, dust, or grout—they germinate within 24 to 48 hours. The organism extends microscopic, root-like structures called hyphae deep into porous host materials to extract nutrients. Effective remediation must kill both the visible surface growth and these submerged hyphae; simply removing surface discoloration leaves the living fungal network intact to regenerate as soon as moisture returns.
- Surface Mold Growth (Visible discoloration)
- Surface Line
- Fungal Hyphae (Root Structure)
- Penetrates porous & semi-porous surfaces
Before attempting any DIY mold removal, assess the scope of contamination. The U.S. Environmental Protection Agency (EPA) establishes a clear safety standard: household remediation techniques apply only to contiguous mold infestations covering less than 10 square feet (roughly a 3-foot by 3-foot patch).
Safety Equipment and Preparation Requirements
Even natural cleaning solutions liberate thousands of fungal spores into the air when scrubbed. Inhaling these spores or active mycotoxins can irritate airways, trigger asthma attacks, or cause allergic reactions.
Always equip yourself with standard Personal Protective Equipment (PPE) before disturbing moldy areas:
- Respirator Protection: Wear an N95 or P100 filtering facepiece respirator fitted tightly over the nose and mouth. Dust masks do not filter microscopic fungal spores.
- Eye Protection: Use unvented or indirectly vented safety goggles to protect mucous membranes from airborne spores and liquid splashes.
- Dermal Protection: Wear long-sleeved clothing and durable nitrile, neoprene, or heavy-duty rubber gloves. Avoid thin latex gloves, which tear easily against abrasive scrubbing tools.
- Containment and Ventilation: Close internal doors connecting the work area to the rest of the home. Open exterior windows and place a box fan pointing outward to vent airborne spores outside. Turn off forced-air heating and cooling systems to stop spores from traveling through ductwork.
Science and Mechanics of Key Home Remedies
Household remedies combat mold through specific chemical mechanisms, such as acid-base reactions, cell oxidation, or desiccation. Selecting the appropriate agent depends heavily on surface porosity, material sensitivity, and the severity of growth.
| Home Remedy | Primary Active Chemical Agent | Biological Action Mechanism |
|---|---|---|
| White Vinegar | Acetic Acid (~5% concentration) | Acidic disruption of cell membranes |
| Hydrogen Peroxide | Hydrogen Peroxide (3% solution) | Oxidation of fungal proteins |
| Baking Soda | Sodium Bicarbonate | Alkaline pH shift & desiccation |
| Tea Tree Oil | Terpinen-4-ol | Broad-spectrum fungicidal action |
1. Distilled White Vinegar (5% Acetic Acid)
Distilled white vinegar is a mild acid with a pH around 2.5. Acetic acid breaks down fungal cellular structures, disrupting internal enzymatic pathways and killing the organism.
- Why It Works: Vinegar penetrates semi-porous surfaces like unsealed wood and grout, destroying fungal hyphae beneath the surface. Research demonstrates that acetic acid effectively eliminates standard indoor mold strains, including Penicillium and Aspergillus species.
- Application Method: Spray full-strength, undiluted white vinegar directly onto affected surfaces. Do not dilute it with water, as reducing the acid concentration lowers its fungicidal strength. Allow it to sit undisturbed for at least 60 minutes before scrubbing.
- Limitations: The acidic nature of vinegar can etch natural stone (marble, granite, limestone), dull unsealed hardwood finishes, and corrode certain raw metals if left unrinsed.
2. Hydrogen Peroxide (3% Concentration)
Standard 3% topical hydrogen peroxide is an oxidizing agent that destroys cellular proteins, lipids, and DNA within fungal cells.
- Why It Works: It works quickly, acts as a natural bleaching agent to lighten residual mold stains, and breaks down into harmless water and oxygen molecules.
- Application Method: Pour full-strength 3% hydrogen peroxide into an opaque spray bottle (light degrades hydrogen peroxide). Saturate the moldy area and let it work for 10 to 15 minutes until effervescence (bubbling) subsides. Scrub thoroughly, wipe dry, and repeat if dark stains persist.
- Limitations: Hydrogen peroxide can bleach colored fabrics, dark carpets, dyed grout, and painted surfaces. Test it on an inconspicuous spot before widespread application.
3. Baking Soda (Sodium Bicarbonate)
Sodium bicarbonate has a mildly alkaline pH (around 8 to 9) that creates an inhospitable environment for acid-loving molds. It also absorbs moisture, which fungi need to thrive.
- Why It Works: Baking soda is non-toxic, odorless, and safe for households with pets and children. Its micro-abrasive texture helps scrub away stubborn surface spores without scratching delicate fixtures.
- Application Method: Dissolve 1/2 teaspoon of baking soda into 2 cups of warm water in a spray bottle. Shake vigorously and spray the surface. Alternatively, create a thick paste using two parts baking soda to one part water for localized grout or tile application. Scrub, rinse with clean water, and re-spray a light coat of the baking soda solution, leaving it to dry to discourage future growth.
- Limitations: Baking soda alone lacks the rapid, deep-killing power of vinegar on heavy structural infestations, making it best used as a mild cleaner or secondary preventative treatment.
4. Essential Oils (Tea Tree Oil)
Essential oils derived from Melaleuca alternifolia (tea tree) contain high levels of terpinen-4-ol, a natural compound with broad-spectrum fungicidal activity.
- Why It Works: Unlike volatile liquids that evaporate rapidly, tea tree oil leaves behind an oil residue that continues to suppress fungal spores over time.
- Application Method: Combine 1 teaspoon of pure tea tree oil with 1 cup of water in a spray bottle. Shake thoroughly to disperse the oil suspended in the liquid. Spray onto the affected area, scrub, and allow it to dry without rinsing.
- Limitations: High-quality, 100% pure tea tree oil can be expensive. Its strong, medicinal aroma can also trigger sensitivities in people with severe chemical allergies or respiratory conditions.
The Problem with Chlorine Bleach on Porous Materials
Chlorine bleach (sodium hypochlorite) is widely used for home cleaning, but it is ineffective for treating mold on porous substrates like wood, drywall, or concrete.
The ionic structure of sodium hypochlorite prevents the active chlorine molecule from penetrating porous materials. The chemical remains on the surface, bleaching the visible mold pigments white without harming the underlying roots. Meanwhile, the water base of the liquid soaks into the material, feeding the surviving fungal hyphae underneath.
Bleach is suitable only for non-porous surfaces like glass, acrylic tubs, and fully glazed ceramic tiles.
Remedy Selection and Material Compatibility Matrix
Choosing the right cleaning agent requires matching the chemical properties of the remedy to the physical characteristics of the surface material.
| Remedy | Active Chemical | Target Surface Porosity | Recommended Contact Time | Root (Hyphae) Penetration | Material Compatibility & Risks |
|---|---|---|---|---|---|
| White Vinegar | Acetic Acid (5%) | Semi-Porous & Non-Porous | 60 minutes | High | Safe for tile, glass, wood; Do not use on marble, granite, or limestone. |
| 3% Hydrogen Peroxide | Hydrogen Peroxide | Non-Porous & Light Materials | 10 to 15 minutes | Moderate | Safe for plastic, sealed tile, glass; Risk of bleaching colored fabrics or paints. |
| Baking Soda Paste | Sodium Bicarbonate | Non-Porous & Delicate Semi-Porous | 15 to 30 minutes | Low to Moderate | Safe for almost all surfaces; acts as a gentle, non-scratch abrasive. |
| Tea Tree Oil Solution | Terpinen-4-ol | Porous & Semi-Porous | Leave on (No rinse) | High | Safe for fabrics, wood, walls; strong odor, expensive over large areas. |
| Dish Soap & Warm Water | Surfactants | Surface-level cleaning all types | 5 to 10 minutes | None | Safe for all surfaces; cleans grime but does not kill underlying spores. |
Practical Cleaning Techniques by Surface Material
Different household materials respond differently to moisture, abrasion, and acidic solutions. Tailor your cleaning technique to the surface material to remove mold effectively without causing permanent damage.
Surface Porosity & Treatment Pathway
- Determine Surface Material
- Non-Porous (Glass, Acrylic, Glazed Tile)
- Apply Peroxide or Vinegar
- Dwell: 10-15 Mins
- Scrub & Wipe Dry
- Semi-Porous (Hardwood, Grout, Concrete)
- Apply Undiluted Vinegar
- Dwell: 60 Mins
- Scrub deep with stiff brush
- Sub-Surface Porous (Drywall, Carpet, Insulation)
- Growth > Surface Level?
- Yes: Cut & Replace
- No: Apply Tea Tree/Peroxide (Light mist only; dry rapidly)
- Growth > Surface Level?
- Non-Porous (Glass, Acrylic, Glazed Tile)
1. Non-Porous Surfaces (Glass, Acrylic, Glazed Ceramic Tile, Sealed Metals)
Non-porous materials prevent fungal roots from penetrating beneath the surface. Cleaning these materials focuses on removing surface buildup and wiping away dead biological matter.
- Dampen: Spray full-strength 3% hydrogen peroxide or undiluted white vinegar directly over the mold.
- Dwell Time: Allow the solution to rest for 10 to 15 minutes to break down fungal cell membranes.
- Agitate: Use a soft-bristled nylon brush or non-scratch sponge to dislodge surface colonies.
- Wipe and Dry: Wipe the area completely dry using a micro-fiber cloth. Ensure no standing dampness remains, as moisture facilitates spore re-attachment.
2. Semi-Porous Surfaces (Hardwood Trim, Grout Lines, Sealed Concrete)
Semi-porous substrates allow moisture and hyphae to enter microscopic pores beneath the surface. Vinegar is ideal here due to its deep penetration depth.
- Saturate: Spray undiluted 5% white vinegar evenly over the wood or grout lines.
- Dwell Time: Wait a full 60 minutes. This gives the acetic acid time to sink into the pores and destroy the fungal roots.
- Scrub Deeply: For grout, use a stiff-bristled detail grout brush using a paste made of baking soda and a small amount of water to physically lift deep-seated debris. For wood, scrub gently along the grain using a medium-bristled brush to avoid damaging the wood fibers.
- Rinse and Dry Immediately: Wipe the surface with a damp cloth wrung out with clean water to remove residue. Immediately dry the area using a clean towel, then run a portable fan to strip away remaining moisture.
3. Highly Porous Surfaces (Drywall, Structural Lumber, Carpeting, Insulation)
When mold colonizes soft or highly porous materials, complete structural restoration often requires physical removal rather than simple surface treatment.
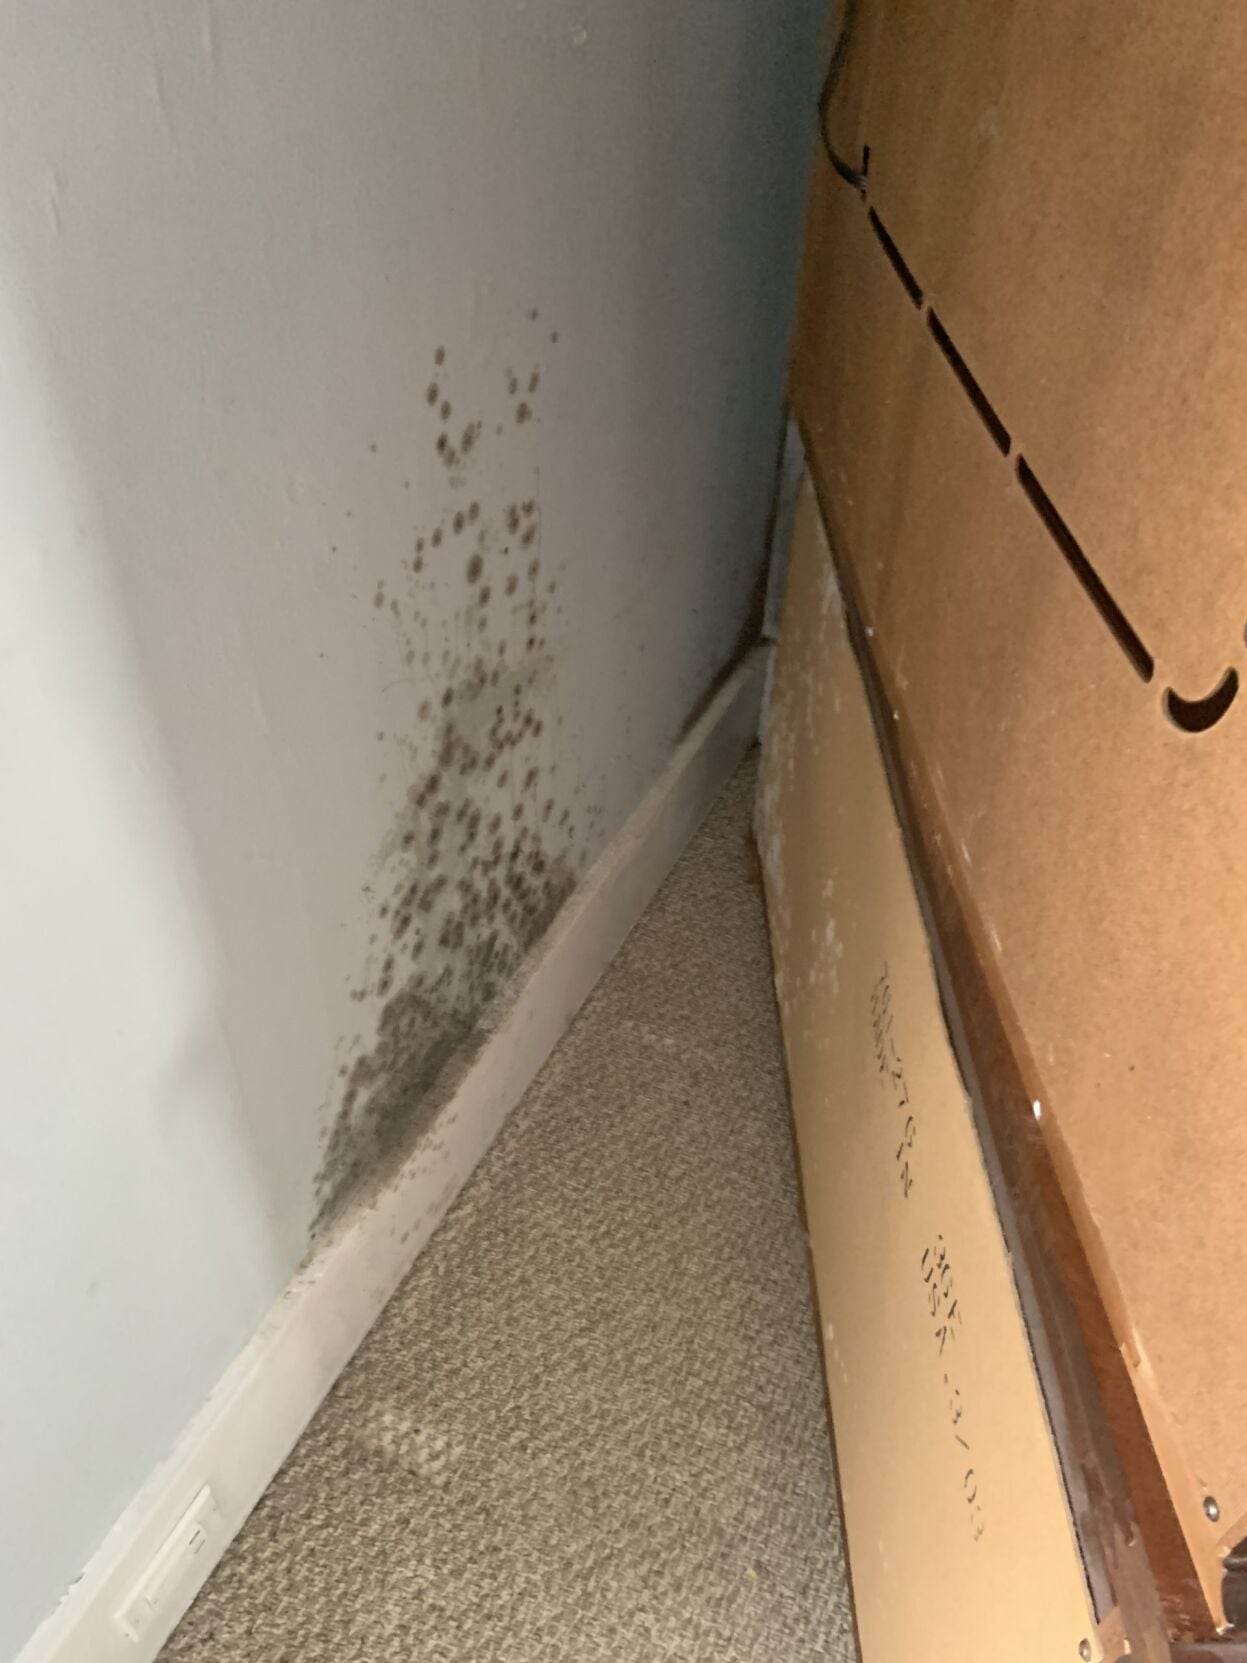
- Drywall: If mold has penetrated the paper backing or gypsum core of drywall, surface cleaning will not solve the issue. Cut out the affected section 12 inches beyond the visible mold boundary using a utility knife, bag the waste in heavy 6-mil plastic trash bags, seal it tightly, and install new drywall.
- Surface-Only Drywall Speckling: If mold sits strictly on top of painted, undamaged drywall, lightly mist it with a hydrogen peroxide spray or tea tree oil mixture. Do not oversaturate the wall, as excess liquid can break down the paper lining. Scrub gently, wipe dry immediately, and run a dehumidifier.
- Carpets and Fabrics: If carpet padding or backing becomes moldy, replace both the carpet and pad. Machine-washable fabrics (curtains, slipcovers) can be laundered in hot water mixed with 1 to 2 cups of white vinegar, then dried completely on high heat.
Room-Specific Application Strategies
Mold thrives in areas with consistent moisture, poor airflow, and available nutrients. Tailoring your approach to specific rooms helps target these localized conditions effectively.
| Area | Common Mold Locations | Key Prevention Technique |
|---|---|---|
| Bathroom | Grout, caulk, ceiling perimeters | Exhaust fan 20 min post-shower |
| Kitchen | Under-sink cabinet, fridge pan | Leak checks, clean drip trays |
| Basement/Attic | Concrete walls, joists, insulation | Dehumidifier (keep RH < 50%) |
Bathrooms and High-Humidity Zones
High steam levels make bathrooms prime locations for surface mold on ceilings, silicone sealant, and tile grout.
- Silicone Caulk: Mold often grows behind aged silicone sealant. If white vinegar or hydrogen peroxide fails to remove black discoloration from caulk, the mold is likely embedded in the substrate beneath it. Scrape out the old caulk using a caulk removal tool, sanitize the bare joint with white vinegar, dry it completely, and re-apply fresh, 100% silicone mold-resistant caulk.
- Ceilings and Upper Walls: Steam rises and condenses on cold ceiling surfaces. Mist upper walls with undiluted white vinegar once a month as a preventative measure. Ensure the bathroom exhaust fan is rated for the room's square footage and run it during showers and for at least 20 minutes afterward.
Kitchens and Under-Sink Cabinetry
Slow, unnoticed plumbing drips under kitchen sinks often cause hidden mold growth inside melamine or plywood cabinets.
- Under-Sink Cabinets: Remove all stored items, inspect pipe connections, and repair any active leaks. Clean wood surfaces with a mixture of warm water, dish soap, and baking soda. Allow the area to dry thoroughly before returning items, and consider placing an absorbent moisture-trap container under vulnerable sink traps.
- Refrigerator Drip Pans and Door Gaskets: Mold commonly grows in the dark rubber folds of refrigerator door gaskets. Clean these tracks using a cotton swab dipped in 3% hydrogen peroxide to eliminate trapped spores without damaging the flexible rubber seal.
Basements, Attics, and Crawlspaces
Sub-grade and unconditioned areas of the home frequently suffer from ambient humidity, ground moisture intrusion, and poor air circulation.
- Unfinished Basement Walls: Concrete walls can exude moisture through capillary action (efflorescence and dampness). Spray white vinegar over affected masonry walls, scrub with a wire brush, and collect any dislodged debris using a HEPA-filtered vacuum.
- Attic Rafters: Roof leaks or inadequate soffit ventilation can trap warm, moist air against wood roof sheathing. Spray dark patches with a concentrated tea tree oil solution or white vinegar. If structural joists are heavily rotted, consult a licensed structural professional.
Preventing Mold Recurrence: Moisture Control & Maintenance
Killing existing mold is only half the battle. Mold will return unless you correct the underlying moisture conditions that allowed it to grow in the first place.
MOLD PREVENTION CHECKLIST
- Maintain relative indoor humidity between 30% and 50% using a hygrometer.
- Run dedicated dehumidifiers in basements and enclosed crawlspaces.
- Inspect window sills for condensation during cold winter months.
- Clean indoor air by operating portable air purifiers fitted with HEPA filters.
- Ensure exterior gutters shed rainwater at least 5 feet away from foundation.
1. Relative Humidity Control
Keep your home's relative humidity (RH) between 30% and 50%. You can monitor indoor air conditions using a digital hygrometer. When ambient RH consistently exceeds 60%, airborne mold spores can germinate on organic indoor surfaces without direct liquid water contact. Use portable or whole-house dehumidifiers to pull excess moisture from the air, especially in low-grade basements.
2. Ventilation and Air Filtration
Stagnant air allows moisture to collect on cold surfaces, creating condensation.
- Keep interior doors open to encourage continuous airflow between rooms.
- Use ceiling fans and localized oscillating fans in poorly ventilated rooms.
- Run high-efficiency particulate air (HEPA) purifiers continuously to capture airborne mold spores, dust mites, and bioaerosols, reducing the overall biological load inside your home.
3. Structural Moisture Management
Inspect your home exterior regularly to prevent water from intruding into interior wall cavities:
- Clean roof gutters and downspouts twice a year to prevent water from backing up under shingles or pooling around your home's foundation.
- Extend downspout discharge pipes at least 5 feet away from exterior basement walls.
- Seal window frame gaps, exterior masonry cracks, and foundation penetrations using high-grade exterior polyurethane caulk.
Common Mistakes to Avoid During DIY Mold Removal
Avoiding critical errors during home remediation protects your health and keeps mold spores from spreading into unaffected areas of your house.
DO NOT MIX CHEMICALS
Vinegar + Bleach = Chlorine Gas (Toxic Hazard!)
Peroxide + Vinegar = Peracetic Acid (Corrosive Liquid!)
Mixing Cleaning Chemicals: Never mix chlorine bleach with white vinegar or ammonia. Combining vinegar (acid) with bleach (sodium hypochlorite) creates toxic chlorine gas, which can cause severe respiratory damage and chemical burns. Similarly, mixing hydrogen peroxide with vinegar forms peracetic acid, a corrosive compound that can irritate skin, eyes, and lungs.
Dry Scrubbing Dry Mold: Scrubbing dry mold releases millions of airborne spores and fragments directly into your breathing zone and HVAC system. Always lightly mist moldy areas with a liquid solution or water before scrubbing to trap spores in the liquid.
Painting Over Active Mold: Applying standard wall paint or latex primer directly over mold does not kill the fungus. Fungal hyphae will quickly break through the paint layer, peeling it off the wall within weeks. Always sanitize, scrub, rinse, and dry the surface completely, then apply an antimicrobial, oil-based primer before painting.
Ignoring the Water Source: Cleaning surface mold without fixing the underlying water leak, high humidity, or condensation issue guarantees that the mold will grow back. Always locate and fix the root cause of the moisture before starting surface remediation.
Frequently Asked Questions
Can white vinegar kill 100% of household mold?
While undiluted white vinegar (5% acetic acid) kills roughly 82% of common mold species—including Penicillium, Aspergillus, and Cladosporium—it may not completely eradicate every single fungal strain on deeply porous materials. However, its ability to penetrate semi-porous surfaces makes it significantly more effective for long-term DIY mold control than surface-only agents like chlorine bleach.
How long should I leave vinegar on mold before wiping it off?
Leave full-strength white vinegar on the surface for at least 60 minutes. This dwell time allows the acetic acid to penetrate the material's surface, break down fungal cell walls, and destroy deeper root networks (hyphae) before you scrub and rinse the area.
Is hydrogen peroxide safer than chlorine bleach for mold removal?
Yes, 3% hydrogen peroxide is generally safer for home use than chlorine bleach. It releases no harsh chemical fumes or volatile organic compounds (VOCs) and breaks down naturally into water and oxygen molecules. Unlike bleach, hydrogen peroxide also effectively treats semi-porous surfaces without leaving behind toxic chemical residues.
What should I do if mold keeps returning after I clean it?
Recurring mold indicates an uncorrected, ongoing moisture issue. Check the area for hidden plumbing leaks, cold spots causing surface condensation, structural water intrusion, or elevated indoor relative humidity above 50%. To stop mold from returning, fix the moisture issue using a dehumidifier, improving ventilation, or repairing structural leaks.
When should I stop DIY cleaning and call a professional remediation service?
You should hire a professional mold remediation company if the contaminated area exceeds 10 square feet (roughly 3 feet by 3 feet), if mold growth is located inside heating and cooling ductwork, or if structural timber shows signs of dry rot. You should also consult a professional if occupants in the home suffer from severe asthma, compromised immune systems, or unexplained mold-related health symptoms.
Recommended Next Actions
To tackle an active indoor mold issue safely and effectively, follow this step-by-step approach:
- Assess and Measure: Inspect the affected area to confirm that total mold growth covers less than 10 square feet. If it is larger, contact a certified professional mold remediation team.
- Fix the Moisture Source: Repair any active plumbing leaks, fix exterior roof gaps, or install a dedicated dehumidifier to lower ambient relative humidity below 50%.
- Equip Proper Safety Gear: Wear an N95 respirator, unvented safety goggles, long sleeves, and chemical-resistant rubber gloves.
- Isolate the Work Area: Close interior doors, open exterior windows, and place an exhaust fan pointing outward to vent airborne spores outside.
- Apply and Scrub your Home Remedy: Spray undiluted 5% white vinegar or 3% hydrogen peroxide onto the surface. Wait for the recommended contact time (60 minutes for vinegar; 15 minutes for peroxide), scrub thoroughly with a brush, and wipe the surface completely dry.
- Monitor the Area: Check the cleaned surface weekly for any signs of returning dampness or growth to ensure your moisture control steps were successful.
Image Gallery
Select an image to open it in a new tab.
Declan O'Connor
Higher Education and Campus Culture Reporter
