
To install a mini split heat pump safely, you must prioritize structural mounting, electrical code compliance, and a moisture-free refrigerant loop. This process involves mounting an indoor air handler, connecting it to an outdoor condenser via copper line sets, and performing a deep vacuum to ensure system integrity before releasing refrigerant.
Installing a ductless mini split heat pump has become one of the most popular home improvement projects in 2026, driven by high-efficiency standards and significant federal tax incentives. However, because these systems involve high-voltage electricity and pressurized chemical refrigerants, safety is not merely a suggestion—it is a technical requirement. A safe installation protects not only the equipment’s lifespan but also the occupants of the home from fire hazards, refrigerant leaks, and structural damage.
Pre-Installation Planning and Sizing Requirements
Before a single hole is drilled, a successful and safe installation begins with a rigorous planning phase. The most common cause of mini split failure isn't the mechanical assembly, but rather improper sizing or poor placement.
Performing a Load Calculation
In 2026, building codes and energy efficiency programs increasingly require a Manual J calculation or an equivalent heat load analysis. This ensures the unit is sized correctly for the specific room. An oversized unit will "short cycle," turning on and off too frequently, which leads to high humidity and premature compressor failure. An undersized unit will run constantly, failing to reach the set temperature and wasting electricity. You must account for square footage, ceiling height, insulation quality (R-value), and the number of windows in the space.
Strategic Component Placement
The indoor unit (air handler) should be mounted on an exterior-facing wall whenever possible to simplify the drainage of condensate. It must be placed at least 7 feet above the floor and have at least 6 inches of open space above and on both sides to allow for proper airflow.
The outdoor unit (condenser) requires a stable, level surface. In 2026, many local jurisdictions require these units to be elevated at least 6 to 12 inches off the ground using a "snow stand" or a wall-mounted bracket to prevent ice buildup from obstructing the heat exchange process during winter months. Ensure the condenser has at least 24 inches of clearance in front of the fan to prevent air recirculation, which significantly reduces efficiency.
Critical Safety Equipment and Tools
Using the correct tools is the difference between a system that lasts 20 years and one that fails in six months. Standard plumbing or carpentry tools are insufficient for HVAC work.
| Tool Category | Specific Tool | Purpose for Safety and Performance |
|---|---|---|
| Refrigeration | Vacuum Pump (2-stage) | Removes air and moisture from the lines to prevent internal acid formation. |
| Measurement | Micron Gauge | Measures the depth of the vacuum; ensures no microscopic leaks exist. |
| Mechanical | Eccentric Flaring Tool | Creates precise 45-degree flares on copper tubing to prevent refrigerant leaks. |
| Fastening | Digital Torque Wrench | Tightens flare nuts to exact manufacturer specifications to avoid over-tightening. |
| Electrical | Non-Contact Voltage Tester | Verifies that circuits are de-energized before handling wiring. |
| Safety Gear | Safety Glasses & Gloves | Protects against "refrigerant burn" (frostbite) from accidental discharge. |
The Installation Process: Step-by-Step Guidance
1. Mounting the Indoor Air Handler
Start by securing the mounting plate to the wall. It is vital to use a stud finder to ensure at least two of the primary screws are anchored into wall studs. If studs are unavailable at the required center, high-strength toggle bolts must be used. Use a level to ensure the plate is perfectly horizontal; while the unit has an internal drain pan, an unlevel unit can lead to water leaking down your interior wall.
Once the plate is secure, use a 3-inch hole saw to drill a hole through the wall at a slight downward angle toward the outside. This downward pitch is critical for gravity-fed condensate drainage. If the hole is level or pitches upward, water will back up into the indoor unit, leading to mold growth and water damage.
2. Managing the Line Set and Communication Wire
The line set consists of two insulated copper pipes (suction and liquid lines), a communication cable (which provides power and signals to the indoor unit), and a plastic drain tube. Carefully feed these through the wall hole.
Safety Note: When bending copper tubing, use a bending spring or a dedicated tube bender. Kinking the copper lines restricts refrigerant flow, which can cause the compressor to overheat and potentially explode under high pressure.
3. Making Leak-Proof Flare Connections
Most DIY-friendly units come with pre-flared lines, but if you are cutting them to length, you must use an eccentric flaring tool. The flare must be smooth and mirror-like. Before connecting the flare nut, apply a small drop of synthetic refrigerant oil (compatible with your specific refrigerant, usually PVE or POE oil) to the back of the flare to allow the nut to glide.
Use a torque wrench. Most 1/4-inch lines require approximately 11-13 lb-ft of torque, while 3/8-inch or 1/2-inch lines require significantly more. Over-tightening will crush the flare and cause a slow leak that may not appear for months.
4. The Critical Vacuum and Dehydration Process
This is the most technically demanding part of a safe installation. You cannot simply "purge" the lines with refrigerant. You must use a vacuum pump and a micron gauge to evacuate the atmosphere from the copper lines.
Air contains nitrogen and oxygen, which are "non-condensables" that increase system pressure and reduce cooling. More importantly, air contains moisture. When moisture mixes with modern refrigerants and oils, it creates hydrofluoric acid, which eats the motor windings from the inside out. You must pull a vacuum down to at least 500 microns and ensure it holds for at least 15 minutes. A rising micron count indicates either a leak or remaining moisture in the lines.
Electrical Safety and Compliance
Mini split systems typically require a dedicated 220V/240V circuit (though some smaller 115V units exist). This circuit must be protected by a double-pole breaker in the main service panel.
The Disconnect Box and Whip
National Electrical Code (NEC) requires a "means of disconnect" within sight of the outdoor unit. This is a weather-proof box that allows a technician to physically pull a plug or flip a switch to kill power before servicing the unit. From this disconnect box, a flexible, weather-tight "whip" carries the power to the condenser's terminal block.
Grounding and Shielding
Proper grounding is essential to protect the sensitive inverter electronics within the heat pump. Most manufacturers specify the use of 14/4 stranded, shielded wire for the communication link between the indoor and outdoor units. Using standard Romex for the communication wire is often a code violation and can cause electromagnetic interference, leading to "E6" or communication error codes.
Environmental and Legal Considerations in 2026
As of 2026, the HVAC industry has largely transitioned away from R-410A in favor of A2L refrigerants like R-32 or R-454B. These newer refrigerants have a much lower Global Warming Potential (GWP) but are classified as "mildly flammable."
EPA Section 608 Regulations: While homeowners are often permitted to perform the mechanical installation of a mini split, the U.S. Environmental Protection Agency (EPA) prohibits the intentional venting of refrigerant into the atmosphere. In many jurisdictions, only a certified technician is legally allowed to "crack the valves" and release the refrigerant into the lines, or to add additional refrigerant if the line set exceeds the factory-charged length. Furthermore, many manufacturers will only honor the 10-year warranty if the final commissioning was performed by a licensed professional who can provide a record of the micron levels and electrical readings.
Common Mistakes to Avoid
- Ignoring the Drain Test: Before closing up the indoor unit, pour a cup of water into the drain pan. Verify that it exits the outdoor drain tube quickly. A slow drain indicates a trap or a kink that will eventually overflow.
- Neglecting the Flare Sealant: While some pros use "Nylog" sealant, never use pipe dope or Teflon tape on flare fittings. These materials can enter the refrigerant loop and clog the expansion valve.
- Cutting the Communication Wire Too Short: Always leave a "service loop" of extra wire at both the indoor and outdoor units. Vibrations and thermal expansion can pull tight wires out of their terminals over time.
- Improper Support: Do not let the line sets hang unsupported. Use a "line hide" or decorative ducting to secure the lines to the side of the house, protecting the insulation from UV degradation and physical damage from animals or weather.
FAQ
Is it legal to install a mini split myself?
In most U.S. states, it is legal for a homeowner to perform the physical installation. However, local building permits are almost always required for the electrical circuit. Additionally, EPA regulations require certification to handle or add refrigerant. Check your local municipal codes before starting, as some areas require a mechanical permit in addition to an electrical one.
How do I know if my system has a leak after installation?
The most reliable method is the vacuum decay test. If you pull the system down to 500 microns and the pressure rises rapidly once the pump is turned off, you have a leak. For a system already in operation, look for oily residue around the flare fittings, as refrigerant oil usually escapes along with the gas. You can also use a dedicated electronic leak detector or "bubbles" (specialized soapy water) on the joints.
Do I need to add refrigerant if I cut the lines?
Most mini split outdoor units come "pre-charged" for a specific length of line set, usually between 15 and 25 feet. If your lines are shorter than this, you do not need to add or remove refrigerant. If your lines are significantly longer (e.g., a 50-foot run), you will likely need to add a specific number of ounces per extra foot, as dictated by the manufacturer’s installation manual.
What is the lifespan of a DIY-installed mini split?
A professional-grade mini split installed with a deep vacuum and proper torque specs can last 15 to 20 years. However, a DIY installation that skips the vacuum process or ignores proper flaring may fail within 1 to 3 years due to compressor burnout caused by moisture or refrigerant loss.
Can I run the lines through a crawlspace or attic?
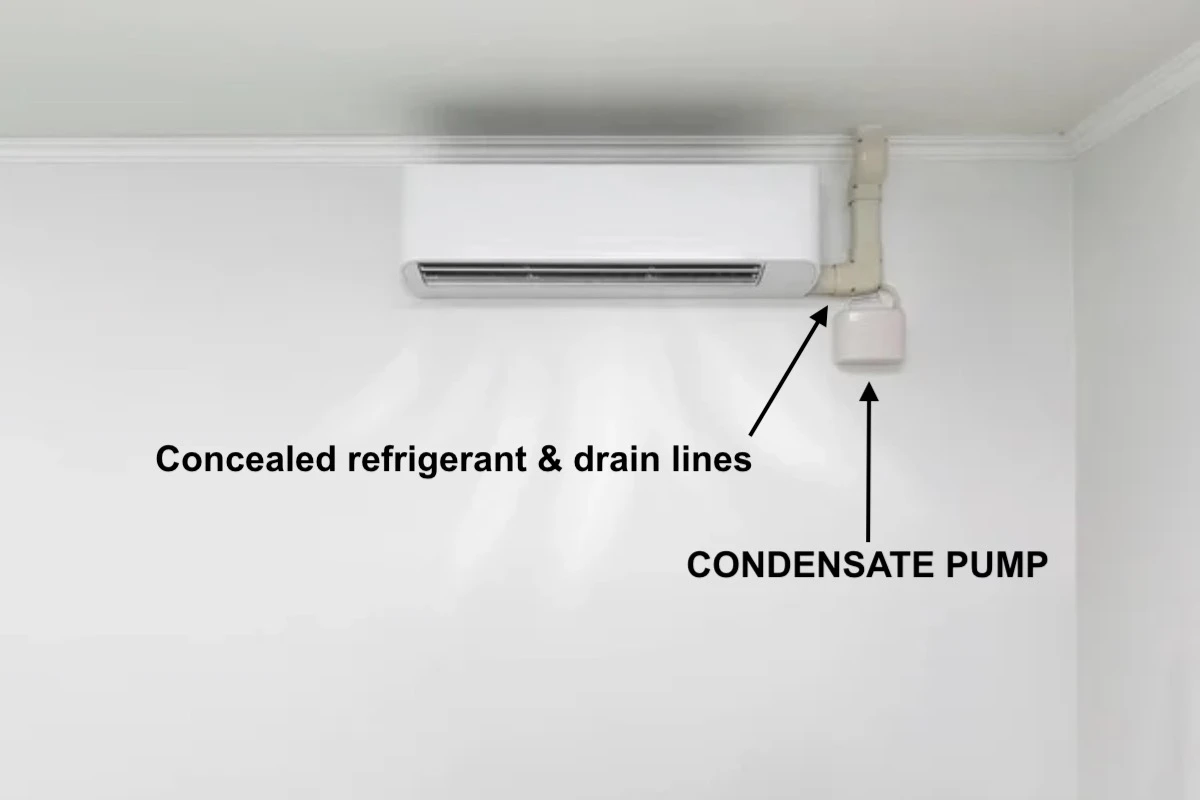
Yes, but you must ensure the condensate drain remains pitched downward the entire way. If the drain must go upward (e.g., to an attic), you must install a "condensate pump" to actively push the water out. Failure to maintain a clear drainage path is a leading cause of indoor water damage.
Final Recommendation
While a DIY installation can save $2,000 to $4,000 in labor costs, the safest and most reliable path is a hybrid installation. Handle the "grunt work" yourself: mount the units, drill the wall hole, and run the line sets. Then, hire a licensed HVAC technician for the final "commissioning." A professional can perform the nitrogen pressure test, the deep vacuum, and the final electrical verification in about two hours. This ensures your system is safe, complies with 2026 environmental laws, and maintains its full manufacturer warranty.
Image Gallery
Select an image to open it in a new tab.
Zara El-Hashem
Sociocultural Dynamics and Academics Writer
