
Effective water damage drying requires a systematic approach known as psychrometrics to manipulate temperature, airflow, and humidity, ensuring that structural materials reach their "dry standard." Successful restoration prevents long-term structural degradation and hazardous mold growth by identifying moisture pockets using specialized thermal and acoustic monitoring tools.
Water damage is one of the most common and costly issues facing property owners in 2026. Whether the cause is a localized appliance failure, a burst pipe, or large-scale flooding, the physical presence of water is only the beginning of the problem. If the drying process is not managed with scientific precision, secondary damage—including microbial growth (mold), wood rot, and compromised structural integrity—can begin within 24 to 48 hours.
Professional water damage drying is not merely about "waiting for things to dry." It is a technical discipline guided by the IICRC S500 Standard for Professional Water Damage Restoration. This article details the essential phases of the drying process, the equipment required, and the technical metrics used to verify a property is truly safe and dry.
Understanding the Classification of Water Damage
Before any equipment is turned on, a professional must categorize and class the water loss. These definitions determine the safety protocols for technicians and the likelihood that materials can be salvaged rather than discarded.
Categories of Water Quality
The "Category" of water refers to the level of contamination in the water source at its origin.
- Category 1 (Clean Water): This originates from a sanitary source, such as a broken supply line or a malfunctioning faucet. While it is the least hazardous, Category 1 water can quickly degrade into Category 2 or 3 if left standing or if it contacts soil or building materials.
- Category 2 (Grey Water): This water contains significant contamination and has the potential to cause discomfort or sickness if consumed or contacted. Examples include discharge from dishwashers or washing machines, and overflows from toilet bowls containing some urine (but no feces).
- Category 3 (Black Water): This is highly contaminated water that contains pathogenic, toxigenic, or other harmful agents. This includes sewage, rising floodwaters from rivers or streams, and any Category 2 water that has remained stagnant for more than 48–72 hours.
Classes of Water Intrusion
The "Class" refers to the estimated evaporation rate based on the type and quantity of materials affected.
- Class 1: Significant portions of the room are unaffected, or materials are minimally porous (e.g., concrete, tile). Only a small amount of moisture has been absorbed.
- Class 2: An entire room of carpet and cushion is wet, or water has wicked up the walls less than 24 inches. There is significant moisture in porous materials.
- Class 3: Water comes from overhead, affecting ceilings, walls, insulation, and flooring. The entire area is saturated.
- Class 4 (Specialty Drying): This involves "deeply held" moisture in low-porosity materials such as hardwood, brick, or stone. These require very low humidity and specialized equipment to dry effectively.
The Science of Psychrometrics in Drying
The drying process is governed by psychrometrics, the study of the thermodynamic properties of moist air. Professionals do not just look for "wet spots"; they measure the relationship between temperature, humidity, and atmospheric pressure to maximize the rate of evaporation.
Vapor Pressure and Evaporation
Evaporation occurs when the vapor pressure of the moisture in a material is higher than the vapor pressure of the surrounding air. To speed up drying, restorers must either increase the vapor pressure of the wet material (usually by heating it) or decrease the vapor pressure of the air (by using dehumidifiers).
Relative Humidity (RH) vs. Grains Per Pound (GPP)
While homeowners often look at Relative Humidity, restoration professionals focus on Grains Per Pound (GPP). GPP is a measure of the actual weight of water vapor in the air. A room can have a low RH but still have high GPP if the temperature is very high. Effective drying usually requires the air in the affected area to have a lower GPP than the air in unaffected "control" areas or the outside air.

The Four Pillars of the Drying Process
To achieve rapid and thorough drying, four factors must be balanced: extraction, airflow, dehumidification, and temperature control.
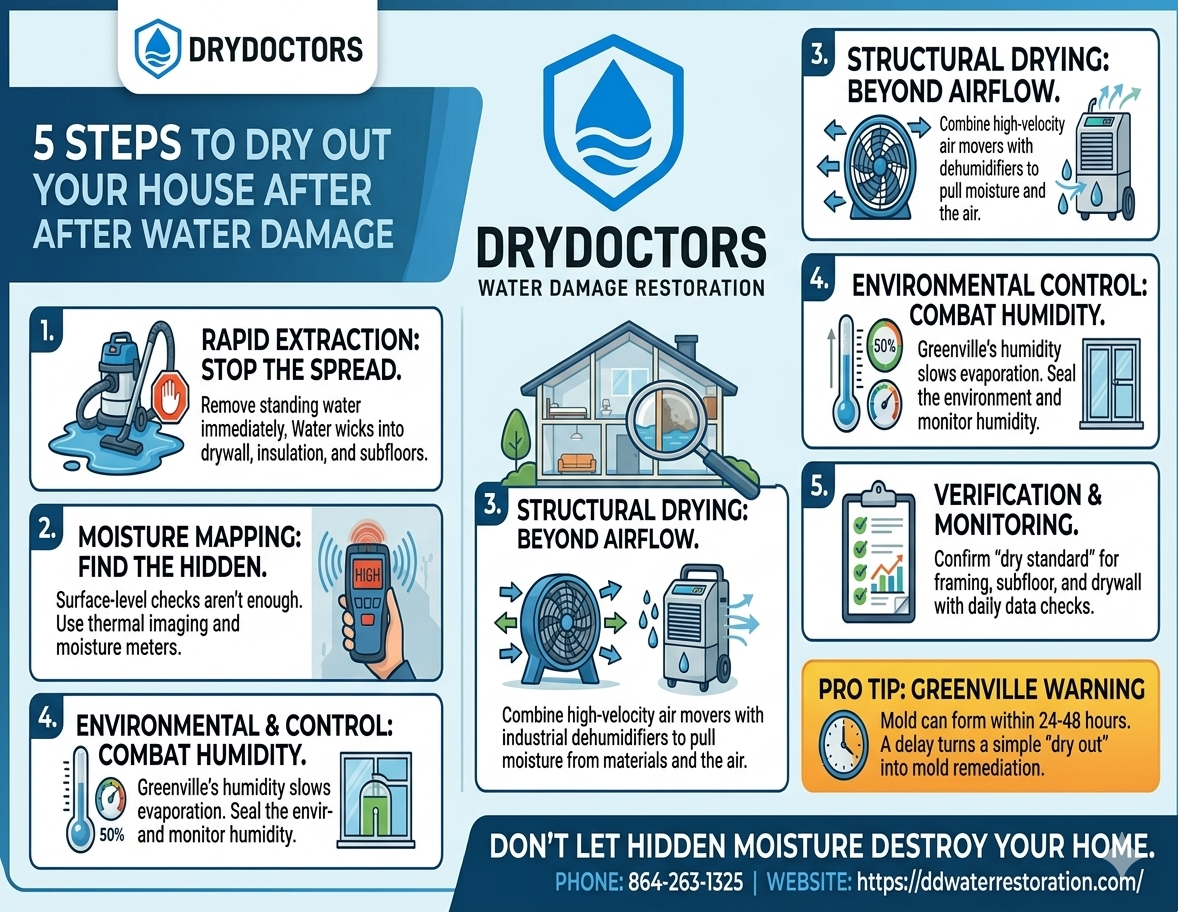
1. Physical Extraction
Removing water in its liquid state is vastly more efficient than removing it through evaporation. Statistics from the Institute of Inspection Cleaning and Restoration Certification (IICRC) suggest that physical extraction is up to 1,200 times more effective than dehumidification alone.
- Submersible Pumps: Used for standing water in basements or crawl spaces.
- Wet-Dry Vacuums: For smaller spills or remaining puddles.
- Weighted Extractors: Often called "ride-on" extractors, these use the weight of the technician to squeeze water out of carpet padding, often saving the carpet from being discarded.
2. Airflow (Evaporation)
Once liquid water is removed, the remaining moisture must be evaporated into the air. This is achieved using high-velocity air movers.
- Laminar Airflow: Air movers are positioned to create a continuous "vortex" of air along the floor and walls. This breaks the "boundary layer"—a thin layer of saturated air that sits on the surface of wet materials—allowing drier air to reach the surface.
- Axial Fans: Used for moving large volumes of air across open spaces or for drying ceilings.
3. Dehumidification (Moisture Removal)
If you only use fans, you will simply move the moisture from the floor into the air, creating a "sauna" effect that can lead to mold on the ceiling and furniture. Dehumidifiers are essential to pull that moisture out of the air.
- LGR (Low Grain Refrigerant) Dehumidifiers: These are the industry standard as of 2026. They pre-cool the air before it hits the cooling coils, allowing them to remove moisture even in very dry environments (down to 34 GPP).
- Desiccant Dehumidifiers: These use chemicals (like silica gel) to absorb moisture. They are typically used in Class 4 drying or in extremely cold temperatures where refrigerant-based units would freeze.
4. Temperature Control
The rate of evaporation increases as the temperature of the material increases. Maintaining an environment between 70°F and 90°F is generally considered ideal for LGR dehumidifiers to operate at peak efficiency. If the area is too cold, evaporation slows; if it is too hot (above 100°F), some dehumidifiers may shut down to prevent compressor damage.
Specialized Drying for High-Value Materials
Different materials require different drying "prescriptions." Using the wrong method on expensive materials can lead to permanent damage.
Hardwood Flooring
Hardwood is "hygroscopic," meaning it absorbs moisture and expands. This often leads to cupping (edges of the planks are higher than the center). To dry hardwood, professionals use Floor Mat Systems. These mats are sealed to the floor, and a high-pressure vacuum (like a Injectidry system) pulls moisture through the wood's pores from the bottom up.
Drywall and Insulation
Drywall acts like a wick. Water can travel several inches or even feet above the actual water line. In many cases, "flood cuts"—removing a strip of drywall 12–24 inches above the floor—are necessary to remove wet insulation and allow the wall cavity to dry. However, if the water is Category 1, "in-place" drying may be possible using specialized wall-venting systems that inject warm air into the wall cavity through small holes.
| Material Type | Typical Drying Goal | Recommended Equipment | Risk of Improper Drying |
|---|---|---|---|
| Drywall | 10-12% Moisture Content | LGR Dehumidifier / Air Movers | Mold growth, crumbling |
| Hardwood | Within 2% of "Dry Standard" | Floor Mats / Desiccant Dehumidifier | Permanent cupping, rot |
| Concrete | <85% Relative Humidity | High-Capacity Dehumidifiers | Floor adhesive failure |
| Carpet/Pad | Dry to the touch/No odor | Weighted Extractor / Air Movers | Delamination, odors |
Monitoring and Verification: How to Know It's Dry
One of the most common mistakes in DIY water damage drying is stopping too early. Surfaces may feel dry to the touch while the subfloor or wall studs remain saturated.
Moisture Detection Tools
Professional restorers use a variety of tools to track progress:
- Moisture Pins: These are pushed into drywall or wood to get a literal reading of the moisture percentage.
- Non-Invasive Moisture Meters: These use radio frequencies to detect moisture behind tile or under linoleum without damaging the surface.
- Thermal Imaging Cameras: Infrared technology allows technicians to "see" temperature differences. Because evaporating water is cooler than dry surfaces, wet areas appear as dark blue or purple spots on the camera.
- Hygrometers: These measure the RH and temperature of the air, helping the technician calculate the GPP and ensure the dehumidifiers are performing correctly.
Establishing the "Dry Standard"
A "Dry Standard" is established by taking a reading from a known dry area of the house (e.g., a room on the same floor that was not affected by the water). The goal is to dry the affected materials until they match this baseline reading.
The Risks of DIY Water Damage Drying
While small spills can be handled by homeowners, significant water intrusion carries risks that are often invisible until it is too late.
- Hidden Mold: Mold can begin growing inside wall cavities where there is no airflow. By the time you smell a musty odor, the mold colony may be extensive.
- Structural Weakening: OSB (Oriented Strand Board) and particle board lose their structural integrity when they remain wet for more than a few days. They can swell and "flake," requiring total replacement.
- Electrical Hazards: Water can travel through conduit and settle in junction boxes, creating a fire hazard or shock risk long after the water on the floor has been mopped up.
For Category 3 losses (sewage or floodwater), DIY drying is strongly discouraged. The health risks associated with E. coli, Salmonella, and Hepatitis A require specialized personal protective equipment (PPE) and antimicrobial treatments that are regulated by the Environmental Protection Agency (EPA).
Frequently Asked Questions
How long does it typically take for a house to dry out?
In most cases, the professional drying process takes between 3 to 5 days. Class 4 losses involving hardwood or concrete can take 7 to 10 days or longer. Factors that influence this duration include the amount of water, the porosity of the materials, and the ability to control the indoor climate.
Should I open my windows to speed up the drying?
Only if the outdoor humidity is significantly lower than the indoor humidity. In many climates, opening windows introduces more moisture into the house, which slows down the process and makes dehumidifiers work harder. A professional will use a "closed drying system" to maintain total control over the environment.
Can I just use a regular house fan to dry my basement?
Standard household fans move very little air compared to industrial centrifugal air movers. While they may dry the very surface of a carpet, they are usually insufficient to pull moisture out of the subfloor or wall studs, which is where mold growth typically begins.
Does insurance always cover the cost of drying?
Most standard homeowners' insurance policies cover "sudden and accidental" water damage, such as a burst pipe. However, gradual leaks (over weeks or months) or flooding from rising outside water often require specific endorsements or separate flood insurance policies. Always document the damage with photos before the drying equipment arrives.
Is it safe to stay in the house during the drying process?
For Category 1 losses, it is generally safe, though the noise from industrial fans (which can reach 70-80 decibels) and the increased heat from dehumidifiers can be disruptive. For Category 3 (sewage) losses, the Centers for Disease Control and Prevention (CDC) typically recommends vacating the area until it has been professionally sanitized and dried.
Next Steps for Property Owners
If you are currently dealing with water damage, your first priority is to stop the source of the water and contact your insurance carrier. If the area affected is larger than 10 square feet or involves Category 2 or 3 water, it is highly recommended to contact an IICRC-certified restoration firm.
Ensure that the technicians on-site are taking daily "moisture maps" and "drying logs." These documents are vital for insurance reimbursement and provide a historical record that the property was returned to a safe, dry state. Do not allow the equipment to be removed until moisture meter readings confirm that the dry standards have been met.
Image Gallery
Select an image to open it in a new tab.


Vivian Cho
Executive IT and Emerging Technologies Reporter
