
Making macaroni and cheese in a rice cooker requires cooking pasta directly in a measured amount of liquid—usually water or broth mixed with butter—until fully absorbed, then stirring in evaporated milk and freshly shredded cheese on the appliance's "Warm" setting until smooth, creamy, and fully emulsified without boiling or draining.
Why Make Macaroni and Cheese in a Rice Cooker?
The rice cooker is often viewed strictly as a grain-steaming appliance, yet its internal temperature control and sealed environment make it an exceptionally effective vessel for pasta dishes. Preparing macaroni and cheese in a rice cooker eliminates several tedious steps associated with traditional stovetop methods, offering both technical and practical advantages for home cooks, college students, and travelers.
Hands-Off Cooking and Heat Control
Stovetop macaroni and cheese requires constant monitoring. Water must be brought to a rolling boil, pasta watched to prevent boiling over, and sauce whisked continuously over precise heat to prevent breaking or scorching. A rice cooker automates temperature management. Standard warm-and-cook mechanisms use thermal sensors that detect when liquid has been absorbed by the pasta. As water turns to steam and gets absorbed into the starches, the temperature rises slightly above 212°F (100°C), prompting the appliance to switch automatically to its "Warm" setting. This automatic drop in temperature provides the ideal environment for melting cheese without breaking the emulsion.
One-Pot Convenience and Energy Efficiency
Traditional pasta preparation wastes significant water and thermal energy by boiling gallons of water that are subsequently poured down the drain. A rice cooker uses an absorption method, requiring only the exact liquid volume needed to hydrate the pasta starches. This single-vessel technique means fewer dishes to wash, zero need for a colander or strainer, and lower electricity consumption compared to heating a large kettle on an electric range.
Superior Sauce Emulsification
When pasta boils in a large pot of water, the starch released from the wheat flour dissolves into a vast volume of water and is discarded down the sink. In a rice cooker, every grain of starch released during cooking remains inside the inner pot. This concentrated starch slurry acts as a natural binder and emulsifier. When butter, milk, and cheese are added to the hot, starchy pasta residual liquid, the starch molecules coat the fat droplets, holding the fat and water phases together into a cohesive, velvety sauce without needing a traditional butter-and-flour roux.
The Science of Starch Gelation and Cheese Emulsification
To consistently yield smooth, creamy mac and cheese in a rice cooker, it helps to understand the physical and chemical transformations taking place inside the vessel. The process relies on two distinct scientific principles: gelation of starch and emulsion stability of dairy proteins.
- Pasta + Water + Salt + Butter
- Cook Cycle (~212°F / 100°C): Starch Gelation & Liquid Absorption
- Thermostat Auto-Switches to "Keep Warm" Mode
- Add Evaporated Milk & Shredded Cheese
- Protein & Starch Emulsification (145°F - 160°F)
- Silky, Cohesive Macaroni and Cheese
Starch Gelation in Absorption Cooking
Wheat pasta consists primarily of gluten matrices encapsulating starch granules (amylose and amylopectin). When exposed to hot liquid, these starch granules absorb water and swell—a process known as gelation. In standard stovetop boiling, excess water dilutes the swelling starches. In rice cooker absorption cooking, the liquid-to-pasta ratio is carefully calibrated (typically 1.5 to 2 parts liquid by weight or volume to 1 part dry pasta).
As the pasta cooks, the liquid hydrates the interior core while starch molecules leach out onto the outer surface of the noodles. Because the liquid volume is minimal, this creates a rich, viscous liquid suspension right in the pot. This starch-rich environment prevents the pasta from becoming mushy, provided the liquid ratio is precise.
Maintaining Emulsion Stability
Cheese is an emulsion of milkfat suspended in water, bound together by a protein network of casein. Heat destabilizes this protein matrix. If cheese is exposed to temperatures exceeding 170°F (77°C), the protein strings tighten, squeezing out fat and water. The result is a oily, grainy, separated sauce with rubbery clumps of cheese.
By relying on the rice cooker’s "Warm" setting—which maintains a target zone between 140°F and 160°F (60°C to 71°C)—you keep the environment safely below the curdling threshold of casein proteins. The addition of concentrated starches from the absorption process, along with proteins from evaporated milk, further stabilizes the mixture, preventing the fat from separating out into greasy pools.
Essential Ingredients and Smart Substitutions
The simplicity of rice cooker mac and cheese means that ingredient quality and functional properties directly determine the final texture and taste. Understanding how each component behaves helps you adjust the recipe based on your pantry stock.
Core Component Breakdown:
- Dry Pasta (Elbows, Shells, Cavatappi)
- Hydration Base (Water / Broth blend)
- Emulsifying Agent (Evaporated Milk)
- Dairy Fats (Unsalted Butter)
- Shredded Cheese (Block Sharp Cheddar)
Dry Pasta Selection
Short, structural pasta shapes work best in a rice cooker because they nestle evenly inside the inner bowl, ensuring uniform submersion in liquid.
- Elbow Macaroni: The traditional choice. Cooks rapidly and offers deep ridges for sauce adhesion.
- Medium Shells (Conchiglie): Excellent for holding pockets of cheese sauce inside their concave shape.
- Cavatappi or Cellentani: Spiral shapes provide an enjoyable, chewy texture ("al dente") and hold up well under warm temperatures.
- Avoid: Long strands like spaghetti or fettuccine, which clump together in low-fluid environments, as well as oversized shapes like rigatoni, which require too much liquid depth to hydrate evenly.
Cooking Liquids
- Water: The neutral default. Requires generous salting (approx. 1/2 teaspoon coarse salt per cup of dry pasta) to season the pasta from within.
- Low-Sodium Chicken or Vegetable Broth: Replaces water partially or fully to add deep savory notes (umami) to the background flavor profile.
- Avoid using 100% Milk during the primary cook cycle: Milk contains sugars (lactose) and proteins that easily scorch, foam over the steam vent, and burn against the heating element during a full cook cycle.
Emulsifiers and Fat Bases
- Evaporated Milk: The secret to smooth rice cooker pasta. Evaporated milk has had roughly 60% of its water content removed, leaving behind a dense concentration of milk solids and proteins without the wateriness of fresh whole milk. These proteins wrap around fat particles, creating an unbreakable emulsion.
- Unsalted Butter: Adds richness, coats the dry pasta during initial heating to prevent sticking, and contributes classic flavor.
- Heavy Cream or Half-and-Half: Can replace evaporated milk, though heavy cream produces a significantly richer, heavier sauce that may require a splash of hot water to loosen.
Cheese Selection and Grating Rules
- Sharp Cheddar: Provides classic tang and robust flavor. Aged cheddars (aged over 12 months) contain less moisture and break more easily, so pair them with a good melting cheese.
- Monterey Jack, Gouda, or Havarti: High-moisture cheeses that melt smoothly, providing stringiness and body.
- Gruyère: Adds a nutty, sophisticated flavor profile ideal for upscale variations.
- American Cheese or Sodium Citrate: Adding just one slice of real American cheese (or a pinch of food-grade sodium citrate) introduces emulsifying salts that make the cheese sauce resistant to breaking.
- CRITICAL RULE: Avoid pre-shredded bagged cheese. Manufacturers coat pre-shredded cheese with cellulose powder, potato starch, and anti-caking agents to keep shreds from sticking in the bag. These coatings absorb liquid, ruin emulsification, and leave a grainy texture in the bottom of the pot. Always grate cheese by hand from a block.
Spices and Flavor Enhancers
- Ground Dry Mustard (Mustard Powder): Essential for mac and cheese. Sharpens the cheddar profile and provides mild emulsification without tasting like hot-dog mustard.
- Garlic Powder & Onion Powder: Adds background savory depth.
- Smoked Paprika or Cayenne Pepper: Adds a touch of warmth and enhances the golden color.
- White Pepper: Offers clean heat without leaving dark specks in your creamy sauce.
Step-by-Step Rice Cooker Mac and Cheese Recipe
This recipe is optimized for a standard 4-cup to 10-cup cook-capacity rice cooker (whether basic single-switch or advanced digital multi-cooker).
Yield and Prep Time
- Prep Time: 5 minutes
- Cook Time: 12–15 minutes (cook cycle) + 3 minutes (emulsification)
- Servings: 3–4 main course portions
Ingredients List
- Dry Elbow Macaroni: 8 ounces (approx. 2 cups / 225 grams)
- Liquid Base: 1 3/4 cups (420 ml) water or low-sodium chicken broth
- Unsalted Butter: 2 tablespoons (28 grams), sliced into small cubes
- Kosher Salt: 1/2 teaspoon (adjust to 1/4 tsp if using salted broth)
- Evaporated Milk: 1/2 cup (120 ml) (canned, unsweetened)
- Sharp Cheddar Cheese: 1 1/2 cups (150 grams), freshly hand-grated
- Monterey Jack or Low-Moisture Mozzarella: 1/2 cup (50 grams), freshly hand-grated
- Dry Mustard Powder: 1/4 teaspoon
- Garlic Powder: 1/8 teaspoon
- Freshly Cracked Black Pepper or White Pepper: To taste
Step 1: Combine the Base Ingredients
Place the non-stick inner cooking pot inside your rice cooker base. Pour in 8 ounces of dry elbow macaroni.
Add the 1 3/4 cups of water or broth, 1/2 teaspoon of salt, and 2 tablespoons of cubed butter. Ensure the butter pieces are scattered over the top. Press down gently on any floating pasta noodles with a wooden spoon or silicone spatula so they are evenly submerged in liquid.
Rice Cooker Inner Pot Setup:
- Butter Cubes Floating On Top
- Water / Broth Submersion
- 8 oz Dry Pasta Levelly Spread
Note: Do not add the milk, cheese, or secondary spices yet. Adding dairy now will cause boiling-over and scorch the bottom of the liner.
Step 2: Run the Cook Cycle
Close the rice cooker lid securely.
- For Simple On/Off Switch Units: Push the lever down to the "Cook" position.
- For Digital / Fuzzy Logic Units: Select the "White Rice" or "Standard Cook" preset and press Start.
Allow the appliance to run. As the liquid heats, the butter will melt, coating the exterior of the pasta to prevent clumping. The pasta will gradually absorb the boiling broth.
Step 3: Check Pasta Hydration
Standard rice cookers will automatically trip their internal thermostat and switch to "Warm" after about 10 to 12 minutes, when the free liquid has been absorbed by the pasta.
When the switch clicks over to "Warm", immediately open the lid. Use a heat-safe spatula to stir the pasta gently from the bottom up.
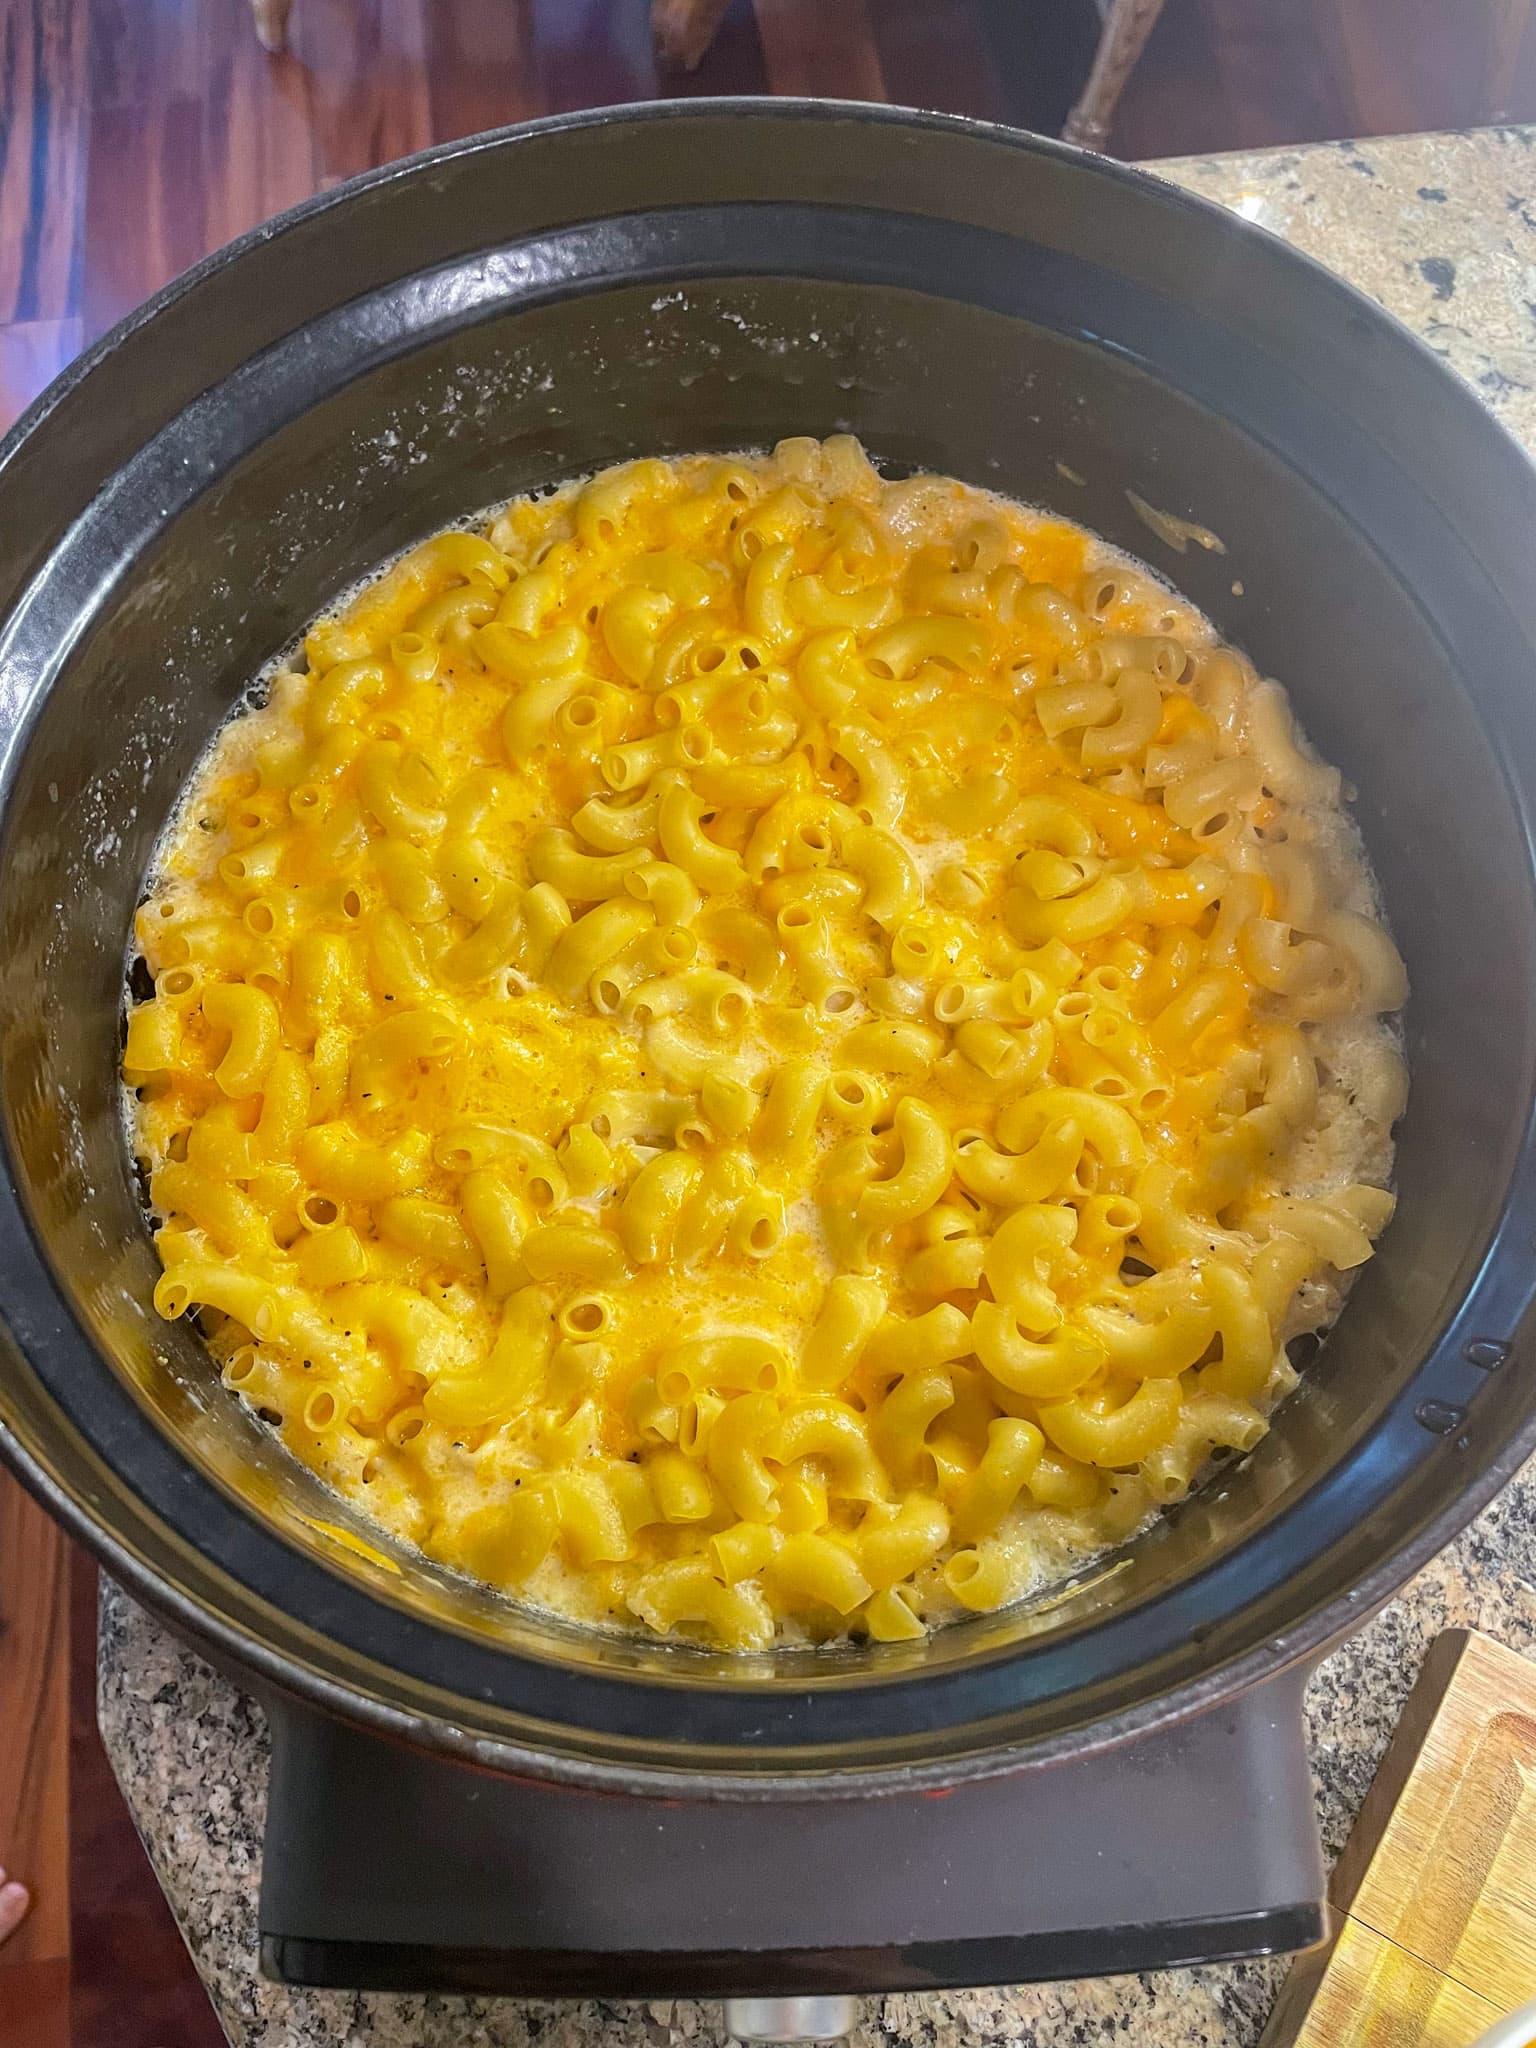
- What you should see: The pasta should be plump, cooked to an al dente or slightly firmer state, sitting in a thin layer of bubbling, starchy paste at the bottom.
- If the cooker has not switched to Warm after 14 minutes: Open the lid and check manually. If all liquid is absorbed and pasta is tender, manually flip the switch to "Warm."
Step 4: Add the Emulsifiers and Seasoning
With the cooker set firmly to "Keep Warm", pour in the 1/2 cup of evaporated milk.
Add the dry mustard powder, garlic powder, and ground pepper. Stir continuously for 30 to 45 seconds. The cold milk will lower the overall temperature of the pot into the ideal cheese-melting zone (roughly 145°F–155°F / 63°C–68°C), while the starchy liquid mixes with the evaporated milk to form a hot cream base.
"Keep Warm" Mode (145-155°F):
- Add: Evaporated Milk + Spices
- Stir 45 seconds to form Warm Cream Base
- Add: Shredded Cheese in 2 Batches
- Vigorously Fold to create Velvety Sauce
Step 5: Incorporate Cheese in Batches
Do not dump all the shredded cheese into the pot at once, as a large block of cold cheese will drop the temperature too fast and cause clumping.
- Add about half of the mixed grated cheeses (Cheddar and Monterey Jack).
- Fold and stir the cheese into the warm pasta using smooth, continuous circular motions.
- As the first batch melts into a glossy sauce (about 30 seconds), add the remaining grated cheese.
- Continue folding until the cheese is completely melted and no visible shreds remain.
Step 6: Rest and Serve
Close the lid and allow the mac and cheese to sit undisturbed on the "Warm" setting for 2 to 3 minutes. This short rest allows the starch gel matrix to set, turning the liquid into a thick, clingy coating that clings to every noodle.
Open the lid, give it one final thorough stir, and taste. Adjust seasoning with additional salt or pepper if desired. Serve immediately while piping hot.
Equipment Variations: Basic On/Off vs. Fuzzy Logic & Multi-Cookers
Not all rice cookers operate on identical heating mechanisms. Understanding how your specific model behaves ensures consistent results.
| Simple On/Off Cookers | Fuzzy Logic & Digital Cookers |
|---|---|
| • Direct thermal plate heating• Cooks hot and fast• Higher risk of minor crust• Manually monitor near end | • Microprocessor-controlled heat• Variable heat ramps• Holds exact temperature on Warm• Highly predictable pasta hydration |
Simple Mechanical (Single-Switch) Rice Cookers
Models such as classic Aroma, Black+Decker, or Dash units feature a mechanical spring-loaded magnet thermistor beneath the inner pot.
- Thermal Dynamics: Heat output is binary (100% power during "Cook", very low power during "Warm").
- Adjustment Required: These units heat quickly and aggressively. Check the liquid levels around the 10-minute mark. If a slight starch crust forms at the bottom of the pot, do not scrape hard with your spoon; simply add a tablespoon of warm water or milk, and the residual heat will quickly dissolve it.
Fuzzy Logic and Micro-Computerized Rice Cookers
Premium brands like Zojirushi, Tiger, Cuckoo, or Panasonic use microprocessors to make real-time temperature adjustments.
- Thermal Dynamics: Heat ramps up more gradually, preventing aggressive boiling and maintaining precise steam pressure.
- Adjustment Required: Digital cookers may take 3 to 5 minutes longer to complete a cycle than mechanical models. If your model features a "Quick Cook" or "Porridge" setting:
- Quick Cook: Best for standard firm pasta.
- Porridge / Slow Cook: Avoid for pasta, as low temperatures will cause noodles to absorb water without cooking, resulting in a mushy texture.
Multi-Cookers and Pressure Cookers (e.g., Instant Pot in Rice Mode)
If using an Instant Pot or similar electric pressure cooker, use the non-pressure "Rice" or "Sauté" modes when adapting this rice cooker method. Alternatively, if pressure cooking macaroni, remember that 4 minutes under high pressure with immediate manual steam release requires double the fluid volume and alters the starch composition. For true rice-cooker-style mac and cheese, keep the lid unsealed or use the dedicated rice function without pressure seal.
Rice Cooker Macaroni and Cheese Ratio & Timing Guide
To expand or reduce this recipe, maintain the liquid-to-pasta balance. Use this reference table for scaling batch sizes accurately across different machine sizes.
| Dry Pasta Weight | Dry Pasta Vol. (Elbows) | Liquid Vol. (Water/Broth) | Evaporated Milk | Total Cheese Weight | Estimated Cook Time | Minimum Rice Cooker Size |
|---|---|---|---|---|---|---|
| 4 oz (113g) | ~1 cup | 7/8 cup (210 ml) | 1/4 cup (60 ml) | 1 cup (100g) | 8–10 mins | 3-Cup Capacity |
| 8 oz (225g) | ~2 cups | 1 3/4 cups (420 ml) | 1/2 cup (120 ml) | 2 cups (200g) | 11–14 mins | 4 to 6-Cup Capacity |
| 12 oz (340g) | ~3 cups | 2 1/2 cups (600 ml) | 3/4 cup (180 ml) | 3 cups (300g) | 13–16 mins | 6 to 8-Cup Capacity |
| 16 oz (450g) | ~4 cups | 3 1/3 cups (800 ml) | 1 cup (240 ml) | 4 cups (400g) | 15–18 mins | 8 to 10-Cup Capacity |
Note: "Cup" measurements for dry pasta and liquid refer to standard US measuring cups (240 ml), not the smaller plastic rice-measuring cups (180 ml) included in cooker boxes.
Troubleshooting Common Issues
Even straightforward recipes can run into technical snags depending on cheese choice, pasta starch levels, or appliance quirks.
Troubleshooting Diagnostic:
- Problem: Grainy / Separated Sauce
- Cause: Overheating or Pre-shredded Bagged Cheese
- Fix: Add 1 tbsp cold evaporated milk off heat; stir vigorously.
- Problem: Hard, Undercooked Noodles
- Cause: Insufficient cooking liquid or premature cook-cycle cutoff
- Fix: Add 3 tbsp boiling water, push to "Cook" for 2-3 extra mins.
- Problem: Watery, Soupy Consistency
- Cause: Excess residual water or too low cheese ratio
- Fix: Close lid on "Warm" setting for 5 mins to allow starch setup.
- Problem: Scorched / Browned Bottom Layer
- Cause: Dry bottom heating element; insufficient initial butter
- Fix: Splash 1 tbsp warm milk into hot base to release brown crust.
1. The Sauce Is Grainy, Oily, or Separated
- The Cause: The temperature was too high when the cheese was added, or pre-shredded cheese containing cellulose was used. Overheated casein proteins shrink, squeezing out fat into an oily pool.
- The Fix: Immediately turn off the rice cooker or unplug it to halt heating. Add 1 to 2 tablespoons of cold evaporated milk or heavy cream along with a single slice of processed American cheese (which contains emulsifying sodium citrate). Stir vigorously off the heat source. The emulsifiers in the American cheese and cold dairy will bring the broken fats back into a smooth liquid phase.
2. The Pasta Is Undercooked or Crunchy
- The Cause: The rice cooker switched to "Warm" too early, or the dry pasta absorbed liquid faster than expected due to low water volume.
- The Fix: Add 3 to 4 tablespoons of hot water or broth directly to the pot. Stir the pasta, close the lid, and manually push the switch back to "Cook." Check after 2 to 3 minutes.
3. The Macaroni Is Mushy and Watery
- The Cause: Too much liquid was added during the initial cook phase, or the pasta was left sitting in hot steam for too long after hydration was complete.
- The Fix: Remove the lid and leave the pot on the "Warm" setting for 5 minutes, stirring occasionally. As excess steam escapes, the starches will gel and thicken the sauce. If it remains too liquid, stir in an extra 1/4 cup of finely grated cheese to bind the excess moisture.
4. Pasta Scorched to the Bottom of the Liner
- The Cause: Non-stick coating wear on older inner pots, or inadequate butter/fat coating during the initial boiling phase.
- The Fix: Do not scrape the burned bottom layer into your dish. Gently spoon the clean mac and cheese out from the top and middle sections into a serving bowl. Pour a splash of warm water into the bottom of the rice cooker to loosen the burnt pasta before cleaning.
Custom Variations and Flavor Enhancements
Once you master the foundational technique, the rice cooker acts as a versatile base for flavor add-ins.
| Flavor Profile | Key Add-ins & Timing |
|---|---|
| Jalapeño Bacon | Stir in crispy cooked bacon & diced fresh jalapeños alongside cheese during Step 5. |
| Truffle & Mushroom | Sauté sliced cremini in butter before adding pasta; finish with 1 tsp white truffle oil. |
| Broccoli Cheddar | Add tiny broccoli florets during the final 4 mins of the pasta cook cycle. |
| Buffalo Chicken | Fold in shredded cooked chicken, 2 tbsp buffalo sauce, and blue cheese crumbs at final rest step. |
Garlic Jalapeño and Bacon Mac
- Additions: 4 strips of cooked, crumbled bacon; 1 finely diced jalapeño pepper; 1/4 teaspoon garlic powder.
- Technique: Stir the jalapeños directly into the water and pasta during Step 1 so they soften as the noodles boil. Fold the crispy bacon into the finished pasta alongside the cheese during Step 5 to maintain its crisp texture.
Broccoli and Sharp Cheddar
- Additions: 1 cup of fresh broccoli florets cut into very small, bite-sized pieces.
- Technique: Open the rice cooker lid 3 to 4 minutes before the cook cycle finishes (when liquid is mostly absorbed but still bubbling). Drop the broccoli florets directly on top of the pasta, close the lid, and allow them to steam in place. Stir everything together when adding the dairy.
Truffle Mushroom Mac and Cheese
- Additions: 1/2 cup finely sliced cremini mushrooms, 1 tablespoon extra butter, 1 teaspoon white or black truffle oil, and 1/2 cup grated Fontina cheese to replace the Monterey Jack.
- Technique: Place the mushrooms in the inner pot with 1 tablespoon of butter before adding dry pasta. Run the "Cook" cycle for 2 minutes with the lid open to soften mushrooms, then add the dry pasta, water, and salt, and proceed with the standard recipe. Drizzle white truffle oil over the pasta just before serving.
Creamy Chili Mac
- Additions: 1/2 cup cooked ground beef or turkey, 1/3 cup canned black beans (drained and rinsed), 1/2 teaspoon chili powder, 1/4 teaspoon ground cumin.
- Technique: Add chili powder, cumin, beans, and cooked ground meat directly into the initial water-and-pasta mix. Proceed with the cook cycle as normal, swapping half of the Cheddar for Pepper Jack cheese during the sauce step.
Frequently Asked Questions
Can I use fresh whole milk instead of evaporated milk?
Yes, but you must be careful with heat management. Fresh milk contains more water and less protein concentration than evaporated milk, making the sauce thinner and more prone to splitting if overheated. If using whole milk, warm it slightly in the microwave first (so it does not chill the pot), and add an extra tablespoon of butter or 1/4 cup more cheese to compensate for the lower viscosity. Avoid skim or 1% milk, as their high water content makes sauce watery and prone to curdling.
Do I need to drain the liquid before adding cheese?
No. The success of rice cooker mac and cheese relies on using an exact liquid-to-pasta ratio so that all cooking water is absorbed by the noodles or converted into a rich starch suspension. Draining the pot discards the natural starches needed to emulsify the cheese, resulting in a thin, greasy sauce.
Can I double this recipe in a standard 6-cup rice cooker?
Yes, provided your machine has sufficient capacity. An 8-ounce pasta batch expands to roughly 4 cups of cooked food. Doubling the recipe to 16 ounces of dry pasta requires an 8-cup to 10-cup capacity rice cooker to avoid overfilling during the initial boil. Maintain exact proportions from the ratio guide and ensure the liquid covers the dry pasta before starting the cook cycle.
Why did my cheese turn stringy and clump into a ball?
Cheese turns stringy when the protein molecules bond tightly together, which happens when heat drops too quickly or when using low-moisture, high-acid cheeses without enough emulsifying liquid. To prevent this, ensure your evaporated milk is stirred into the warm pasta before adding cheese, and use a 50/50 mix of sharp cheddar (for flavor) and a good melting cheese like Monterey Jack or Young Gouda (for smooth texture).
Can I make gluten-free mac and cheese using a rice cooker?
Yes, but you must adjust the cooking liquid and timing. Gluten-free pastas (made from brown rice, corn, chickpea, or cassava flour) release different starches than wheat pasta and tend to break down faster. Use 10% less liquid than called for in standard wheat recipes, and check for donor tenderness at the 8-minute mark. Turn the unit to "Warm" manually as soon as the pasta reaches an al dente texture to keep gluten-free noodles from becoming mushy.
Summary of Best Practices for Success
To consistently achieve rich, creamy mac and cheese in your rice cooker, keep these core principles in mind:
- Measure Liquid Accurately: Use exact liquid ratios (approx. 1.75 cups liquid per 8 oz dry wheat pasta) so no draining is necessary and all starch stays in the pot.
- Avoid Milk in the Initial Cook: Cook dry pasta only in water, broth, and butter. Add dairy products only after the machine drops to the "Warm" setting.
- Shred Cheese by Hand: Never use pre-shredded bagged cheese coated in anti-caking starches. Grate fresh cheese from a block for a smooth melt.
- Rely on Evaporated Milk: The concentrated milk solids in canned evaporated milk bind water and dairy fats together, preventing separated, greasy sauces.
- Melt on "Warm" Heat: Stir cheese in off active boiling heat (between 145°F and 160°F) to protect dairy proteins from curdling.
By combining the natural starches of low-water pasta cooking with controlled residual heat, your rice cooker produces rich, velvety macaroni and cheese with minimal effort and easy cleanup.
Image Gallery
Select an image to open it in a new tab.






Ingrid Bjornson
Global Cyber Policy and Regulation Analyst
