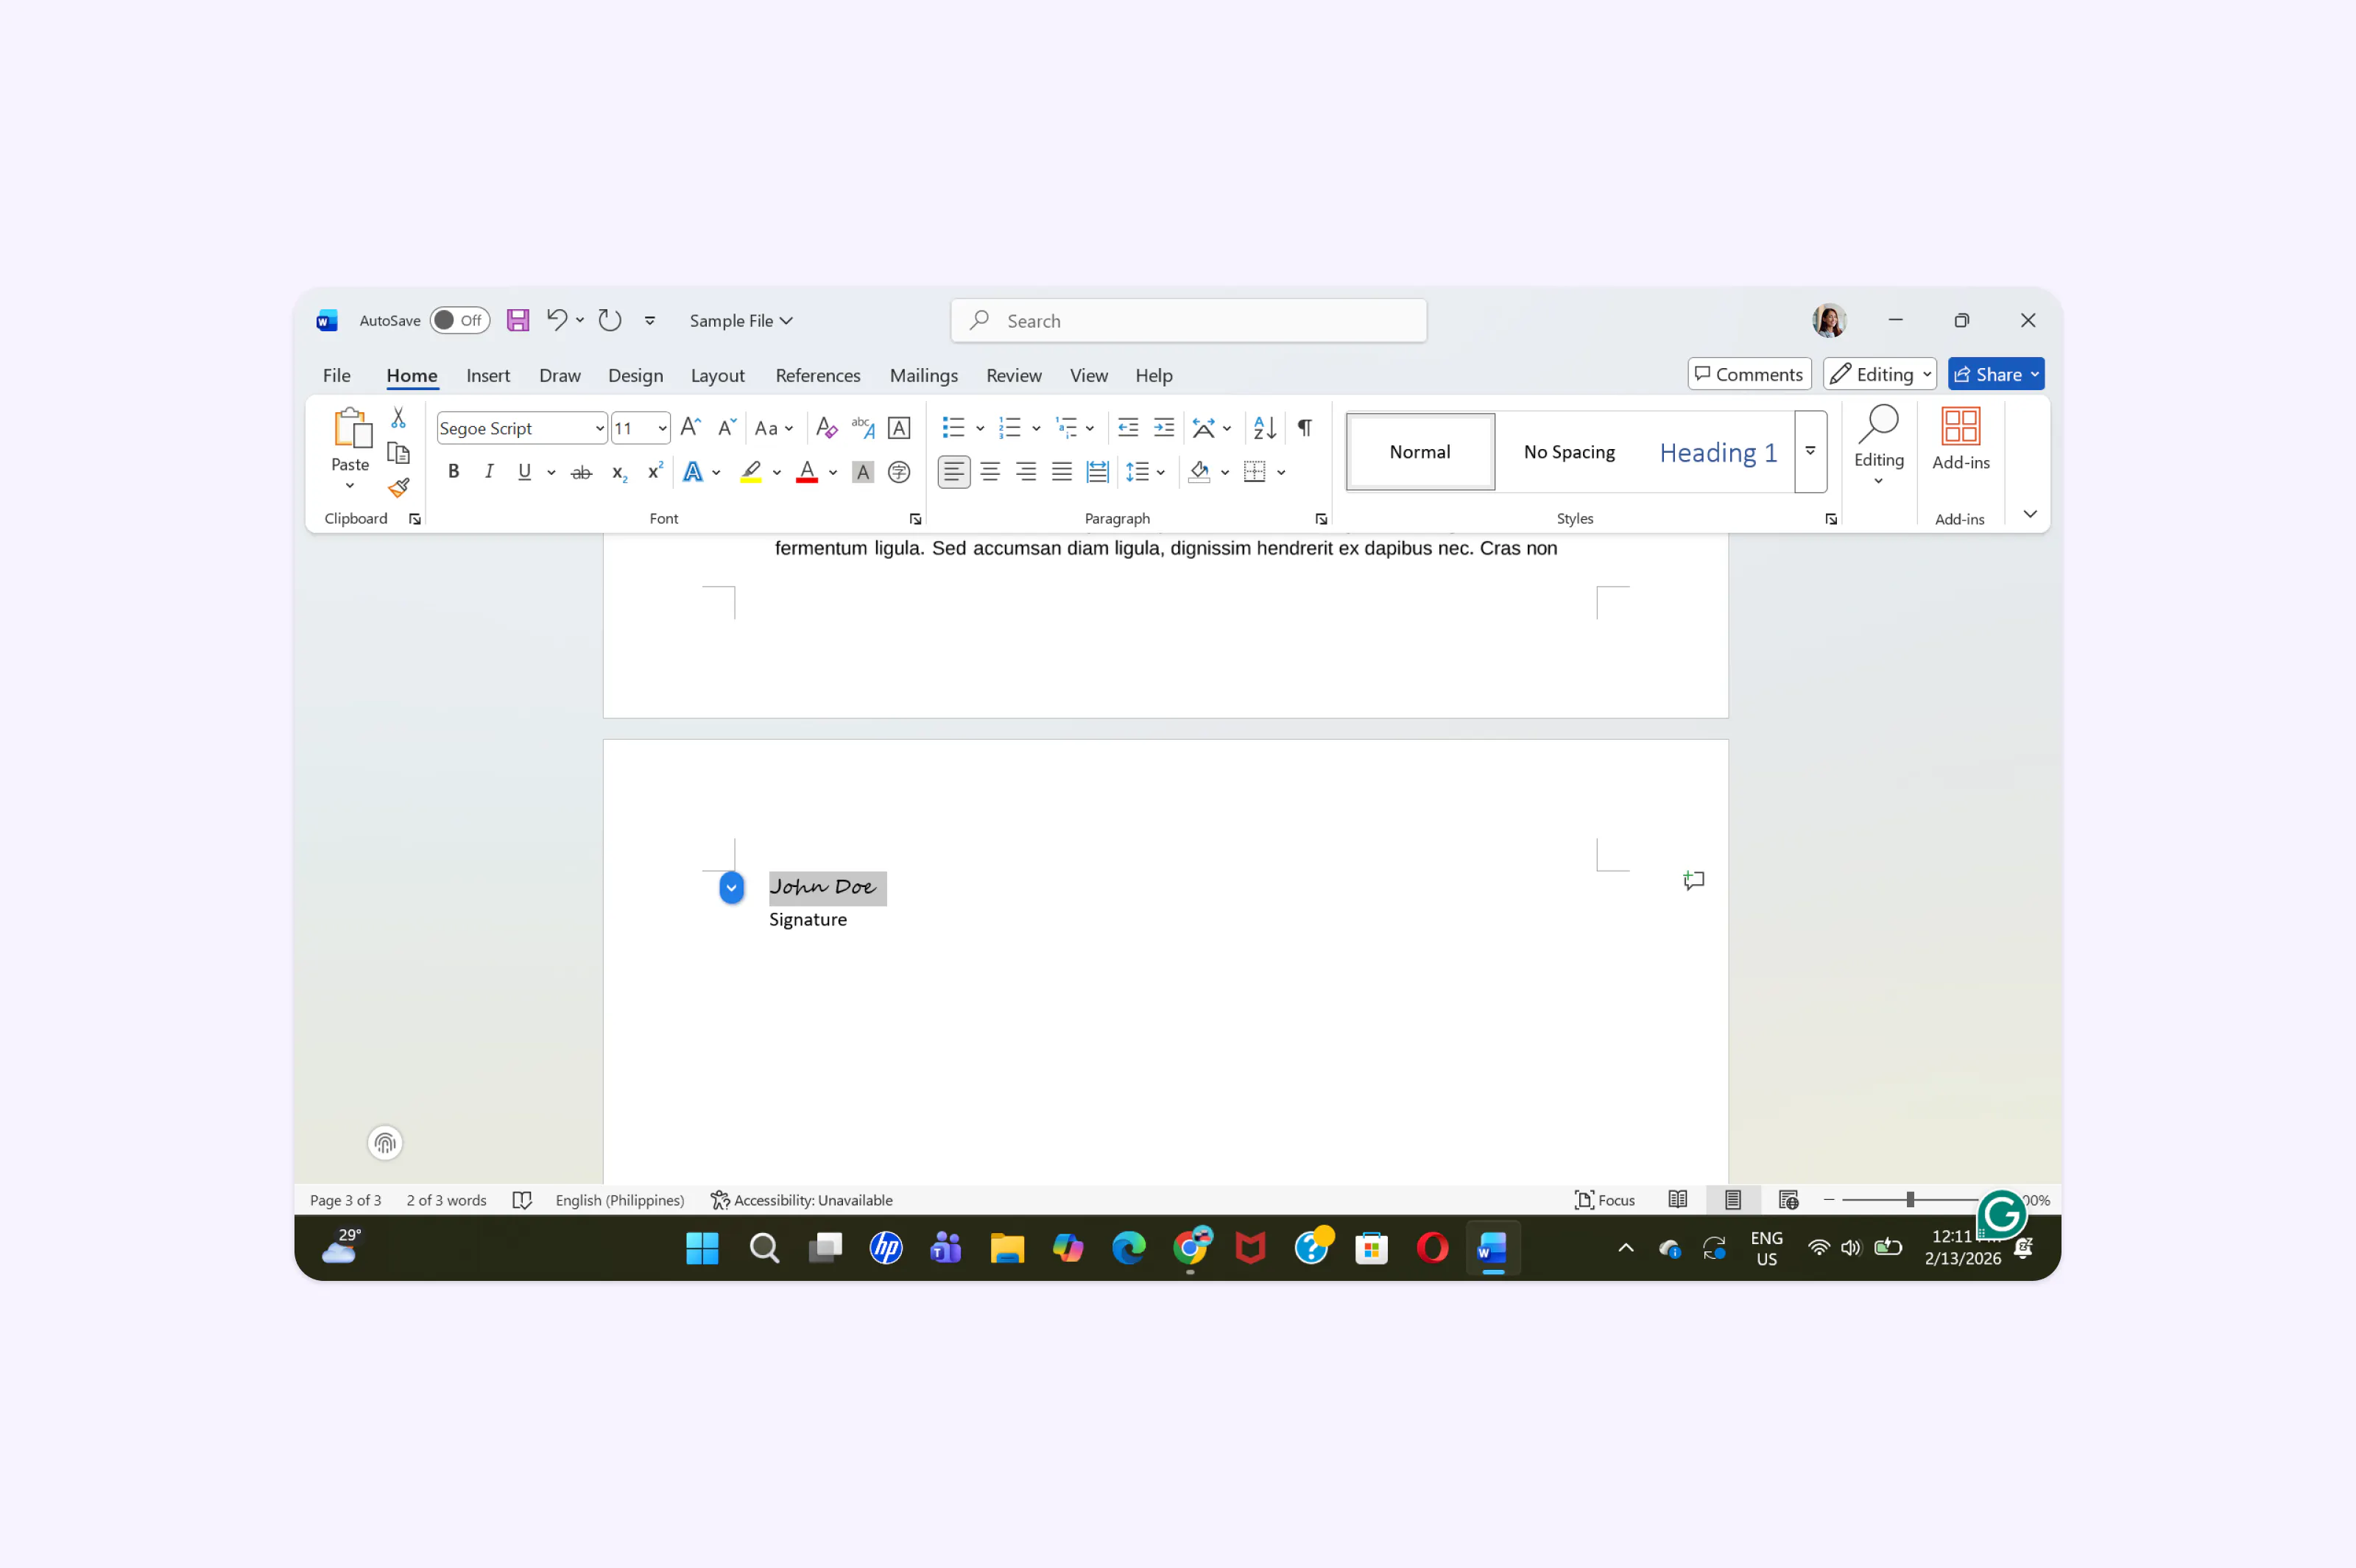
To insert an electronic signature in Microsoft Word, use the Signature Line feature under the Insert tab for a formal placeholder, or simply insert a scanned image of your handwritten signature via Insert > Pictures. For enhanced security and legal compliance, you can also utilize third-party add-ins like DocuSign or Adobe Sign.
The transition to fully digital workflows is no longer a future goal; in 2026, it is the standard operating procedure for businesses, freelancers, and government agencies alike. Microsoft Word has evolved its suite of tools to ensure that adding a signature is not just a cosmetic addition, but a functional, secure, and often legally binding step in document management. However, the term "electronic signature" is often used as a catch-all for several different methods, ranging from a simple image of a name to a cryptographically encrypted digital ID.
Understanding which method to use depends entirely on the purpose of your document. An internal memo may only require a quick image, while a multi-million dollar contract requires a verifiable digital certificate. This guide breaks down every professional method available in the 2026 version of Microsoft Word, ensuring your documents remain professional, secure, and compliant.
Electronic vs. Digital Signatures: Understanding the Difference
Before you begin the technical process, it is vital to distinguish between a standard electronic signature and a digital signature. While the terms are often used interchangeably, they serve different technical and legal purposes.
An electronic signature (e-signature) is a broad category that includes any electronic sound, symbol, or process attached to a record and executed by a person with the intent to sign. In Word, this is often represented by a scanned image of your handwriting or a typed name on a specific line. It is generally sufficient for everyday business correspondence, internal approvals, and informal agreements.
A digital signature, however, is a specific, technology-based type of e-signature. It uses a digital certificate—often issued by a third-party Certificate Authority (CA)—to provide a high level of security. It uses "public key infrastructure" (PKI) to encrypt data. If the document is altered after the digital signature is applied, the signature becomes invalid. In 2026, this is the gold standard for legal filings, financial contracts, and sensitive HR documents because it provides non-repudiation, meaning the signer cannot easily claim they didn’t sign the document.
Method 1: Using the Microsoft Word Signature Line
The built-in Signature Line is the most structured way to prepare a document for signing. It creates a placeholder that tells the signer exactly where to place their mark and provides a visible indicator of the signer’s identity.
Step 1: Insert the Signature Line
- Open your document and place the cursor where you want the signature to appear.
- Navigate to the Insert tab on the top ribbon.
- In the Text group, click on Signature Line. A dropdown menu will appear; select Microsoft Office Signature Line.
- A Signature Setup dialog box will appear. Here, you should enter the specific details:
- Suggested signer: The person's full name.
- Suggested signer's title: Their job title (e.g., CEO, Project Manager).
- Suggested signer's e-mail address: This is optional but helpful for tracking.
- Instructions to the signer: You can add custom text like "Please verify the content before signing."
Step 2: Customizing the Setup
In the same dialog box, you will see two checkboxes:
- Allow the signer to add comments in the Sign dialog: This allows the person signing to add a reason for signing or other notes.
- Show sign date in signature line: This is highly recommended for audit trails in 2026.
Click OK. A signature line will appear in your document with a large "X" and the signer’s name and title below it.
Step 3: Signing the Document
To actually sign the line, double-click the signature placeholder. You can then:
- Type your name next to the "X" to create a typed signature.
- Click Select Image to upload a file of your handwritten signature.
- If you are using a tablet or touchscreen, you can write your name directly in the box using a stylus.
Once signed, Microsoft Word adds a "Signatures" button at the bottom of the window, and the document is "Marked as Final." This prevents further editing. If someone edits the document after this point, the signature is automatically removed to protect the integrity of the agreement.
Method 2: Inserting a Scanned Image (The "Quick and Easy" Way)
If you prefer the look of your actual handwriting, you can use an image file. This is the most common method for informal letters and creative documents.
Preparing Your Signature Image
- Sign your name on a piece of white, unlined paper using a black ink pen.
- Scan the page or take a high-quality, top-down photo with your smartphone.
- Save the image in a common format like .png or .jpg.
Inserting and Formatting in Word
- Go to Insert > Pictures > This Device and select your signature file.
- Once the image is in the document, click on it to open the Picture Format tab.
- Remove Background: If your image has a gray or yellow tint, use the "Remove Background" tool or adjust the Brightness/Contrast settings to ensure the background matches the "white" of the Word page perfectly.
- Wrap Text: Click the "Layout Options" icon next to the image and select Behind Text or In Front of Text. This allows you to move the signature freely over a typed signature line without disrupting the paragraph spacing.
The Power User Tip: AutoText for 2026 Efficiency
To avoid repeating these steps every time, you can save your signature as a Quick Part:
- Select the signature image and any typed text (like "Sincerely, [Your Name]") that you want to include.
- Go to Insert > Quick Parts > Save Selection to Quick Part Gallery.
- Give it a name like "MySig."
- In the future, simply type "MySig" and press F3, or find it under the Quick Parts menu, and Word will instantly insert your formatted signature.
Method 3: Using Third-Party Add-ins (DocuSign, Adobe Sign, etc.)
For professional environments where legal validity and "audit trails" are mandatory, third-party integrations are the preferred choice in 2026. These services provide a secure platform that tracks when the document was opened, the IP address of the signer, and the exact time of completion.
How to Install an Add-in
- Go to the Insert tab and click Get Add-ins.
- Search for "DocuSign," "Adobe Acrobat Sign," or "PandaDoc."
- Click Add and follow the prompts to sign into your account.
Using the Add-in
Once installed, these tools usually appear in their own tab or on the far right of the Home tab. Clicking the icon will open a sidebar. You can then:
- Specify who needs to sign (you, someone else, or multiple parties).
- Drag and drop "Signature," "Date," and "Initial" fields onto the document.
- Click Send or Finish. The document is then processed through the provider's secure cloud, ensuring that the resulting PDF is tamper-proof and includes a certificate of completion.
Method 4: Digital Signatures with a Digital ID
If you need a cryptographically backed signature without using a third-party subscription, you can use a Digital ID. This is common in engineering, law, and government sectors.
Obtaining a Digital ID
You can obtain a digital ID from a reputable Certificate Authority such as GlobalSign or DigiCert. These IDs are verified against your identity. While you can create a "self-signed" certificate using the SelfCert.exe tool included in your Office installation folder, these are generally only trusted on your own computer and will show a "Security Warning" to others.
Applying the Digital Signature
- Follow the steps in Method 1 to insert a Microsoft Office Signature Line.
- Double-click the signature line.
- Click Sign.
- Under "Signing as," click Change to select your verified Digital ID from your computer’s certificate store.
- Click Sign. The document will now have an invisible (or visible) layer of encryption.
Comparison of Signing Methods
| Method | Security Level | Setup Effort | Best For |
|---|---|---|---|
| Typed Name | Very Low | Minimal | Internal notes, casual drafts |
| Scanned Image | Low | Medium | Personal letters, newsletters |
| Word Signature Line | Medium | Medium | Business memos, basic contracts |
| Third-Party Add-in | Very High | Low (after setup) | Multi-party legal agreements, HR |
| Digital ID (PKI) | Very High | High | Engineering specs, government filings |
Troubleshooting Common Issues
"The document is read-only"
If you cannot insert a signature, check the top of the window for a yellow "Enable Editing" bar. Additionally, if a document has already been signed by someone else, Word often locks it to prevent tampering. You must remove existing signatures to edit the text, but this will invalidate those signatures.
"Signature is invisible"
In some cases, users want to sign a document without a visible line. You can do this by going to File > Info > Protect Document > Add a Digital Signature. This adds the signature to the document's metadata rather than on the page itself.
"Image background is not transparent"
If your scanned signature looks like a white box over the text, use a PNG with a transparent background. In Word 2026, you can also use Picture Format > Color > Set Transparent Color and click on the white background of your signature image.
Frequently Asked Questions
Is an electronic signature in Word legally binding?
Yes, in most jurisdictions, including the United States (under the ESIGN and UETA Acts) and the European Union (eIDAS), electronic signatures are legally binding for most business and personal transactions. However, certain documents, such as wills or real estate deeds, may still require a physical "wet" signature or a specific type of high-security digital signature. Always consult local laws for high-stakes documents.
How do I remove a signature from a Word document?
To remove a signature, right-click the signature line and select Remove Signature. If the document is marked as final, you may need to click "Edit Anyway" at the top of the screen first. Note that removing a signature is permanent; you will need to re-sign if you make changes.
Can I sign a Word document on the mobile app?
Yes. On the Word mobile app (iOS and Android), you can use the Draw tab. Select a pen tool, sign directly on the screen with your finger or a stylus, and then move the drawing to the appropriate location. For more formal needs, the mobile app also supports DocuSign and Adobe Sign integrations.
Do I need a stylus to sign digitally?
A stylus is not required but provides the most natural-looking signature. You can use a mouse to "draw" your signature, but this often results in a jagged, unprofessional appearance. For better results without a stylus, use the Scanned Image or Signature Line (Typed) methods.
Why does my signature say "Invalid" or "Recoverable Error"?
This usually happens with digital signatures if the document was altered after signing. Even a single extra space or a change in formatting will break the cryptographic seal. To fix this, you must clear the invalid signature, make your final edits, and then resign the document.
Recommendation for 2026 Users
For the majority of professional users in 2026, the Microsoft Office Signature Line combined with an AutoText image of your signature offers the best balance of visual professionalism and ease of use. If you are handling contracts where legal proof of identity is critical, investing in a DocuSign or Adobe Sign add-in is the most reliable way to ensure your documents stand up to legal scrutiny while providing a seamless experience for your clients and partners.
Image Gallery
Select an image to open it in a new tab.
Lars Thomsen
Global Labor Markets and Economic Strategy Editor
