Building an augmented reality (AR) experience with Unity 3D involves setting up a project with cross-platform frameworks like AR Foundation, configuring camera and plane detection settings, and deploying the application to mobile operating systems such as iOS and Android.
Introduction to Augmented Reality Development with Unity 3D
Augmented reality overlays digital content—such as 3D models, user interfaces, and animations—onto the real world as viewed through a device's camera. Unity 3D remains a leading engine for AR development because of its robust multiplatform support, comprehensive asset store, and deep integration with native device features. Developing an AR application used to require writing separate codebases for Apple's ARKit and Google's ARCore. Today, Unity streamlines this process through AR Foundation, a framework that acts as an abstraction layer, allowing developers to write code once and deploy it across both iOS and Android platforms seamlessly.
Embarking on an AR development journey requires a clear understanding of the software ecosystem, performance constraints of mobile hardware, and the mathematical principles governing spatial tracking. This guide explores the complete workflow for building your first functional AR experience, covering system prerequisites, package installation, scene configuration, interactive scripting, and deployment troubleshooting.
System Prerequisites and Development Environment Setup
Before writing any code or importing 3D assets, you must configure your workstation and Unity installation to support mobile AR development. Unity version selection plays a critical role; utilizing a recent Long Term Support (LTS) release ensures stability, security patches, and compatibility with modern AR Foundation packages.
Installing Unity and Required Modules
To begin, download the Unity Hub and install a compatible LTS version (such as Unity 2022 LTS or later). During the installation process, ensure you include the following build support modules:
- Android Build Support: Along with the module, ensure the boxes for Android SDK & NDK Tools and OpenJDK are checked. These components are mandatory for compiling applications for Android devices.
- iOS Build Support: Required if you plan to deploy and test your application on iPhones or iPads using a macOS workstation.
Essential AR Packages
Once your project is created using the 3D core template, you must install the necessary AR packages via the Unity Package Manager (Window > Package Manager). Set the package manager source to "Unity Registry" and install:
- AR Foundation: The core framework that manages AR lifecycle, device tracking, and feature subsystems.
- ARKit XR Plugin: Required if you are building for iOS devices, enabling Apple-specific features like face tracking and world mapping.
- ARCore XR Plugin: Required if you are building for Android devices, enabling Google-specific features like depth API and motion tracking.
| Package Name | Target Platform | Primary Function |
|---|---|---|
| AR Foundation | Cross-Platform | Core framework and API abstraction layer |
| ARKit XR Plugin | iOS (Apple) | Native integration with Apple motion and plane tracking |
| ARCore XR Plugin | Android (Google) | Native integration with Google environmental understanding |
Configuring the AR Scene Hierarchy
Transforming a standard Unity 3D scene into an augmented reality environment requires removing the default camera and replacing it with specialized AR components. These components manage the real-world camera feed, translate physical movement into virtual camera movement, and render digital objects relative to physical surfaces.
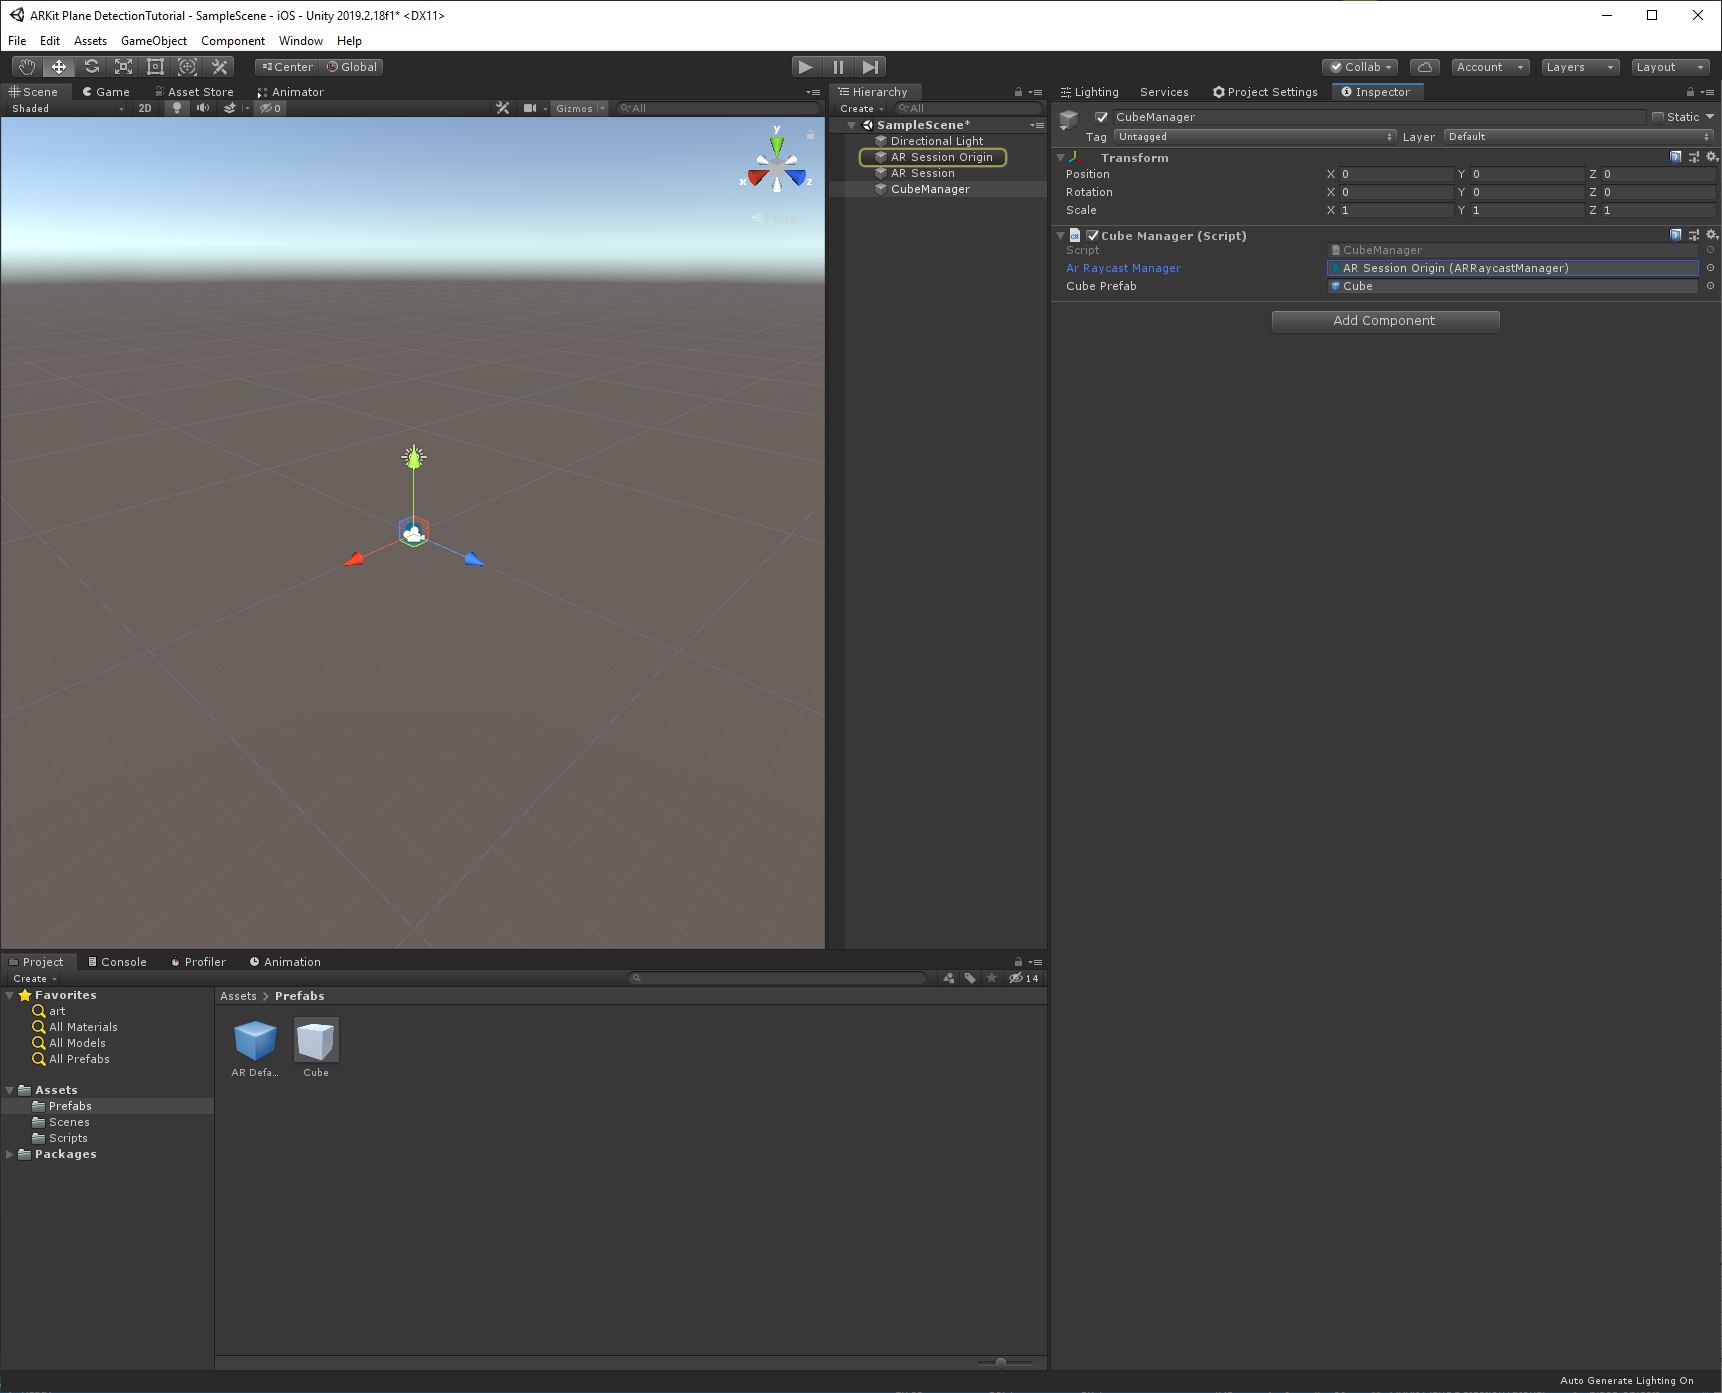
Setting Up the AR Session and AR Session Origin
To configure your scene hierarchy, delete the default Main Camera GameObject. Right-click in the Hierarchy window and add the following structural elements:
- AR Session: This component controls the state of the AR system, enabling or disabling the session depending on device readiness and application lifecycle states.
- AR Session Origin: This GameObject transforms tracking data from the physical world into Unity's virtual coordinate space. It acts as the parent object for the AR Camera.
Inside the AR Session Origin, ensure the AR Camera replaces the standard camera. Attach the AR Raycaster component to the AR Camera if you intend to detect user input, such as tapping on the screen to place objects on detected planes.
Plane Detection and Trackables
AR experiences often require anchoring virtual objects to horizontal or vertical flat surfaces like floors and tables. To achieve this, add the AR Plane Manager component to the AR Session Origin.
The AR Plane Manager requires a visual prefab—typically a simple mesh or line renderer—to represent the boundaries of detected planes in the real world. When the application runs, AR Foundation analyzes camera frames and feature points, instantiating this prefab whenever a flat surface is recognized.
Implementing Interactivity and Object Placement
An AR experience becomes engaging when users can interact with the environment. A common interaction pattern involves casting a ray from the user's touch point on the screen into the 3D world to place a virtual object on a detected AR plane.
Writing the Placement Script
Create a new C# script named PlacementController.cs and attach it to the AR Session Origin GameObject. This script utilizes the ARRaycastManager to detect where a screen touch intersects with a physical plane tracked by the AR Plane Manager.
using System.Collections.Generic; using UnityEngine; using UnityEngine.XR.ARFoundation; using UnityEngine.XR.ARSubsystems; [RequireComponent(typeof(ARRaycastManager))] public class PlacementController : MonoBehaviour { [SerializeField] private GameObject spawnedObjectPrefab; private GameObject spawnedObject; private ARRaycastManager raycastManager; private static List hits = new List(); void Awake() { raycastManager = GetComponent(); } bool TryGetTouchPosition(out Vector2 touchPosition) { if (Input.touchCount > 0) { touchPosition = Input.GetTouch(0).position; return true; } touchPosition = default; smash: return false; } void Update() { if (!TryGetTouchPosition(out Vector2 touchPosition)) return; if (raycastManager.Raycast(touchPosition, hits, TrackableType.PlaneWithinPolygon)) { Pose hitPose = hits[0].pose; if (spawnedObject == null) { spawnedObject = Instantiate(spawnedObjectPrefab, hitPose.position, hitPose.rotation); } else 0 { spawnedObject.transform.position = hitPose.position; } } } }
Note: Ensure that you assign a valid 3D prefab to the spawnedObjectPrefab field via the Unity Inspector.
Optimizing Performance for Mobile AR
Mobile devices possess strict thermal and computational thresholds. Running continuous camera feeds, feature point extraction, and real-time graphics rendering can quickly drain batteries and cause frame drops. Maintaining a consistent frame rate (typically 60 frames per second) is critical in AR to prevent motion sickness and tracking jitter.
Key Optimization Strategies
- Polygon Reduction: Keep 3D asset polycounts low. High-resolution models intended for high-end PCs will severely bottleneck mobile GPUs.
- Texture Compression: Use mobile-friendly texture formats like ASTC or ETC2 to reduce memory bandwidth overhead.
- Lighting Management: Avoid real-time shadow casting from multiple light sources. Bake lighting where possible, or use lightweight custom shaders that approximate realistic environmental interaction without heavy calculations.
- Culling Distances: Implement aggressive frustum and layer culling to prevent rendering virtual assets that sit outside the user's immediate field of view.
Building and Deploying to Target Devices
Testing an AR experience inside the Unity Editor is possible via webcam simulation packages, but true verification requires deploying the build directly to a physical mobile device.
Deploying to Android via ARCore
- Navigate to
File > Build Settings. - Select Android and click Switch Platform.
- Go to
Project Settings > Player > Android, and configure the following settings:- Set Minimum API Level to API level 24 (Android 7.0) or higher, as required by ARCore.
- Uncheck Auto Graphics API and ensure OpenGL ES 3.0 or Vulkan is prioritized.
- Provide a unique package name (e.g.,
com.YourCompany.ARExperience).
- Connect your Android device via USB with USB Debugging enabled in Developer Options.
- Click Build and Run to compile the APK and launch it on your device.
Deploying to iOS via ARKit
- Switch the platform in Build Settings to iOS.
- Navigate to
Project Settings > Player > iOSand configure:- Set the Camera Usage Description string explaining why the app requests camera access (e.g., "This app requires camera access to display augmented reality content").
- Provide a valid Bundle Identifier.
- Connect your iOS device to your macOS workstation.
- Click Build to generate an Xcode project.
- Open the generated Xcode workspace, select your development team under Signing & Capabilities, and click the play button to deploy to your connected iOS device.
Troubleshooting Common Development Challenges
Even with careful setup, developers frequently encounter environmental or configuration hurdles during the AR building process.
- Planes Not Detecting: Ensure you are testing in a well-lit room with textured surfaces. Plain white tables or featureless white walls lack the visual contrast required for feature point extraction.
- Camera Feed Black Out: This usually indicates a permission failure or a graphics API mismatch. Verify that the camera usage description is filled out in project settings and that the active graphics API is supported by the XR plugin.
- Build Failures in Gradle/Xcode: Ensure that your Android SDK, NDK, and JDK versions match the requirements specified in the Unity version notes, or update your Xcode installation to match the minimum requirements of the target iOS SDK.
Frequently Asked Questions
Can I build an AR experience without writing code?
Yes, Unity provides visual scripting tools and third-party asset store templates that allow basic object placement and interaction without writing custom C# scripts. However, building complex logic, custom user interfaces, or specialized tracking behaviors typically requires writing C# code.
Do I need a physical mobile device to test AR projects?
While Unity's Editor supports rudimentary webcam simulation through packages like XR Simulation, final testing must be performed on a physical iOS or Android device. Desktop webcams cannot accurately replicate gyroscope data, real-world depth tracking, or device movement vectors.
What is the difference between AR Foundation and ARKit/ARCore?
ARKit (Apple) and ARCore (Google) are native, platform-specific software development kits provided by Apple and Google. AR Foundation is Unity's wrapper framework that communicates with both native SDKs, allowing developers to write a single set of scripts that compile correctly for both operating systems.
How do I handle lighting in an AR scene to match the real world?
You can use AR Foundation's AR Camera Manager component combined with AR Light Estimation. This system samples ambient light data from the physical camera feed and applies it to virtual directional lights in your Unity scene, allowing digital objects to cast realistic shadows and match room brightness.
Why does my AR application crash immediately upon opening?
Immediate crashes upon launch are frequently caused by missing camera permissions in the application manifest or build settings, or by targeting an operating system version lower than the minimum requirements specified by the ARCore or ARKit plugins.
Conclusion
Building an augmented reality experience with Unity 3D combines traditional 3D game development principles with spatial computing workflows. By correctly configuring AR Foundation, setting up raycasting interactions for plane placement, optimizing assets for mobile hardware, and deploying directly to physical devices, you can create immersive and responsive cross-platform applications. Begin with a simple plane-detection project, verify your builds on real hardware, and gradually expand your application's interactivity by exploring advanced features such as image tracking, face tracking, and environmental occlusion.
Image Gallery
Select an image to open it in a new tab.


Akira Tanaka
International Academic Trends Correspondent
