Recreating an iconic New York City pastrami sandwich at home requires understanding the historical techniques of legendary Jewish delis, sourcing a heavily seasoned beef navel cut, curing and smoking the meat to perfection, and slicing it warm against the grain to pile high on fresh rye bread.
The classic New York City pastrami sandwich stands as an enduring monument to culinary history, a towering stack of mahogany-crusted, spice-rubbed beef brisket or navel that has been cured, smoked, and steamed until it yields to the gentlest touch of a knife. While you can certainly board a flight to Manhattan and wait in a legendary line at Katz’s Delicatessen, making this masterpiece at home offers a deeply rewarding culinary adventure. Achieving authentic NYC deli results in a home kitchen or backyard smoker requires meticulous attention to detail, traditional curing agents, precise smoke management, and proper steaming techniques. This comprehensive guide details the ingredients, equipment, and step-by-step methodology needed to build the ultimate NYC pastrami sandwich from scratch.
Understanding NYC Pastrami: History and Anatomy
Pastrami traces its roots to the pastrama of the Ottoman Empire, brought to the United States by Romanian-Jewish immigrants in the late 19th century. Originally made from goose or mutton because beef was expensive, resourceful immigrant deli owners soon transitioned to beef navel—a cut from the plate section of the steer that is exceptionally fatty, rich, and well-suited to the intense curing and smoking process. While modern commercial delis frequently substitute beef brisket flat for ease of slicing and lower cost, true purists and heritage delis still rely on the beef navel for that melt-in-your-mouth texture.
The distinct flavor profile of NYC pastrami relies on a specific crust, known as the "bark," which is heavily laden with coarsely cracked black pepper and coriander seeds. Unlike Texas brisket, which often relies on a simple salt-and-pepper rub, pastrami demands a more complex spice blend. The meat undergoes a multi-day wet cure (brining), followed by an overnight rinse and descaling, a heavy coating of spices, hot smoking, and finally, a long steam bath before slicing. Skipping any of these steps compromises the authenticity, turning what should be pastrami into ordinary smoked corned beef.
Essential Ingredients and Equipment
Before embarking on a pastrami-making project, you must gather specialized ingredients and reliable equipment. Because curing and smoking meat involves food safety considerations, precision is paramount.
Ingredients
- The Meat: 10 to 12 pounds of beef navel (preferred) or a well-marbled beef brisket flat. Look for a thickness of at least 2 inches with an ample fat cap.
- The Curing Salt: Prague Powder #1 (also known as Insta Cure #1 or pink curing salt, containing 6.25% sodium nitrite). Warning: Never use standard table salt as a substitute for curing salt when making pastrami; sodium nitrite is essential for preventing botulism and creating the signature pink color and cured flavor.
- Kosher Salt: For balancing the salinity of the brine.
- Sugars: Brown sugar or turbinado sugar to balance the salt and feed the curing process.
- Pickling Spices: Mustard seeds, whole allspice berries, bay leaves, juniper berries, whole cloves, and red pepper flakes.
- The Pastrami Rub: Equal parts coarsely cracked black pepper and freshly toasted, coarsely ground coriander seeds, supplemented by garlic powder, onion powder, and sweet paprika.
- The Bread and Condiments: Authentic Jewish rye bread (with or without caraway seeds), sharp yellow deli mustard (such as Gulden's or Düsseldorf style), and optional sour half-sour pickles on the side.
Equipment
- A food-grade curing container or large zipper bag.
- A digital kitchen scale (measuring in grams for precise curing salt measurements).
- A smoker (offset, pellet, or electric) capable of maintaining a steady temperature between 225°F and 250°F (107°C to 121°C).
- Fruitwood or oak wood chunks (white oak or hickory are traditional).
- A digital meat thermometer with probe capabilities.
- A dedicated steaming setup (a large pot with a steamer insert or a commercial bamboo steamer).
- A long, sharp slicing knife (a granton-edge slicer works best).

Step-by-Step Pastrami Production Process
Crafting this sandwich is a multi-day endeavor. Plan for 5 to 7 days of curing, a day of smoking, and a final steaming session right before serving.
Phase 1: The Curing (Brining) Process
Curing transforms raw beef into pastrami by penetrating the muscle fibers with salt, sugar, and nitrites, preserving the meat and locking in moisture.
- Calculate Ratios: Weigh your cut of meat in kilograms or pounds. Ensure your curing salt ratio is exact according to manufacturer guidelines (typically 2.5 grams of Prague Powder #1 per kilogram of meat).
- Prepare the Brine: In a large pot, combine water, kosher salt, brown sugar, Prague Powder #1, and pickling spices. Heat gently until the salts and sugars dissolve completely. Cool the brine down to refrigerator temperature (below 40°F / 4°C) before adding the meat.
- Submerge the Meat: Place the beef navel or brisket in your curing container, pour the chilled brine over it, and weight it down with a small plate if necessary to keep it fully submerged.
- Cure in Refrigeration: Store the container in a refrigerator maintained at 35°F to 38°F (1.6°C to 3.3°C). Allow it to cure for 5 to 7 days, turning the meat once a day to ensure even penetration.
Phase 2: Descaling and Applying the Rub
Once the curing cycle is complete, the meat must be desalted and coated in its iconic spice crust.
- Soak and Rinse: Remove the beef from the brine and rinse it thoroughly under cold running water. To remove excess surface salt, submerge the meat in a bowl of fresh cold water for 1 to 2 hours, changing the water halfway through. Pat completely dry with paper towels.
- Toast and Grind Spices: Toast whole coriander seeds in a dry skillet over medium heat until fragrant. Coarsely grind them in a spice grinder or mortar and pestle, then mix vigorously with an equal volume of coarsely cracked black pepper, garlic powder, and paprika.
- Apply the Bark: Rub a very light coating of yellow mustard or water over the exterior of the beef to act as a binder. Generously press the spice rub into every inch of the meat, ensuring a thick, uniform crust.
Phase 3: Smoking the Pastrami
Smoking infuses the meat with deep, savory wood notes and begins the rendering of internal fats.
- Preheat the Smoker: Bring your smoker to a stable temperature of 225°F to 250°F (107°C to 121°C). Add clean-burning hardwood chunks like oak or cherry. Avoid heavy, acrid smoke; you want a thin, blue wispy smoke.
- Smoke to the Stall: Place the spiced beef directly on the smoker grates. Cook until the internal temperature reaches approximately 165°F (74°C) and the exterior bark is set firmly, usually taking 5 to 7 hours depending on the size of the cut.
- The Optional Wrap (The "Texas Crutch"): If you want to speed up the cooking process or preserve moisture, you can wrap the pastrami tightly in peach butcher paper once it hits the stall. Alternatively, you can take it straight from the smoker to the cooling rack. Chill the smoked pastrami overnight in the refrigerator before the final step, or proceed immediately to steaming.
Phase 4: The Final Steaming
Steaming is the secret weapon of authentic NYC delis. While smoking cooks the meat, steaming renders the remaining hard fats, gelatinizes the collagen, and softens the tough outer crust into a tender, sliceable texture.
- Set Up the Steamer: Bring a large pot of water to a rolling boil. Insert a steaming basket or rack that keeps the pastrami above the water level.
- Steam the Meat: Place the pastrami inside, cover tightly with a lid, and let it steam for 2 to 3 hours. Monitor the water level and replenish with boiling water as needed.
- Check for Tenderness: The pastrami is ready when an instant-read thermometer slides into the thickest part with zero resistance, registering an internal temperature of about 203°F (95°C).
| Preparation Stage | Time Required | Temperature / Environment | Primary Goal |
|---|---|---|---|
| Curing (Brining) | 5 to 7 Days | 35°F – 38°F (Refrigerator) | Penetrate meat with salt, nitrites, and flavor |
| Desalting & Rubbing | 2 Hours | Ambient / Room Temperature | Remove surface salt and apply thick spice crust |
| Hot Smoking | 5 to 8 Hours | 225°F – 250°F Smoker | Develop bark, infuse smoke flavor |
| Final Steaming | 2 to 3 Hours | Boiling Water Vapor | Render interior fats, soften collagen, achieve tenderness |
Constructing the Ultimate NYC Deli Sandwich
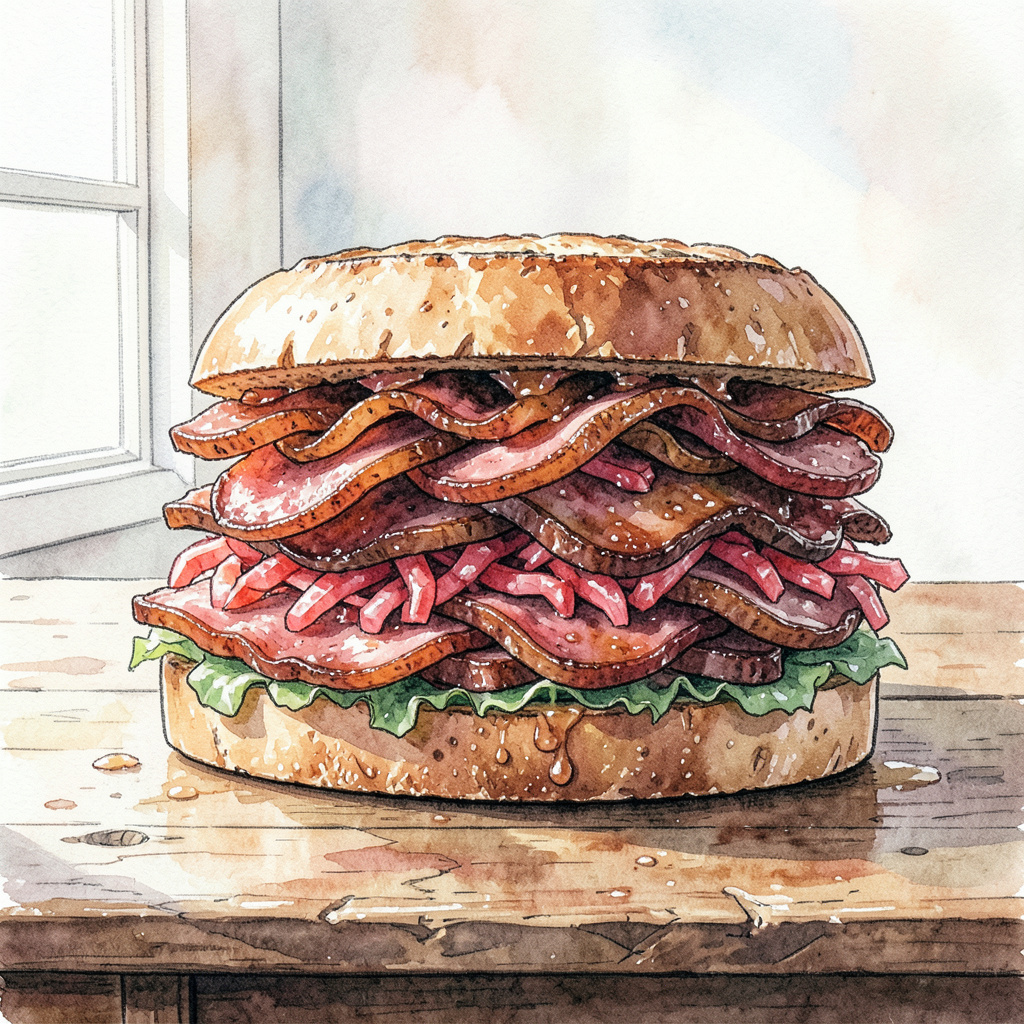
Assembling the sandwich requires as much reverence as preparing the meat. Piling it high isn't just about aesthetics; it's about structural integrity and bite distribution.
[ Top Slice of Jewish Rye Bread ] ----------------------------------- Thick Spread of Deli Mustard ----------------------------------- Warm Pastrami Sliced 1/4-inch Thick (Piled High and Hand-Stacked) ----------------------------------- Thick Spread of Deli Mustard ----------------------------------- [ Bottom Slice of Jewish Rye Bread ]
- Slice Against the Grain: Let the steamed pastrami rest for 15 minutes, then use a long, sharp slicing knife to carve thick, uniform slices (about 1/4-inch thick) against the grain. Cutting against the grain shortens the muscle fibers, ensuring maximum tenderness.
- Warm the Bread: Lightly toast two slices of fresh, thick-cut Jewish rye bread. Traditional NYC delis often serve the bread un-toasted or lightly warmed on a steam table, so choose your preference based on structural crunch versus soft chew.
- Apply Mustard Liberally: Slather a generous layer of sharp deli mustard onto both interior faces of the rye bread. Do not use sweet or mild mustards; the sharp bite cuts through the rich, fatty pastrami.
- Build the Tower: Mound the hot pastrami high. A proper NYC deli sandwich should contain at least half a pound of meat, piled high enough that eating it requires unhinging your jaw. Press the top slice down gently, secure with a deli pick if necessary, and serve immediately with a sour pickle on the side.
Common Pitfalls and Troubleshooting
Home cooks often encounter hurdles when making pastrami for the first time. Understanding these common mistakes ensures a successful outcome.
- Salty, Unpalatable Meat: If you skip the fresh water soak after brining, the cured meat will retain too much sodium, making it virtually inedible. Always perform the descaling soak.
- Dry or Tough Texture: Using a lean beef round or low-fat cut instead of a fatty navel or well-marbled brisket flat will result in dry pastrami. The high fat content is non-negotiable for authentic moisture and mouthfeel.
- Bitter Bark: If your smoker produces heavy, billowing white smoke instead of thin blue smoke, creosote will form on the spice crust, resulting in an acrid, bitter flavor. Control your fire and wood airflow carefully.
Frequently Asked Questions
Can I make pastrami using a standard beef brisket instead of a navel?
Yes. While a beef navel is the traditional cut used in classic NYC delis, it can be difficult to source at standard grocery stores. A whole beef brisket (specifically the flat cut, or a "packer" brisket split into flat and point) serves as an accessible and delicious alternative.
How long does cured, uncooked pastrami keep in the refrigerator?
Once the curing cycle is complete, the raw cured meat can sit wrapped tightly in plastic wrap in your refrigerator for up to 3 days before smoking. Once smoked and steamed, cooked pastrami keeps safely in the refrigerator for 5 to 7 days and can be reheated gently via steaming.
Should I slice the pastrami before or after steaming?
Always steam the pastrami whole (or in manageable sections) until it reaches tender perfection, then slice it immediately before building your sandwich. Slicing raw or smoked meat before steaming will cause it to dry out and lose its structural integrity during the steaming process.
What is the difference between pastrami and corned beef?
Both start as cured beef briskets or navels using similar brining solutions. However, corned beef stops after the curing stage and is boiled or steamed directly. Pastrami goes significantly further by being coated in a heavy coriander-and-pepper spice rub, hot-smoked, and then steamed.
Can I freeze cooked pastrami leftovers?
Yes. Wrap leftover cooked pastrami tightly in heavy-duty aluminum foil, place it in a freezer-safe bag, and freeze for up to 3 months. To reheat, thaw overnight in the refrigerator and steam the slices until piping hot to restore their original moisture and texture.
Final Recommendations and Next Steps
To master the NYC pastrami sandwich, start by ordering a whole beef navel or high-grade brisket from a local butcher who understands barbecue cuts. Invest in a reliable digital scale to measure your curing salts safely and accurately. Once you taste the complex interplay of the peppery bark, the rich smoked beef, the sharp mustard, and the earthy rye bread, you will understand why this iconic sandwich remains a crown jewel of American comfort food.
Image Gallery
Select an image to open it in a new tab.




Omar Farooq
EdTech Innovation and Virtual Pedagogy Journalist
