Mastering the Rectangle Tool in Adobe Photoshop allows designers to quickly create precise shapes, interface elements, background panels, and vector-based geometric layouts. By default, you can access this feature within the toolbar's shape group, adjust its properties such as fill, stroke, and corner radius in real-time, and output your work as vector paths, pixel shapes, or custom layers.
Understanding the Rectangle Tool in Adobe Photoshop
The Rectangle Tool is one of the fundamental vector shape creation instruments within Adobe Photoshop. Unlike raster painting brushes that lay down permanent pixels, vector shapes are built using mathematical equations, points, and paths. This architecture means you can scale, stretch, and transform rectangles infinitely without losing edge crispness or structural fidelity.
When you draw a rectangle in Photoshop, the application generates a dedicated shape layer in the Layers panel. This layer encapsulates both the vector mask and the visual styling attributes. Because these properties remain fully editable long after you draw the shape, you can alter a rectangle's dimensions, color, border width, and corner rounding at any point during your creative workflow. Understanding this distinction between vector shapes and rasterized imagery is essential for modern web design, user interface (UI) layouts, graphic arts, and print composition.
Locating and Accessing the Rectangle Tool
Before you can draw, you need to know where the tool resides in the workspace interface. Adobe Photoshop groups related shape tools together to conserve screen space and maintain a clean layout.
- Toolbar
- Rectangle Tool (U)
- Options Bar (Mode, Fill, Stroke, W/H)
- Rectangle Tool (U)
The Toolbar Location
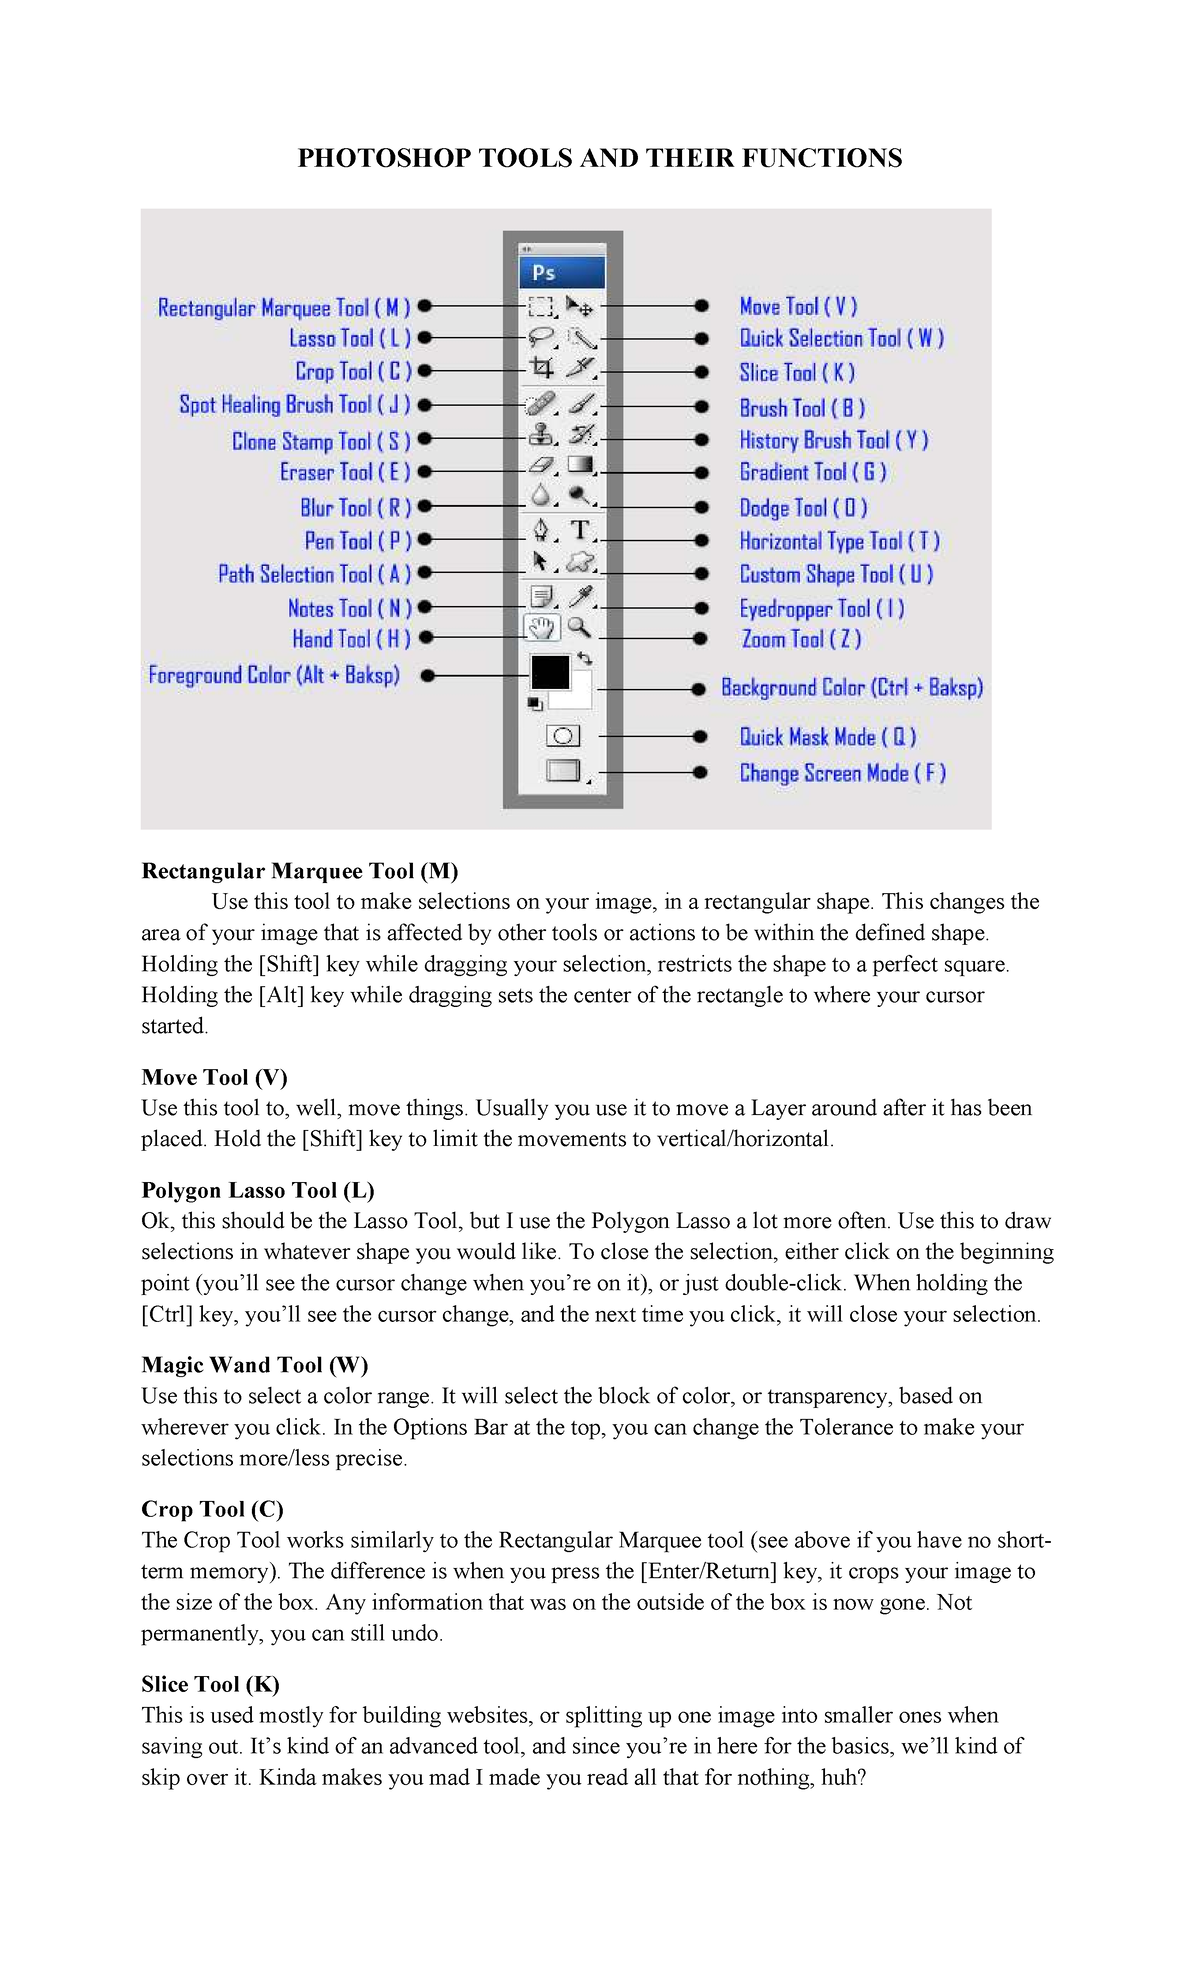
Look down your primary toolbar on the left side of the screen. By default, you will find the Rectangle Tool nested inside a flyout menu alongside other geometric shape utilities, including the Ellipse Tool, Triangle Tool, Polygon Tool, Line Tool, and Custom Shape Tool.
Keyboard Shortcuts
To select the Rectangle Tool quickly without hunting through the toolbar flyout, press the U key on your keyboard. If another shape tool (like the Ellipse) is currently active, you can cycle through the grouped shape tools by holding Shift + U until the rectangle icon appears. Alternatively, you can right-click (or control-click on macOS) the shape icon in the toolbar to open the contextual flyout menu and click directly on the Rectangle Tool.

Configuring the Options Bar Settings
Once you select the Rectangle Tool, the Options Bar across the top of your Photoshop workspace updates to display tool-specific settings. Configuring these parameters before you drag on the canvas ensures your shape matches your project requirements immediately.
Mode Selector
The leftmost dropdown menu in the Options Bar determines how Photoshop treats your new rectangle:
- Shape: Creates a brand-new vector shape layer with a fill and a stroke. This is the standard, most versatile mode for modern design workflows.
- Path: Draws a work path instead of a filled layer. Useful for creating clipping masks, vector selections, or defining custom vector paths for type-on-a-path.
- Pixels: Paints raster pixels directly onto your active layer. This mode bypasses vector flexibility and is generally discouraged unless you specifically need pixel-level painting control.
Fill and Stroke Properties
- Fill: Determines the interior color, gradient, or pattern of the rectangle. Clicking the color swatch opens the Color Picker, allowing you to sample colors or enter specific HEX, RGB, or CMYK values. You can also select a transparent fill with a red diagonal line.
- Stroke: Defines the outer border of the rectangle. You can set the stroke color, choose a solid line, dashed line, or dotted line, and adjust the stroke weight in pixels.
Dimensions and Alignment
You can explicitly type exact pixel dimensions into the W (Width) and H (Height) text fields in the Options Bar before clicking the canvas. Additional gear-icon settings allow you to define whether shapes snap to pixels, maintain specific aspect ratios, or center themselves automatically upon creation.
Step-by-Step Guide: Drawing and Modifying Rectangles
Drawing a basic rectangle requires just a few simple mouse interactions. Follow this procedural sequence to build and refine your shape:
- Select the Tool: Press U to activate the Rectangle Tool.
- Set Your Parameters: In the top Options Bar, choose your desired Fill color, Stroke color, and Stroke thickness.
- Click and Drag: Click anywhere on your canvas and drag your cursor diagonally. As you drag, a live preview of the rectangle appears, accompanied by a small tooltip displaying exact pixel dimensions (width and height).
- Constrain Proportions (Optional): Hold down the Shift key while dragging to lock the aspect ratio into a perfect square.
- Draw from Center (Optional): Hold down the Alt key (Windows) or Option key (macOS) while dragging to draw the rectangle outward from your initial click point rather than from the top-left corner.
- Release: Release your mouse button to finalize the shape. Photoshop automatically generates a new shape layer in the Layers panel.
Adjusting Corner Radius and Curvature
One of the most powerful features of the modern Photoshop Rectangle Tool is independent, dynamic corner radius control. Whether you want subtle rounded corners for a modern user interface button or a pill-shaped badge, adjusting corners is straightforward.
Using the On-Canvas Corner Widgets
When you select an existing shape layer with the Rectangle Tool or the Path Selection Tool (A) active, you will see four small circular handles (widgets) appear inside each corner of the rectangle bounding box.
- Click and drag any of these four internal widgets toward the center of the shape to curve all four corners simultaneously.
- Hold the Alt (Windows) or Option (macOS) key while dragging a single widget to modify only that specific corner independently.
Using the Properties Panel
If you prefer numerical precision over manual dragging, open the Properties Panel (Window > Properties). Under the appearance section, you will see four input fields representing the top-left, top-right, bottom-right, and bottom-left corner radii. You can type exact pixel values here.
To link all corners together so that changing one updates all four uniformly, ensure the chain icon in the center of the corner controls is toggled on.
Transforming and Positioning Rectangles with Precision
After creating your rectangle, you will frequently need to reposition or resize it. Because the tool operates on vector data, transformation is completely non-destructive.
Free Transform Tool
Press Ctrl + T (Windows) or Cmd + T (macOS) to activate Free Transform. From here, you can drag the bounding box handles to resize the rectangle, hover just outside the corners to rotate it, or right-click within the transform box to access advanced perspective, skew, and warp distortions. Press Enter or Return to commit your transformations.
Align and Distribute Panels
If your composition requires precise layout alignment—such as centering a rectangle in the middle of a document—use the Align Panel (Window > Align).
- Select your rectangle layer.
- If aligning relative to the entire canvas, change the alignment reference dropdown in the Options Bar or Align panel to Align to Canvas.
- Click the Horizontal Centers and Vertical Centers icons to snap the rectangle into the exact dead center of your working area.
Comparing Shape Creation Methods in Photoshop
Photoshop offers multiple ways to create rectangular boundaries. Choosing the right method depends on whether you need temporary selections, permanent pixels, or editable vector objects.
| Feature / Method | Rectangle Tool (Vector Shape) | Marquee Tool (Pixel Selection) | Fill / Brush Technique |
|---|---|---|---|
| Layer Type | Dedicated Shape Layer | Active Pixel Selection / Mask | Raster Pixels on Standard Layer |
| Scalability | Infinitely scalable without quality loss | Pixelates and blurs when enlarged | Pixelates and blurs when enlarged |
| Corner Editing | Dynamic live corner radius control | Fixed once drawn; requires manual masking | Manual painting required |
| Color Changes | Double-click thumbnail to change anytime | Requires re-selection and bucket fill | Requires repainting or adjustment layers |
| Best Used For | UI design, backgrounds, buttons, icons | Photo cropping, localized adjustments | Freehand painting, texture work |
Common Mistakes and Troubleshooting
Even experienced designers occasionally encounter unexpected behavior when working with shape tools. Review these common pitfalls to resolve issues quickly.
Accidental Pixel Mode Selection
- The Problem: You draw a rectangle, but you cannot change its color afterward in the Properties panel, and no new shape layer appears.
- The Cause: You accidentally selected Pixels mode instead of Shape mode in the Options Bar. Photoshop painted permanent raster pixels directly onto your active pixel layer.
- The Fix: Press Ctrl + Z (Windows) or Cmd + Z (macOS) to undo, then change the Options Bar mode dropdown from Pixels back to Shape.
Hidden Stroke or Fill
- The Problem: You drag out a rectangle, but nothing appears on the canvas except a faint bounding box outline.
- The Cause: Both the Fill and Stroke color blocks in the Options Bar are set to "None" (represented by a white box with a red diagonal line).
- The Fix: Re-select your shape layer, click the Fill swatch in the Options Bar or Properties panel, and select a visible color swatch.
Path Outlines Obstructing View
- The Problem: Annoying blue paths and anchor points clutter your view whenever you click your rectangle.
- The Cause: You have the Path Selection tool active, or path visibility is toggled to show vector construction lines.
- The Fix: Switch back to the Move Tool (V) or press Ctrl + H (Windows) or Cmd + H (macOS) to hide extra path edges temporarily.
Frequently Asked Questions
How do I make a rectangle with transparent center and only a border?
To create an unfilled outline box, set your Fill color swatch to none (the white box with a red diagonal slash) in the Options Bar or Properties panel. Next, set your Stroke to your desired color and increase the stroke weight (in pixels) to your preferred border thickness. This leaves the interior completely transparent while displaying a clean outer border.
Can I turn a rectangle into a custom shape?
Yes. Once you have drawn your rectangle and adjusted its corner radii or proportions to your liking, right-click the shape layer in the Layers panel and select Define Custom Shape. Give your new shape a recognizable name in the dialogue box. It will now be permanently saved inside your Custom Shape Tool library for use across any future Photoshop documents.
Why are my corner radius values locked together?
When editing corner curves in the Properties panel, Photoshop links all four corners by default. To make only one specific corner rounded while keeping the others sharp, click the small link chain icon located in the center of the corner radius input grid. This unlinks the fields, allowing you to enter independent pixel measurements for each individual corner.
How do I draw a rectangle with exact millimeter or inch measurements?
Instead of clicking and dragging blindly on the canvas, select the Rectangle Tool and click once anywhere on your blank canvas workspace. This action opens a Create Rectangle dialog box. Here, you can type exact physical dimensions using your preferred unit of measurement (such as 100mm, 5in, or 1200px) and click OK to generate a mathematically precise shape instantly.
What is the difference between the Rectangle Tool and the Rectangular Marquee Tool?
The Rectangle Tool (U) creates editable vector shape layers with modifiable fills, strokes, and corner radiuses. In contrast, the Rectangular Marquee Tool (M) creates a temporary dotted-line selection boundary used for cutting, cropping, deleting, or filling raster pixels on standard pixel layers. Use the Rectangle Tool for vector design work and the Marquee Tool for pixel editing and image selection.
Summary and Next Actions
Mastering the Rectangle Tool provides a solid foundation for structuring layouts, designing user interfaces, and constructing complex vector artwork in Adobe Photoshop. By utilizing live corner controls, non-destructive shape layers, and precise dimensional inputs from the Properties panel, you can streamline your design workflow significantly. To build upon these skills, practice combining multiple overlapping rectangles using Pathfinder shape-combining operations in the Properties panel to create custom icons and UI component layouts.
Image Gallery
Select an image to open it in a new tab.
Mateo Castillo
Decentralized Finance and E-Payments Strategist
