Tuning Up Your Water Heater for Better Comfort: A Comprehensive Guide to Adjusting Your System

Adjusting your water heater to a higher temperature can significantly improve daily comfort by providing hotter water for long showers, faster dishwasher cycles, and more effective grease-cutting in the kitchen. However, balancing this comfort against energy efficiency and safety risks—such as scalding and accelerated mineral buildup—requires careful calibration, an understanding of your specific unit type, and strict adherence to recommended temperature thresholds.
Understanding Water Heater Temperature Mechanics
Before modifying your water heating system, it is vital to understand how these appliances regulate thermal output and why minor adjustments can yield substantial changes in user experience. Whether you operate a conventional tank-style gas or electric water heater or a modern tankless system, the thermostat acts as the command center for thermal regulation.
Water heaters do not function like standard space thermostats where you dial in an exact ambient room temperature. Instead, traditional tank thermostats typically feature dials marked with generic indicators like "Low," "Medium," "High," or specific temperature gradations ranging from 120°F to 160°F (49°C to 71°C). When you turn up the dial, you are instructing the heating elements or the gas burner to sustain a higher baseline water temperature inside the storage tank.
The primary limitation of traditional storage tank water heaters is thermal depletion. As you use hot water, cold water enters the bottom of the tank, diluting the remaining hot supply. If your thermostat is set too low, the effective delivery temperature drops rapidly during high-demand periods. Raising the setting stores a higher density of thermal energy within the same volume of water, effectively increasing your hot water capacity through thermal mixing at the tap.
The Role of Mixing Valves
In many modern plumbing configurations, homeowners pair their water heaters with thermostatic mixing valves. A mixing valve blends hot water from the heater with cold supply water directly before it exits the plumbing system. This engineering marvel allows you to store water inside the tank at a higher, safer temperature—such as 140°F (60°C), which effectively inhibits the growth of Legionella bacteria—while safely tempering the water delivered to your taps to 120°F (49°C) to prevent accidental scalding.
Safety Considerations and Scald Risks
While maximizing comfort is the primary goal of turning up your water heater, safety must remain paramount. Water that is too hot poses immediate physical dangers, particularly in households with young children, elderly residents, or individuals with reduced tactile sensitivity.
The relationship between water temperature and skin damage is non-linear and progresses with shocking speed. According to data from the U.S. Consumer Product Safety Commission (CPSC), severe third-degree burns can occur within seconds of exposure to high-heat water:
- 120°F (49°C): Takes approximately five minutes to cause a serious burn.
- 130°F (54°C): Causes third-degree burns in roughly 30 seconds.
- 140°F (60°C): Causes severe burns in less than 5 seconds.
- 150°F (66°C): Causes instantaneous third-degree burns.
For these reasons, public health organizations and building codes traditionally recommend setting residential water heater thermostats to 120°F (49°C) as a baseline balancing safety and usability. If you choose to turn up your water heater beyond this threshold for enhanced comfort or sanitization purposes, installing anti-scald thermostatic mixing valves at point-of-use fixtures is strongly advised.

Step-by-Step Guide: How to Safely Turn Up Your Water Heater
Adjusting your water heater is generally a straightforward task, but the exact procedure varies depending on whether your system runs on electricity or natural gas/propane, and whether it features a tank or operates on-demand.
Step 1: Locate and Inspect the Unit
Locate your water heater in the basement, utility closet, garage, or attic. Inspect the exterior for signs of leaking, corrosion, or error codes. Before touching any controls, find the manufacturer's manual or data plate, which outlines the system's specifications and safety guidelines.
Step 2: Shut Off Power or Gas Supply (If Necessary)
- For Electric Water Heaters: Turn off the dedicated circuit breaker supplying power to the water heater in your main electrical panel. Working with electrical components while energized risks severe shock.
- For Gas Water Heaters: Leave the gas control valve in the "On" or "Pilot" position unless you are performing maintenance. You do not need to shut off the gas supply merely to adjust the external temperature dial, but avoid touching the burner assembly.
Step 3: Access and Adjust the Thermostat
- Electric Tank Water Heaters: Remove the upper and lower access panels secured by screws. Peel back the insulation blanket protecting the electrical thermoset. Use a flathead screwdriver to gently turn the dial on each thermostat (many dual-element heaters feature an upper and a lower thermostat; both must be set to the exact same temperature to ensure balanced heating).
- Gas Tank Water Heaters: Locate the gas control valve gas cock at the base of the tank. Turn the temperature dial clockwise or counterclockwise to your desired setting, aligning the indicator mark with the chosen temperature or level.
- Tankless Water Heaters: Locate the digital control pad mounted on the front of the unit or on a remote wall display. Press the "Up" arrow button to increase the target temperature incrementally.
Step 4: Restore Power and Monitor
If you turned off a breaker for an electric unit, switch it back on. Allow 1 to 2 hours for the water inside a storage tank to fully heat to the new setting. Test the water temperature at the nearest tap using a digital cooking thermometer to verify the output matches your expectations.
Comparing Water Heater Types and Adjustments
Different water heating technologies respond differently to temperature adjustments. Understanding these nuances helps you manage your expectations regarding energy consumption and recovery rates.
| Water Heater Type | Primary Energy Source | Adjustment Mechanism | Typical Recovery Time | Key Comfort Consideration |
|---|---|---|---|---|
| Conventional Tank | Electricity | Dual thermostats beneath access panels | 1 to 2 hours | Higher settings increase available hot water volume via thermal mixing. |
| Conventional Tank | Natural Gas / Propane | Gas control valve dial at base | 30 to 60 minutes | Faster recovery rates than electric models; sensitive to draft and combustion efficiency. |
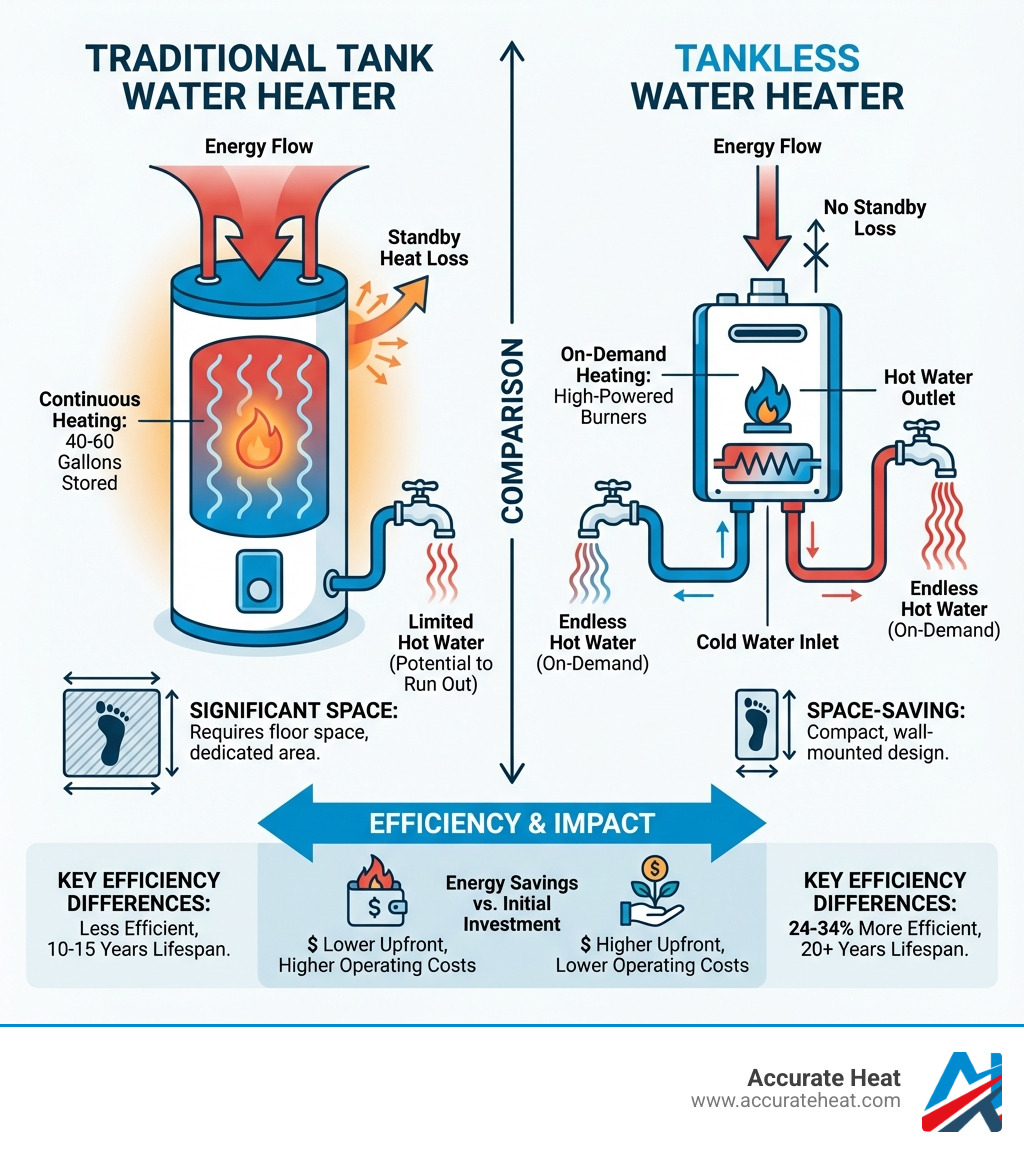
| Tankless (On-Demand) | Gas or Electricity | Digital control interface / Remote pad | Instantaneous | Delivers endless hot water; raising temperature too high may reduce flow rate capacity in cold climates. |
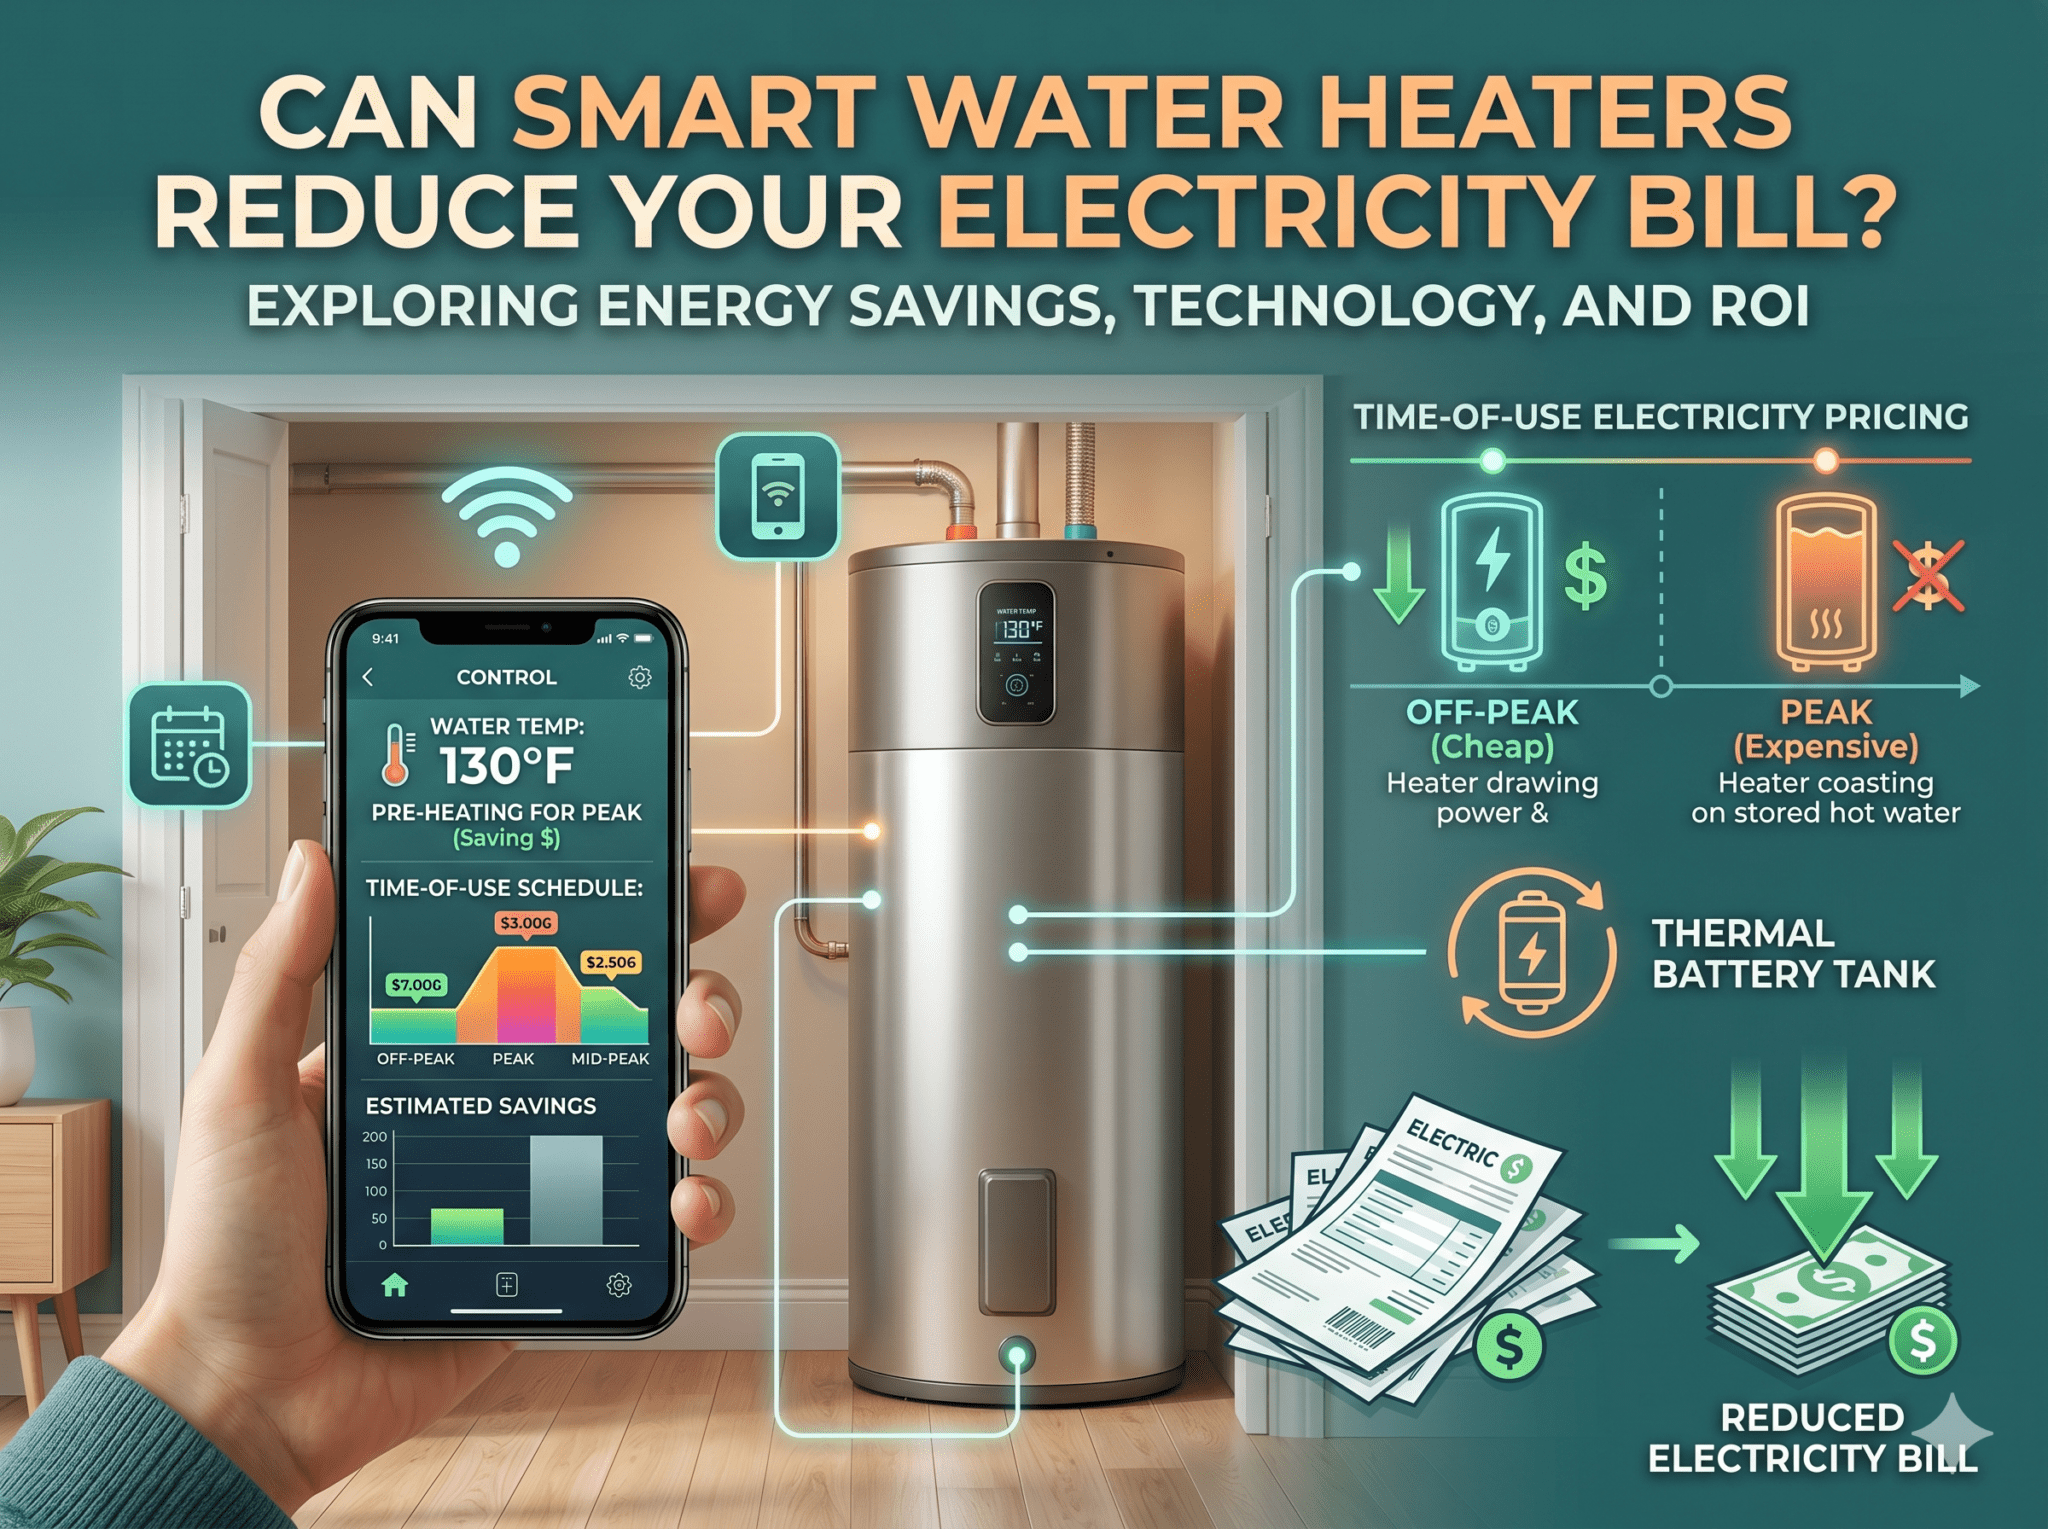
| Hybrid Heat Pump | Electricity & Ambient Air | Digital display / Smartphone app | 2 to 4 hours | Higher settings may force the unit to rely more on auxiliary electric resistance elements rather than efficient heat pump mode. |
Potential Drawbacks and Long-Term Impacts
While turning up your water heater provides immediate relief for lukewarm showers and heavy domestic demands, it introduces several trade-offs that every homeowner should weigh.
Increased Energy Consumption
Maintaining a higher water temperature requires your heating elements or burners to work harder and cycle on more frequently to combat standby heat loss through the tank walls. According to the U.S. Department of Energy, every 10°F reduction in water heater temperature can save between 3% and 5% in energy costs; conversely, turning the temperature up increases your monthly utility bills.
Accelerated Mineral Scale Buildup
Hard water contains dissolved minerals like calcium and magnesium. As water temperatures rise, these minerals precipitate out of the solution faster and accumulate as solid sediment at the bottom of the storage tank. This sediment acts as a thermal barrier between the burner or lower heating element and the water, reducing system efficiency, causing rumbling noises, and potentially premature tank failure.
Shortened Anode Rod Lifespan
The sacrificial anode rod inside your tank protects the steel walls from corrosion through electrolysis. Higher operating temperatures accelerate the electrochemical reactions inside the tank, causing the anode rod to corrode and deplete at a much faster rate.
Troubleshooting Water Heater Comfort Issues
If turning up your thermostat does not resolve your comfort issues, the root cause may lie elsewhere in your plumbing and mechanical systems.
- Faulty Heating Element (Electric): If only lukewarm water is available, one of the dual electric heating elements or thermostats may have failed. Test continuity with a multimeter after cutting power.
- Sediment Accumulation: A thick layer of mineral sludge at the bottom of the tank insulates the water from the heat source. Flushing the tank annually resolves this issue.
- Dip Tube Failure: The cold water inlet dip tube directs incoming cold water to the bottom of the tank. If the tube is cracked or broken, cold water mixes with hot water at the top of the tank, causing lukewarm delivery even when the thermostat is turned up high.
- Sizing Constraints: If your household demand exceeds the gallons-per-minute (GPM) or first-hour rating (FHR) of your appliance, no amount of temperature adjustment will prevent the water from running cold during simultaneous showers and appliance usage.
Best Practices and Maintenance Recommendations
To maximize both your comfort and the lifespan of your water heating equipment, integrate these routine maintenance steps into your home care schedule:
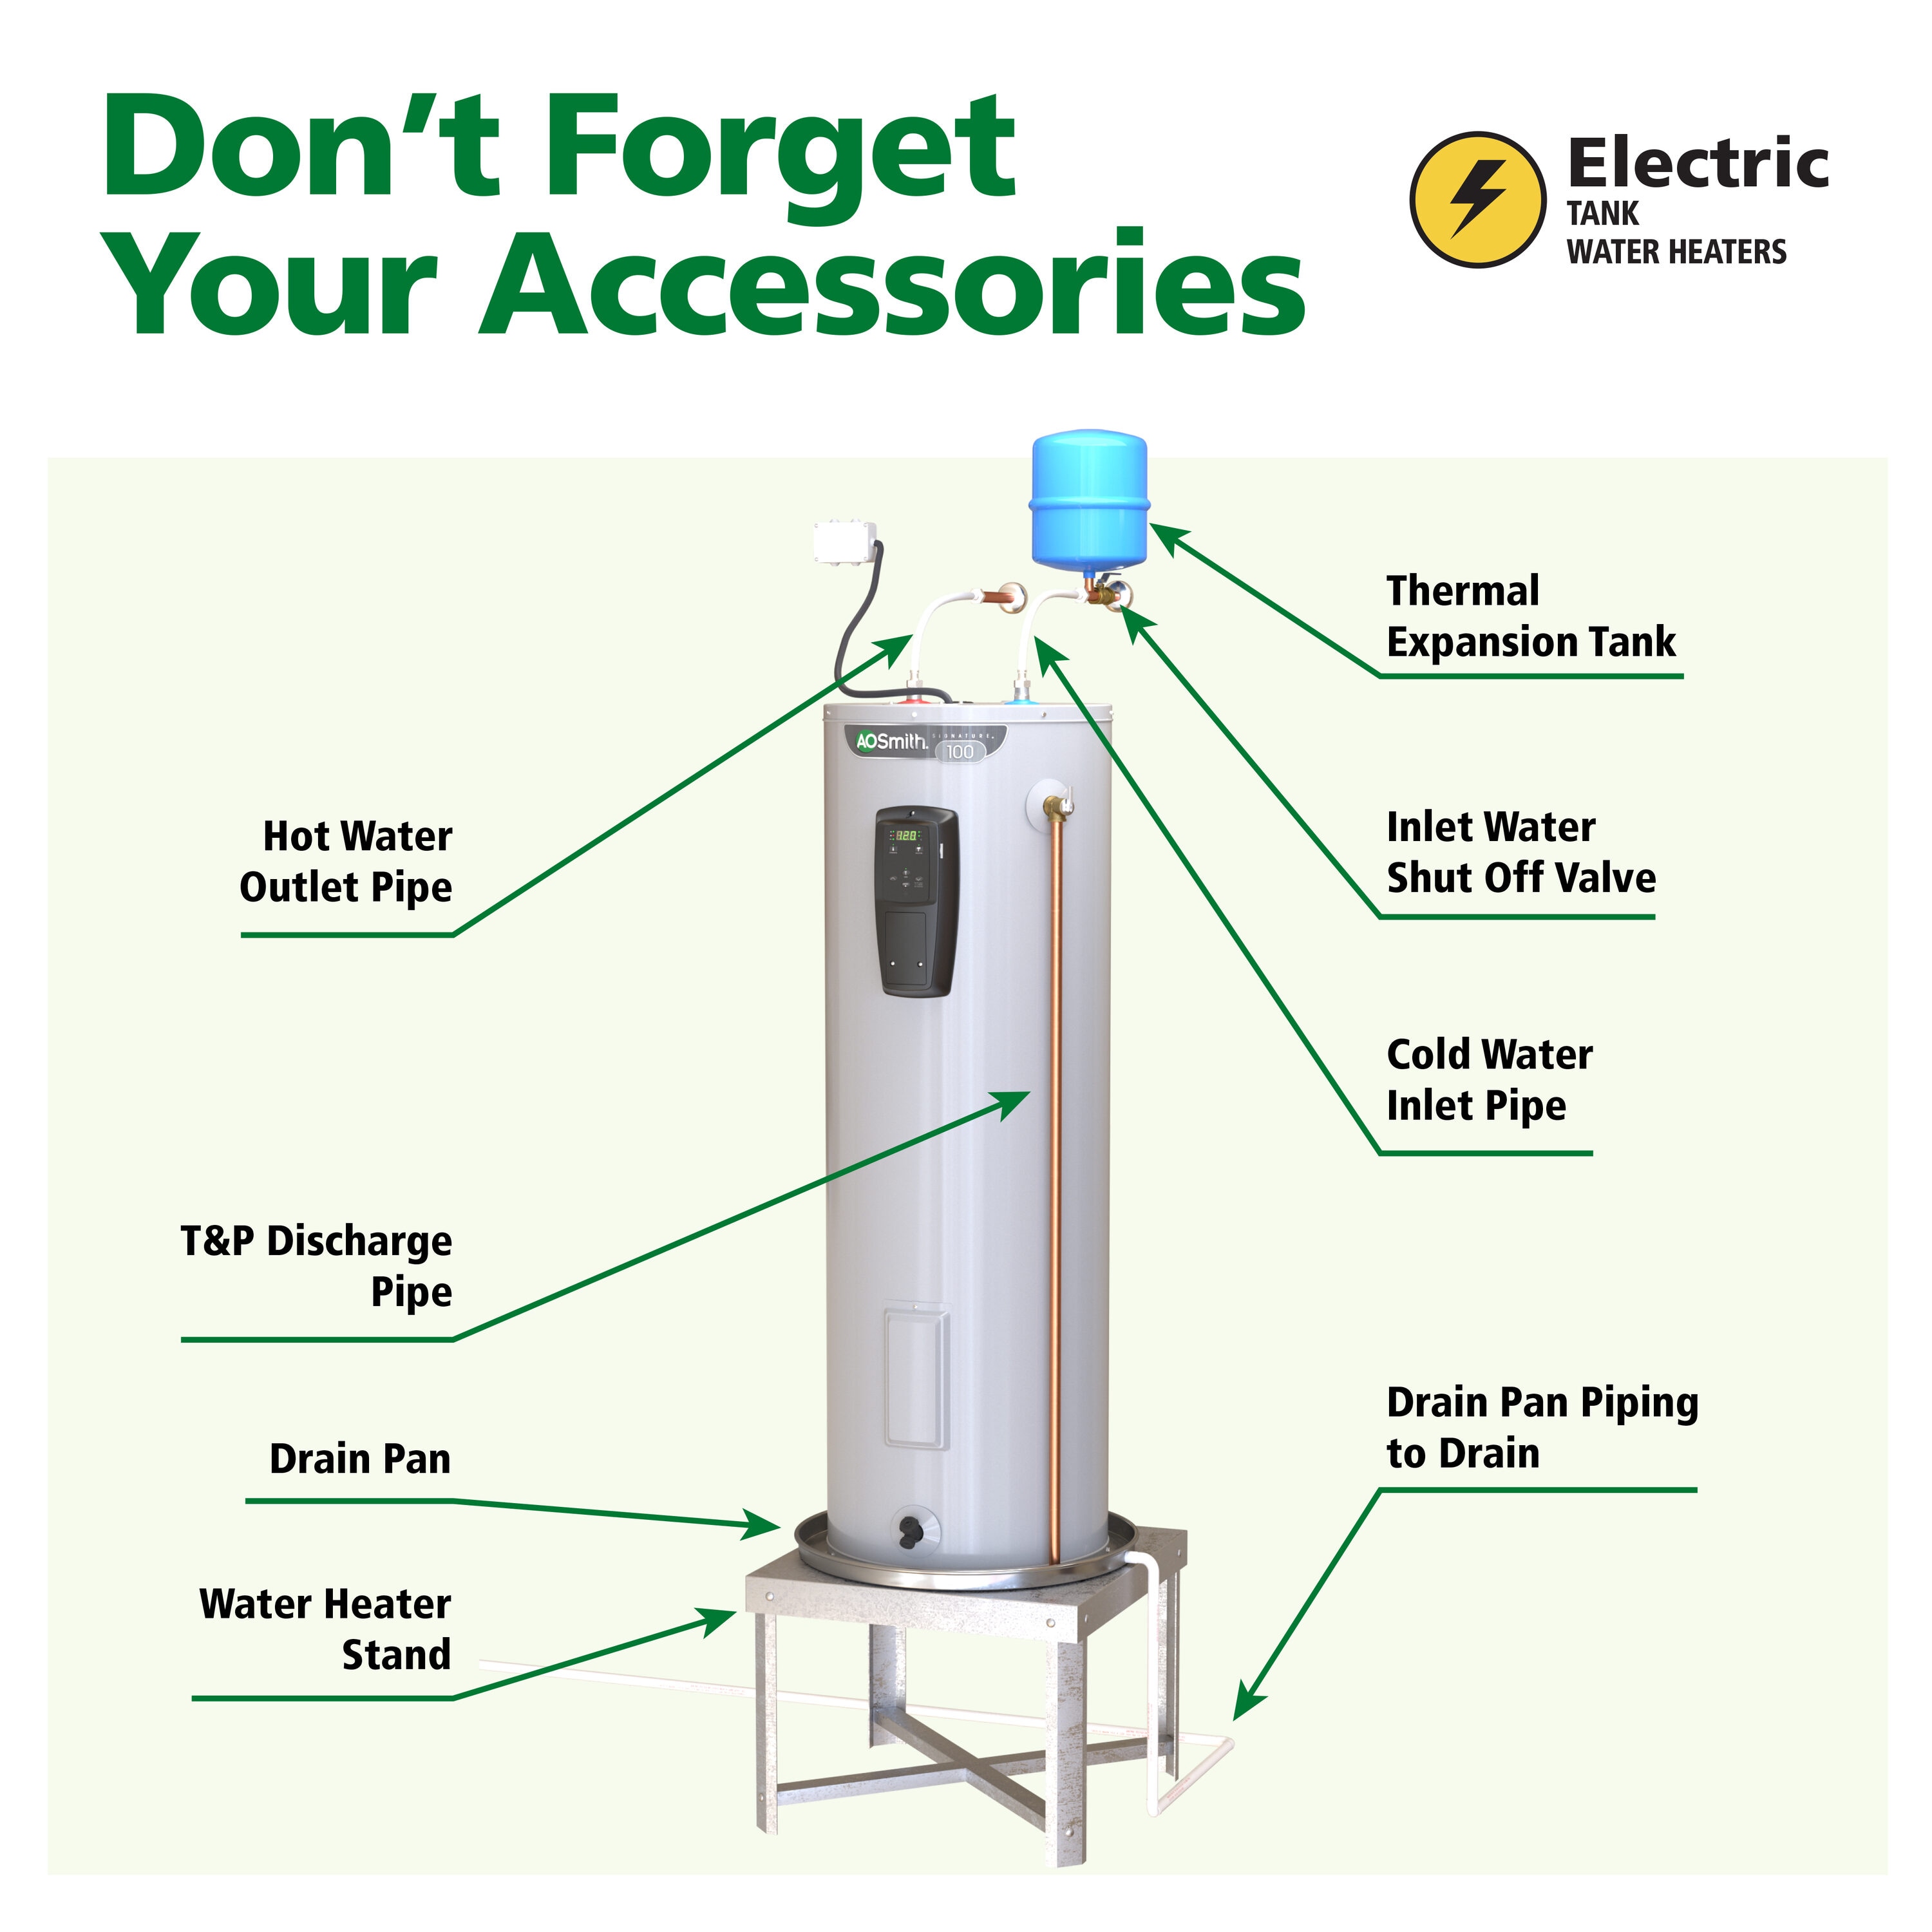
- Test the Pressure Relief Valve (T&P Valve): Lift the lever on the T&P valve annually to ensure water flows freely through the discharge pipe, preventing dangerous over-pressurization.
- Flush the Tank: Drain several gallons of water from the tank drain valve once a year to clear out accumulated sediment and maintain optimal heat transfer.
- Inspect the Anode Rod: Check the sacrificial anode rod every two to three years. Replace it if the core wire is exposed or if the diameter is reduced to less than 3/8 inch.
- Insulate Pipes and Tanks: Wrap older storage tanks in an insulating blanket and insulate the first six feet of hot and cold water pipes connected to the unit to minimize standby heat loss.
By combining careful temperature adjustments with proactive maintenance, you can achieve optimal domestic comfort while safeguarding your investment against premature wear and safety hazards.
Image Gallery
Select an image to open it in a new tab.

Vivian Cho
Executive IT and Emerging Technologies Reporter
